- Remove the transmission assembly from the vehicle. Ref. to CONTINUOUSLY VARIABLE TRANSMISSION (TR690)>Automatic Transmission Assembly>REMOVAL .
- Remove the air breather hose. Ref. to CONTINUOUSLY VARIABLE TRANSMISSION (TR690)>Air Breather Hose>REMOVAL .
- Remove the transmission harness. Ref. to CONTINUOUSLY VARIABLE TRANSMISSION (TR690)>Transmission Harness>REMOVAL .
- Remove the secondary speed sensor. Ref. to CONTINUOUSLY VARIABLE TRANSMISSION (TR690)>Secondary Speed Sensor>REMOVAL .
- Remove the inhibitor switch. Ref. to CONTINUOUSLY VARIABLE TRANSMISSION (TR690)>Inhibitor Switch>REMOVAL .
- Remove the extension case. Ref. to CONTINUOUSLY VARIABLE TRANSMISSION (TR690)>Extension Case>REMOVAL .
- Remove the rear drive shaft. Ref. to CONTINUOUSLY VARIABLE TRANSMISSION (TR690)>Rear Drive Shaft>REMOVAL .
- Remove the transfer clutch assembly. Ref. to CONTINUOUSLY VARIABLE TRANSMISSION (TR690)>Transfer Clutch>REMOVAL .
- Remove the transfer reduction driven gear assembly. Ref. to CONTINUOUSLY VARIABLE TRANSMISSION (TR690)>Transfer Reduction Driven Gear>REMOVAL .
- Remove the intermediate case. Ref. to CONTINUOUSLY VARIABLE TRANSMISSION (TR690)>Intermediate Case>REMOVAL .
- Remove the forward clutch assembly. Ref. to CONTINUOUSLY VARIABLE TRANSMISSION (TR690)>Forward Clutch Assembly>REMOVAL .
- Remove the reduction driven gear. Ref. to CONTINUOUSLY VARIABLE TRANSMISSION (TR690)>Reduction Driven Gear>REMOVAL .
- Remove the oil pan and control valve body. Ref. to CONTINUOUSLY VARIABLE TRANSMISSION (TR690)>Control Valve Body>REMOVAL .
NOTE:
When removing the control valve body, also remove the pressure pipe if it is attached on the case.
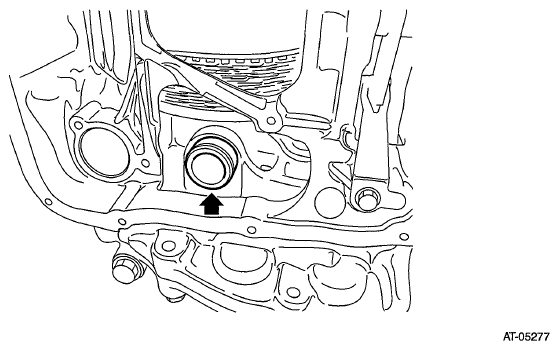 Courtesy of SUBARU OF AMERICA, INC.
- Remove the CVTF pipe using a tire lever etc.
NOTE:
Remove by hooking the stepped portion of CVTF pipe with a tire lever etc.
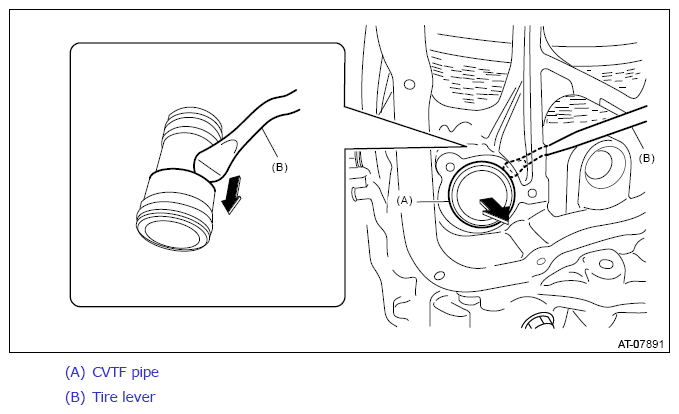 Courtesy of SUBARU OF AMERICA, INC.
- Remove the CVTF cooler hose.
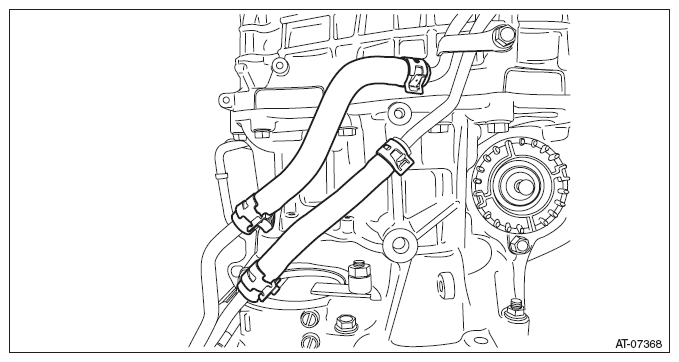 Courtesy of SUBARU OF AMERICA, INC.
- Remove the transmission case.
NOTE:
The total number of transmission case mounting bolts is 15.
- Remove the O-ring of lubrication pipe.
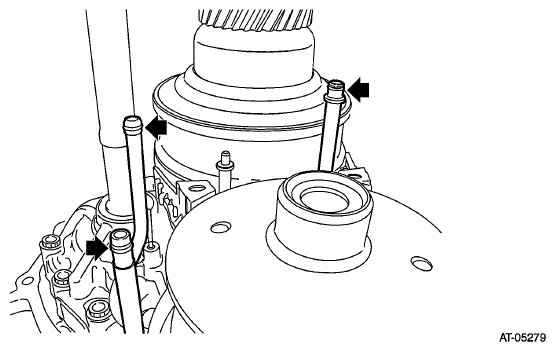 Courtesy of SUBARU OF AMERICA, INC.
- Remove the control device system. Ref. to CONTINUOUSLY VARIABLE TRANSMISSION (TR690)>Transmission Control Device>REMOVAL .