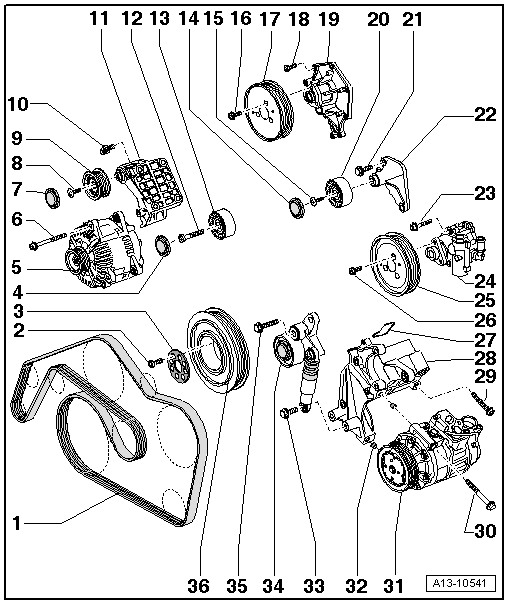
Ribbed Belt Drive Overview
 Courtesy of AUDI OF AMERICA, LLC
- Ribbed Belt
- Check for wear
- Before removing, mark the direction of rotation using chalk or a felt-tip pen.
- Removing and installing, refer to RIBBED BELT
- Do not kink
- When installing, make sure it is seated correctly on the ribbed belt pulleys
- Bolt
- Replace
- 20 Nm plus an additional 90° turn
- Shim
- Idler Roller Cover
- Generator
- Removing and installing, refer to the appropriate service information
- Bolt
- For the correct tightening specification, refer to the appropriate service information
- Idler Roller Cover
- Bolt
- Idler Roller for Ribbed Belt
- On the generator bracket
- Pay attention to the installed position
- Bolt
- Generator and Idler Roller Bracket
- Bolt
- Right Idler Roller for Ribbed Belt
- Pay attention to the installed position
- Left Idler Roller Cover
- Bolt
- Bolt
- Ribbed Belt Pulley for Coolant Pump
- Bolt
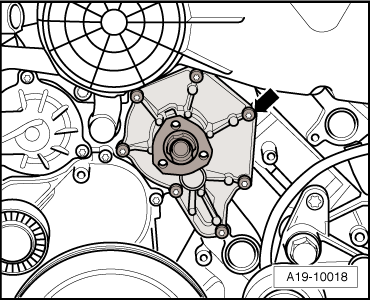
- Tightening specification and sequence, refer to Fig 2
- Coolant Pump
- Left Idler Roller for Ribbed Belt
- Bolt
- Idler Roller Holder
- Bolt
- Power Steering Pump
- Power Steering Pump Ribbed Belt Pulley
- Bolt
- Gasket
- Bracket for Assemblies
- Bolt
- Bolt
- Tightening specifications, refer to the appropriate service information
- A/C Compressor
- Do not remove or disconnect refrigerant lines
- Removing and installing, refer to the appropriate service information
- Be careful of the alignment sleeves -item 32- when installing
- Alignment Bushing
- 2 pieces
- Make sure the accessory assembly bracket fits correctly
- Bolt
- Ribbed Belt Tensioning Damper
- Bolt
- Replace
- 50 Nm plus an additional 90° turn
- Vibration Damper with Ribbed Belt Pulley
 Courtesy of AUDI OF AMERICA, LLC