Removal [09/2024 - ]: Procedure
WARNING: This page is about a different car, the 2025 Toyota GR Corolla. However, it is still accessible from the selected car via links, so may be relevant.
- REMOVE ENGINE ASSEMBLY WITH TRANSAXLE
Refer to REMOVAL [09/2024 - ]
- DISCONNECT WIRE HARNESS
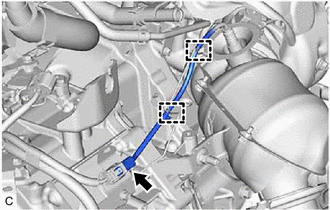
- Disconnect the air fuel ratio sensor connector.
 Courtesy of © TOYOTA, LICENSE AGREEMENT TMS1002 Courtesy of © TOYOTA, LICENSE AGREEMENT TMS1002
|
- Disengage the 2 clamps.
- REMOVE EXHAUST MANIFOLD CONVERTER SUB-ASSEMBLY
Refer to PROCEDURE - Step 14
- REMOVE EXHAUST PIPE CLAMP
Refer to PROCEDURE - Step 15
- REMOVE OUTLET TURBINE ELBOW GASKET
Refer to PROCEDURE - Step 16
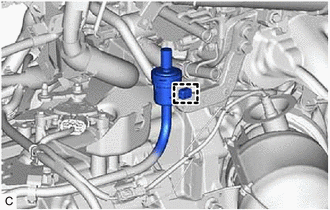
- DISCONNECT TRANSMISSION BREATHER HOSE SUB-ASSEMBLY
- Disengage the clamp to disconnect the transmission breather hose sub-assembly from the flexible hose bracket.
 Courtesy of © TOYOTA, LICENSE AGREEMENT TMS1002 Courtesy of © TOYOTA, LICENSE AGREEMENT TMS1002
|
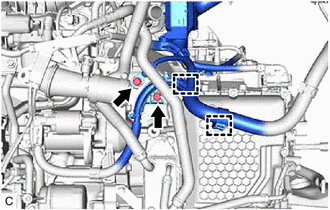
- SEPARATE ENGINE WIRE
- Disengage the clamp and guide.
 Courtesy of © TOYOTA, LICENSE AGREEMENT TMS1002 Courtesy of © TOYOTA, LICENSE AGREEMENT TMS1002
|
- Remove the 2 bolts.
- Disengage the 3 clamps.
 Courtesy of © TOYOTA, LICENSE AGREEMENT TMS1002 Courtesy of © TOYOTA, LICENSE AGREEMENT TMS1002
|
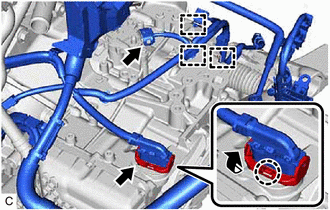
- Disengage the claw, rotate the lever and disconnect the transmission wire connector.
- Disconnect the park/neutral position switch assembly connector.
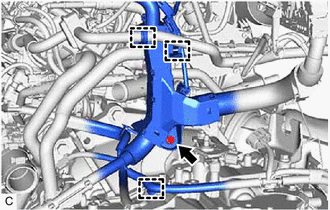 Courtesy of © TOYOTA, LICENSE AGREEMENT TMS1002 Courtesy of © TOYOTA, LICENSE AGREEMENT TMS1002
|
Disengage the clamp to disconnect the No. 1 fuel vapor feed hose.
- Remove the bolt.
- Disengage the 2 clamps.
- Disengage the 3 clamps.
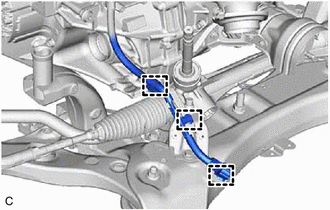 Courtesy of © TOYOTA, LICENSE AGREEMENT TMS1002 Courtesy of © TOYOTA, LICENSE AGREEMENT TMS1002
|
- DISCONNECT OUTLET NO. 1 OIL COOLER HOSE
- Slide the clip and disconnect the outlet No. 1 oil cooler hose from the oil cooler union sub-assembly.
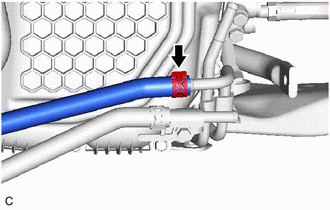 Courtesy of © TOYOTA, LICENSE AGREEMENT TMS1002 Courtesy of © TOYOTA, LICENSE AGREEMENT TMS1002
|
HINT:
Use a container to catch any automatic transaxle fluid which flows out.
- DISCONNECT NO. 1 TRANSMISSION OIL COOLER HOSE
- Slide the clip and disconnect the No. 1 transmission oil cooler hose from the No. 1 oil cooler tube sub-assembly without hose.
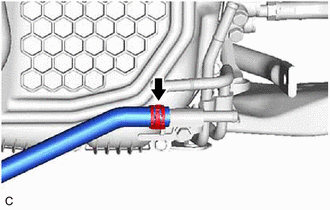 Courtesy of © TOYOTA, LICENSE AGREEMENT TMS1002 Courtesy of © TOYOTA, LICENSE AGREEMENT TMS1002
|
HINT:
Use a container to catch any automatic transaxle fluid which flows out.
- DISCONNECT NO. 4 WATER BY-PASS HOSE
Refer to PROCEDURE - Step 12
- DISCONNECT NO. 5 WATER BY-PASS HOSE
Refer to PROCEDURE - Step 9
- REMOVE TRANSMISSION OIL COOLER
Refer to PROCEDURE - Step 13
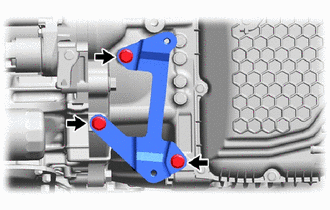
- REMOVE NO. 2 TRANSMISSION OIL COOLER BRACKET
- Remove the 3 bolts and No. 2 transmission oil cooler bracket from the transaxle housing.
 Courtesy of © TOYOTA, LICENSE AGREEMENT TMS1002 Courtesy of © TOYOTA, LICENSE AGREEMENT TMS1002
|
- REMOVE FLYWHEEL HOUSING SIDE COVER
Refer to PROCEDURE - Step 72
- REMOVE STARTER ASSEMBLY
Refer to PROCEDURE - Step 21
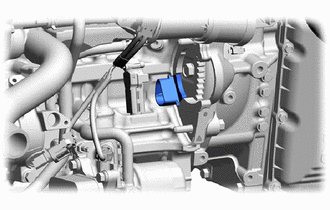
- REMOVE FLYWHEEL HOUSING UNDER COVER
- Remove the flywheel housing under cover from the cylinder block sub-assembly.
 Courtesy of © TOYOTA, LICENSE AGREEMENT TMS1002 Courtesy of © TOYOTA, LICENSE AGREEMENT TMS1002
|
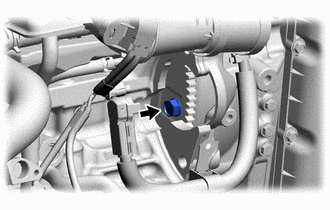
- REMOVE DRIVE PLATE AND TORQUE CONVERTER ASSEMBLY SETTING BOLT
- Turn the crankshaft to gain access to the 6 drive plate and torque converter assembly setting bolts and remove each drive plate and torque converter assembly setting bolt while holding the crankshaft pulley set bolt with a wrench.
HINT:
There will be one black colored drive plate and torque converter assembly setting bolt.
 Courtesy of © TOYOTA, LICENSE AGREEMENT TMS1002 Courtesy of © TOYOTA, LICENSE AGREEMENT TMS1002
|
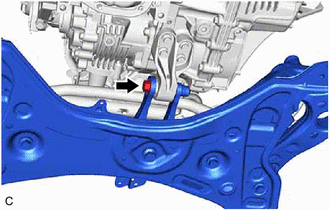
- REMOVE FRONT SUSPENSION CROSSMEMBER SUB-ASSEMBLY
- Remove the bolt and front suspension crossmember sub-assembly from the No. 2 engine moving control rod.
 Courtesy of © TOYOTA, LICENSE AGREEMENT TMS1002 Courtesy of © TOYOTA, LICENSE AGREEMENT TMS1002
|
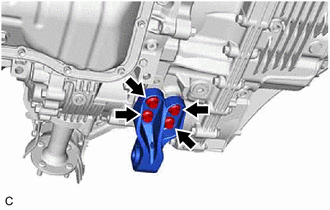
- REMOVE NO. 2 ENGINE MOVING CONTROL ROD
- Remove the 4 bolts and No. 2 engine moving control rod from the transaxle housing.
 Courtesy of © TOYOTA, LICENSE AGREEMENT TMS1002 Courtesy of © TOYOTA, LICENSE AGREEMENT TMS1002
|
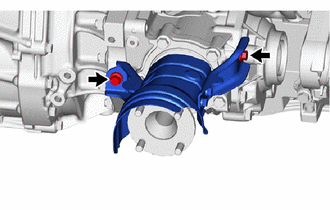
- REMOVE PROPELLER SHAFT HEAT INSULATOR
- Remove the 2 bolts and propeller shaft heat insulator from the transfer assembly.
 Courtesy of © TOYOTA, LICENSE AGREEMENT TMS1002 Courtesy of © TOYOTA, LICENSE AGREEMENT TMS1002
|
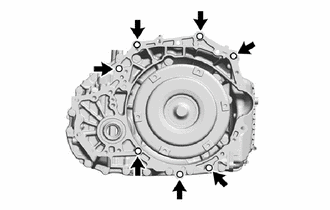
- REMOVE AUTOMATIC TRANSAXLE ASSEMBLY
- Support the automatic transaxle assembly with a transmission jack.
 Courtesy of © TOYOTA, LICENSE AGREEMENT TMS1002 Courtesy of © TOYOTA, LICENSE AGREEMENT TMS1002
|
NOTE:
Secure the automatic transaxle assembly to the transmission jack using a suitable adapter, such as a rope or attachment.
- Remove the 7 bolts and automatic transaxle assembly from the engine assembly.
NOTE:
To prevent damage to the 2 knock pins, do not pry between the automatic transaxle assembly and engine assembly.
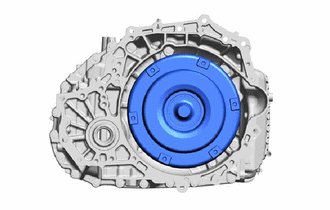
- REMOVE TORQUE CONVERTER ASSEMBLY
- Remove the torque converter assembly from the automatic transaxle assembly.
 Courtesy of © TOYOTA, LICENSE AGREEMENT TMS1002 Courtesy of © TOYOTA, LICENSE AGREEMENT TMS1002
|
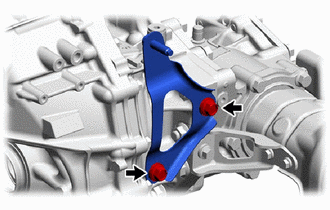
- REMOVE EXHAUST PIPE SUPPORT STAY
- Remove the 2 bolts and exhaust pipe support stay from the transaxle housing.
 Courtesy of © TOYOTA, LICENSE AGREEMENT TMS1002 Courtesy of © TOYOTA, LICENSE AGREEMENT TMS1002
|
- REMOVE TRANSFER ASSEMBLY
Refer to PROCEDURE - Step 4
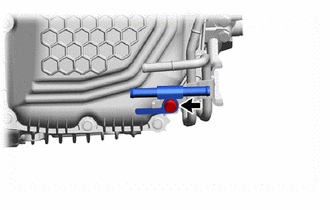
- REMOVE NO. 1 OIL COOLER TUBE SUB-ASSEMBLY WITHOUT HOSE
- Remove the bolt and No. 1 oil cooler tube sub-assembly without hose from the oil cooler union sub-assembly.
 Courtesy of © TOYOTA, LICENSE AGREEMENT TMS1002 Courtesy of © TOYOTA, LICENSE AGREEMENT TMS1002
|
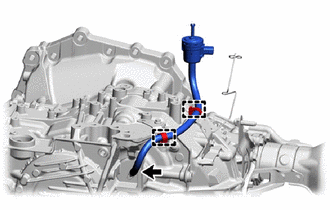
- REMOVE TRANSMISSION BREATHER HOSE SUB-ASSEMBLY
- Using a screwdriver with its tip wrapped with protective tape, remove the transmission breather hose sub-assembly from the No. 1 breather plug (ATM).
 Courtesy of © TOYOTA, LICENSE AGREEMENT TMS1002 Courtesy of © TOYOTA, LICENSE AGREEMENT TMS1002
|
NOTE:
Be careful not to damage the No. 1 breather plug (ATM).
- Disengage the 2 clamps.
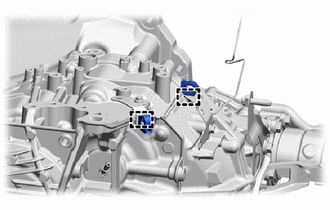
- REMOVE WIRING HARNESS CLAMP
- Disengage the 2 clamps to remove the 2 wiring harness clamps from the automatic transaxle case sub-assembly.
 Courtesy of © TOYOTA, LICENSE AGREEMENT TMS1002 Courtesy of © TOYOTA, LICENSE AGREEMENT TMS1002
|
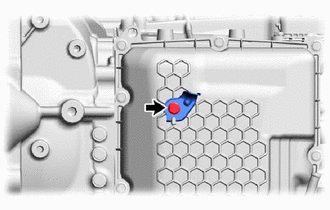
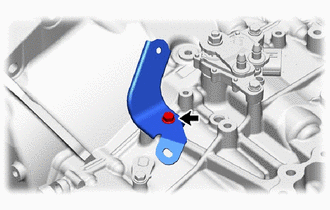
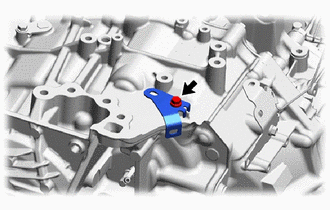
- REMOVE WIRE HARNESS CLAMP BRACKET
- Remove the bolt and wire harness clamp bracket from the transmission case side cover.
 Courtesy of © TOYOTA, LICENSE AGREEMENT TMS1002 Courtesy of © TOYOTA, LICENSE AGREEMENT TMS1002
|
- Remove the bolt and wire harness clamp bracket from the automatic transaxle case sub-assembly.
 Courtesy of © TOYOTA, LICENSE AGREEMENT TMS1002 Courtesy of © TOYOTA, LICENSE AGREEMENT TMS1002
|
- Remove the bolt and wire harness clamp bracket from the automatic transaxle case sub-assembly.
 Courtesy of © TOYOTA, LICENSE AGREEMENT TMS1002 Courtesy of © TOYOTA, LICENSE AGREEMENT TMS1002
|
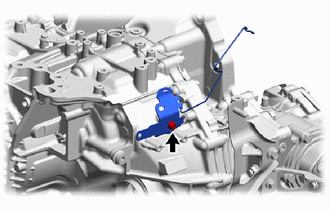
- REMOVE EXHAUST SENSOR CLAMP BRACKET
- Remove the bolt and exhaust sensor clamp bracket from the automatic transaxle case sub-assembly.
 Courtesy of © TOYOTA, LICENSE AGREEMENT TMS1002 Courtesy of © TOYOTA, LICENSE AGREEMENT TMS1002
|
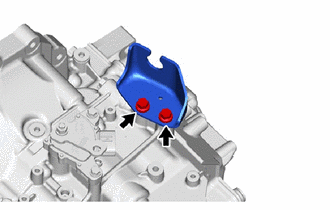
- REMOVE NO. 1 TRANSMISSION CONTROL CABLE BRACKET
- Remove the 2 bolts and No. 1 transmission control cable bracket from the automatic transaxle case sub-assembly.
 Courtesy of © TOYOTA, LICENSE AGREEMENT TMS1002 Courtesy of © TOYOTA, LICENSE AGREEMENT TMS1002
|
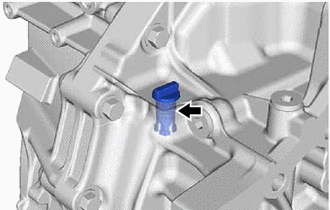
- REMOVE TRANSMISSION CASE PLUG ASSEMBLY
- Remove the transmission case plug assembly from the transaxle housing.
 Courtesy of © TOYOTA, LICENSE AGREEMENT TMS1002 Courtesy of © TOYOTA, LICENSE AGREEMENT TMS1002
|
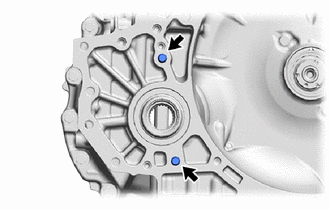
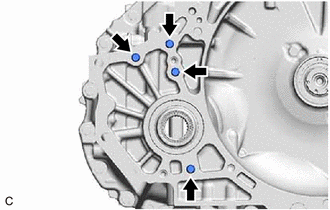
- REMOVE TRANSFER AND TRANSAXLE SETTING STUD BOLT
- Type A:
 Courtesy of © TOYOTA, LICENSE AGREEMENT TMS1002 Courtesy of © TOYOTA, LICENSE AGREEMENT TMS1002
|
- Using 2 nuts, remove the 2 transfer and transaxle setting stud bolts from the automatic transaxle assembly.
- Type B:
 Courtesy of © TOYOTA, LICENSE AGREEMENT TMS1002 Courtesy of © TOYOTA, LICENSE AGREEMENT TMS1002
|
- Using 2 nuts, remove the 4 transfer and transaxle setting stud bolts from the automatic transaxle assembly.
- INSPECT TORQUE CONVERTER ASSEMBLY
See step 1
- INSPECT DRIVE PLATE AND RING GEAR SUB-ASSEMBLY
See step 2