Disassembly [09/2021 - 11/2022]: Procedure
WARNING: This page is about a different car, the 2025 Toyota Corolla Cross, 2024 Toyota Corolla Cross, 2023 Toyota Corolla Cross, and 2022 Toyota Corolla Cross. However, it is still accessible from the selected car via links, so may be relevant.
- PRECAUTION
 Courtesy of © TOYOTA, LICENSE AGREEMENT TMS1002 Courtesy of © TOYOTA, LICENSE AGREEMENT TMS1002
|
WARNING:
Some of these service operations affect the SRS airbag system. Read the precautionary notices concerning the SRS airbag system before servicing.
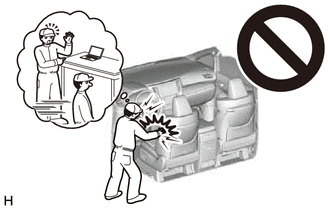 Courtesy of © TOYOTA, LICENSE AGREEMENT TMS1002 Courtesy of © TOYOTA, LICENSE AGREEMENT TMS1002
|
Refer to PRECAUTION [09/2021 - 11/2022]
|
- DISCONNECT CABLE FROM NEGATIVE AUXILIARY BATTERY TERMINAL
Courtesy of © TOYOTA, LICENSE AGREEMENT TMS1002
|
WARNING:
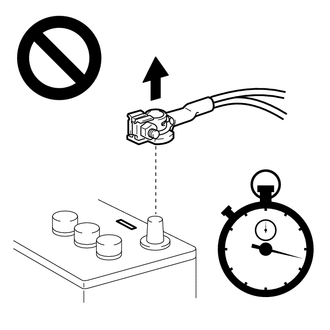 Courtesy of © TOYOTA, LICENSE AGREEMENT TMS1002 Courtesy of © TOYOTA, LICENSE AGREEMENT TMS1002
|
- Wait at least 90 seconds after disconnecting the cable from the negative (-) auxiliary battery terminal to disable the SRS system.
- If the airbag deploys for any reason, it may cause a serious accident.
|
Refer to PROCEDURE - Step 6
- REMOVE FRONT DOOR INSIDE HANDLE BEZEL PLUG
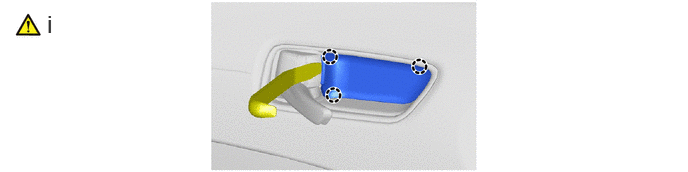 Courtesy of © TOYOTA, LICENSE AGREEMENT TMS1002 Courtesy of © TOYOTA, LICENSE AGREEMENT TMS1002
|
- Using a moulding remover A, disengage the claws to remove the front door inside handle bezel plug.
- REMOVE DOOR ASSIST GRIP COVER
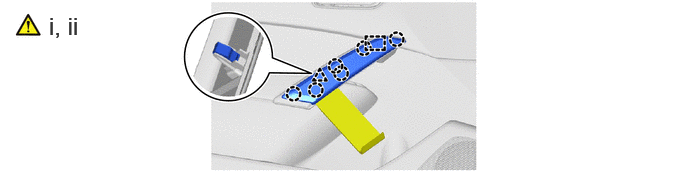 Courtesy of © TOYOTA, LICENSE AGREEMENT TMS1002 Courtesy of © TOYOTA, LICENSE AGREEMENT TMS1002
|
- Using a moulding remover D, disengage the claws.
- Disengage the guide and clip to remove the door assist grip cover.
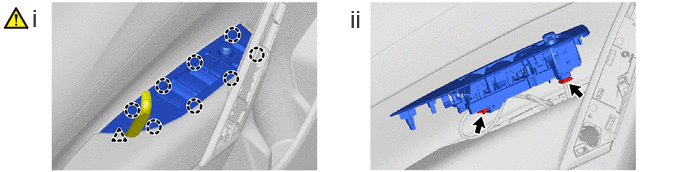
- REMOVE MULTIPLEX NETWORK MASTER SWITCH ASSEMBLY WITH FRONT DOOR UPPER ARMREST BASE PANEL (for Driver Side)
 Courtesy of © TOYOTA, LICENSE AGREEMENT TMS1002 Courtesy of © TOYOTA, LICENSE AGREEMENT TMS1002
|
- Using a moulding remover A, disengage the clip and claws.
- Disconnect the 2 connectors to remove the multiplex network master switch assembly with front door upper armrest base panel.
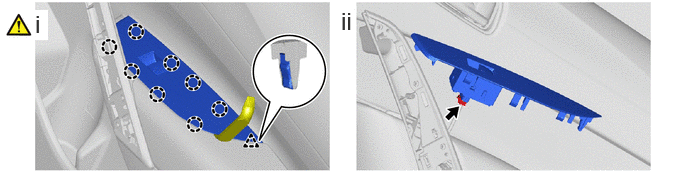
- REMOVE POWER WINDOW REGULATOR SWITCH ASSEMBLY WITH FRONT DOOR UPPER ARMREST BASE PANEL (for Front Passenger Side)
 Courtesy of © TOYOTA, LICENSE AGREEMENT TMS1002 Courtesy of © TOYOTA, LICENSE AGREEMENT TMS1002
|
- Using a moulding remover A, disengage the clip and claws.
- Disconnect the connector to remove the power window regulator switch assembly with front door upper armrest base panel.
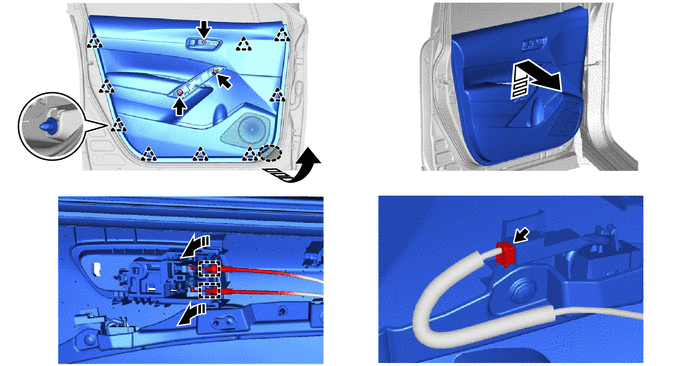
- REMOVE FRONT DOOR TRIM BOARD SUB-ASSEMBLY
 Courtesy of © TOYOTA, LICENSE AGREEMENT TMS1002 Courtesy of © TOYOTA, LICENSE AGREEMENT TMS1002
|
 |
Place Hands Here |
 |
Remove in this Direction |
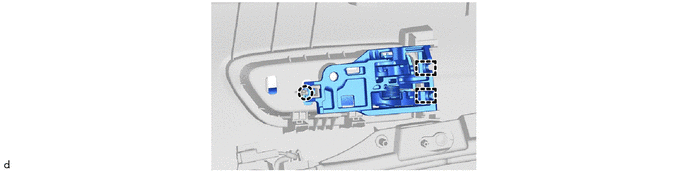
- REMOVE FRONT DOOR INSIDE HANDLE SUB-ASSEMBLY
 Courtesy of © TOYOTA, LICENSE AGREEMENT TMS1002 Courtesy of © TOYOTA, LICENSE AGREEMENT TMS1002
|
- REMOVE FRONT DOOR GLASS INNER WEATHERSTRIP
 Courtesy of © TOYOTA, LICENSE AGREEMENT TMS1002 Courtesy of © TOYOTA, LICENSE AGREEMENT TMS1002
|
|
Remove in this Direction |
- |
- |
- REMOVE FRONT DOOR REAR BELT SEAL
 Courtesy of © TOYOTA, LICENSE AGREEMENT TMS1002 Courtesy of © TOYOTA, LICENSE AGREEMENT TMS1002
|
|
Remove in this Direction |
- |
- |
- REMOVE FRONT DOOR FRONT BELT SEAL
 Courtesy of © TOYOTA, LICENSE AGREEMENT TMS1002 Courtesy of © TOYOTA, LICENSE AGREEMENT TMS1002
|
|
Remove in this Direction |
- |
- |
- REMOVE FRONT DOOR SERVICE HOLE COVER
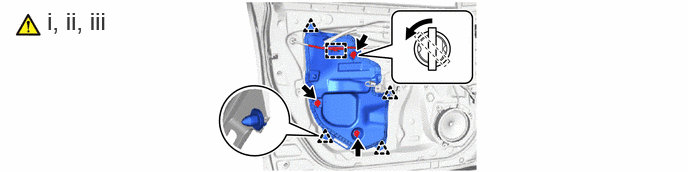 Courtesy of © TOYOTA, LICENSE AGREEMENT TMS1002 Courtesy of © TOYOTA, LICENSE AGREEMENT TMS1002
|
- Disengage the clamp to separate the wire harness.
- Turn the 3 front door weatherstrip clips 45 degrees as shown in the illustration to remove it.
- Disengage the clips to remove the front door service hole cover.
- REMOVE FRONT NO. 1 SPEAKER ASSEMBLY
Refer to PROCEDURE - Step 6
- REMOVE OUTER MIRROR INSTALL HOLE COVER
Refer to PROCEDURE - Step 6
- REMOVE OUTER REAR VIEW MIRROR ASSEMBLY
Refer to PROCEDURE - Step 7
- REMOVE SIDE AIRBAG PRESSURE SENSOR
Courtesy of © TOYOTA, LICENSE AGREEMENT TMS1002
|
Refer to PROCEDURE - Step 9 |
- REMOVE FRONT DOOR CHECK ASSEMBLY
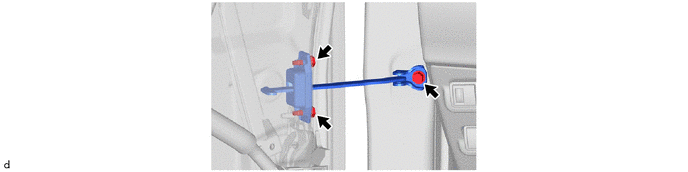 Courtesy of © TOYOTA, LICENSE AGREEMENT TMS1002 Courtesy of © TOYOTA, LICENSE AGREEMENT TMS1002
|
- REMOVE DOOR FRAME UPPER GARNISH
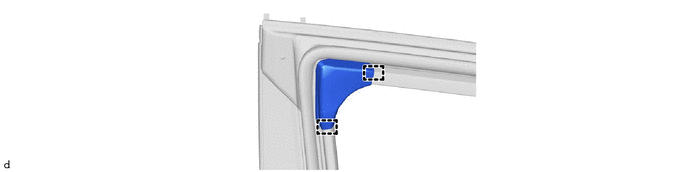 Courtesy of © TOYOTA, LICENSE AGREEMENT TMS1002 Courtesy of © TOYOTA, LICENSE AGREEMENT TMS1002
|
- REMOVE FRONT DOOR WEATHERSTRIP
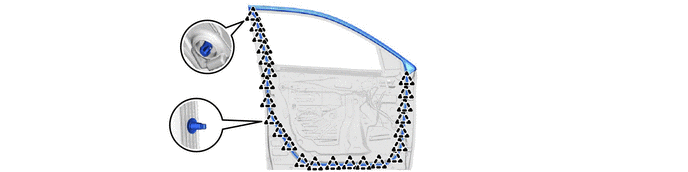 Courtesy of © TOYOTA, LICENSE AGREEMENT TMS1002 Courtesy of © TOYOTA, LICENSE AGREEMENT TMS1002
|
- REMOVE FRONT DOOR GLASS SUB-ASSEMBLY
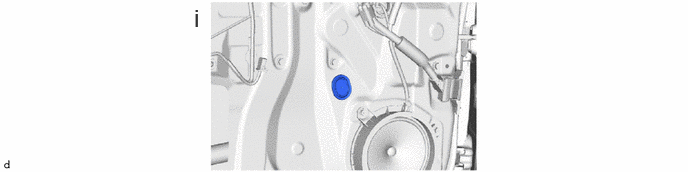 Courtesy of © TOYOTA, LICENSE AGREEMENT TMS1002 Courtesy of © TOYOTA, LICENSE AGREEMENT TMS1002
|
- Remove the hole plug.
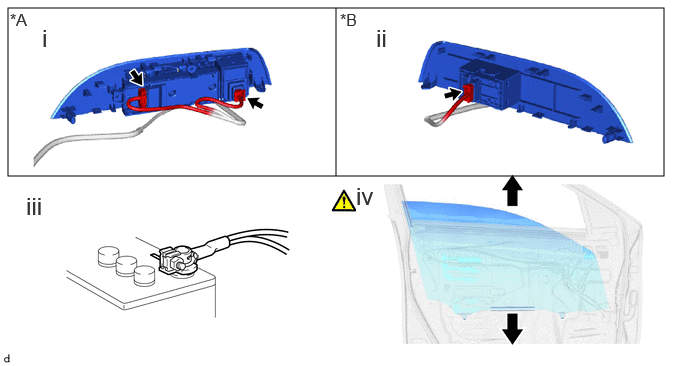 Courtesy of © TOYOTA, LICENSE AGREEMENT TMS1002 Courtesy of © TOYOTA, LICENSE AGREEMENT TMS1002
|
| *A |
for Driver Side |
*B |
for Front Passenger Side |
- for Driver Side:
- Connect the multiplex network master switch assembly.
- for Front Passenger Side:
- Connect the power window regulator switch assembly.
- Connect the cable to the negative (-) auxiliary battery terminal.
- Move the front door glass sub-assembly so that the door glass bolts can be seen.
NOTE:
After the bolts are removed, do not allow the front door glass sub-assembly to fall.
NOTE:
Do not damage the front door glass sub-assembly.
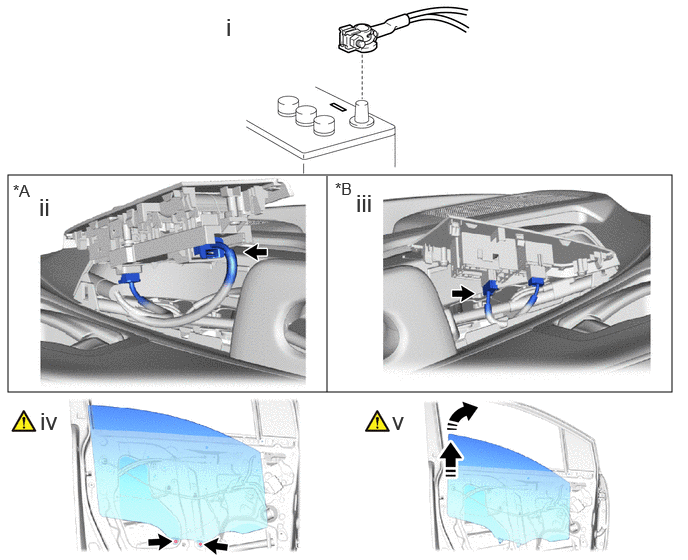 Courtesy of © TOYOTA, LICENSE AGREEMENT TMS1002 Courtesy of © TOYOTA, LICENSE AGREEMENT TMS1002
|
| *A |
for Driver Side |
*B |
for Front Passenger Side |
|
Remove in this Direction |
- |
- |
- Disconnect the cable from negative (-) auxiliary battery terminal.
- for Driver Side:
- Disconnect the multiplex network master switch assembly.
- for Front Passenger Side:
- Disconnect the power window regulator switch assembly.
- Remove the 2 bolts.
NOTE:
After the bolts are removed, do not allow the front door glass sub-assembly to fall.
- Remove the front door glass sub-assembly as shown in the illustration.
NOTE:
Do not damage the front door glass sub-assembly.
- REMOVE FRONT DOOR GLASS RUN
 Courtesy of © TOYOTA, LICENSE AGREEMENT TMS1002 Courtesy of © TOYOTA, LICENSE AGREEMENT TMS1002
|
- REMOVE FRONT DOOR REAR LOWER FRAME SUB-ASSEMBLY
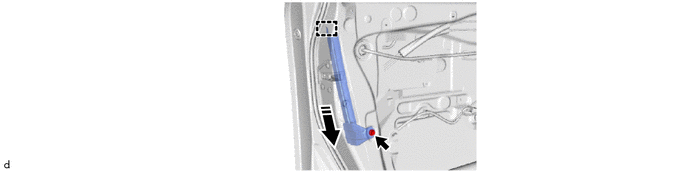 Courtesy of © TOYOTA, LICENSE AGREEMENT TMS1002 Courtesy of © TOYOTA, LICENSE AGREEMENT TMS1002
|
|
Remove in this Direction |
- |
- |
- REMOVE FRONT DOOR FRONT LOWER FRAME SUB-ASSEMBLY
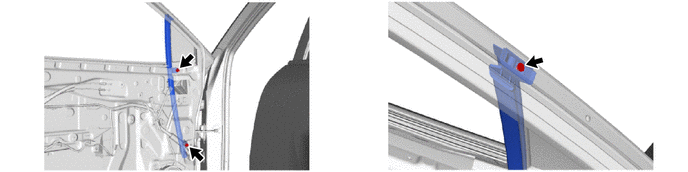 Courtesy of © TOYOTA, LICENSE AGREEMENT TMS1002 Courtesy of © TOYOTA, LICENSE AGREEMENT TMS1002
|
- REMOVE FRONT DOOR FIX WINDOW GLASS
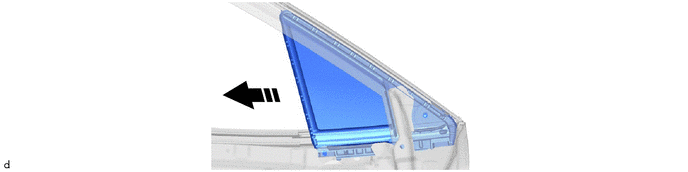 Courtesy of © TOYOTA, LICENSE AGREEMENT TMS1002 Courtesy of © TOYOTA, LICENSE AGREEMENT TMS1002
|
|
Remove in this Direction |
- |
- |
- REMOVE FRONT DOOR FIX WINDOW WEATHERSTRIP
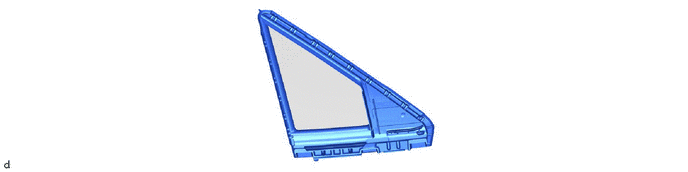 Courtesy of © TOYOTA, LICENSE AGREEMENT TMS1002 Courtesy of © TOYOTA, LICENSE AGREEMENT TMS1002
|
- REMOVE NO. 2 FRONT DOOR SERVICE HOLE COVER
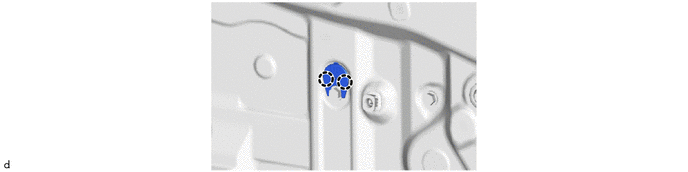 Courtesy of © TOYOTA, LICENSE AGREEMENT TMS1002 Courtesy of © TOYOTA, LICENSE AGREEMENT TMS1002
|
- REMOVE FRONT DOOR WINDOW REGULATOR ASSEMBLY
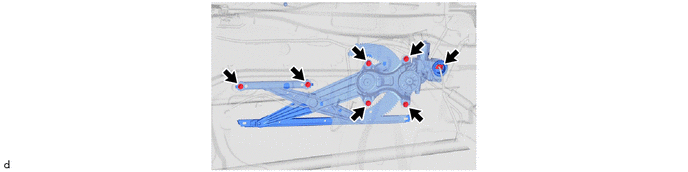 Courtesy of © TOYOTA, LICENSE AGREEMENT TMS1002 Courtesy of © TOYOTA, LICENSE AGREEMENT TMS1002
|
- REMOVE FRONT DOOR OUTSIDE HANDLE ASSEMBLY
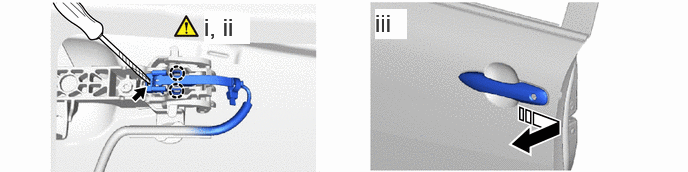 Courtesy of © TOYOTA, LICENSE AGREEMENT TMS1002 Courtesy of © TOYOTA, LICENSE AGREEMENT TMS1002
|
|
Remove in this Direction |
- |
- |
- Using a screwdriver with its tip wrapped in protective tape, disengage the claws.
- Using a screwdriver with its tip wrapped in protective tape, disconnect the connector.
- Remove the front door outside handle assembly as shown in the illustration.
- REMOVE FRONT DOOR LOCK CYLINDER ASSEMBLY (for Driver Side)
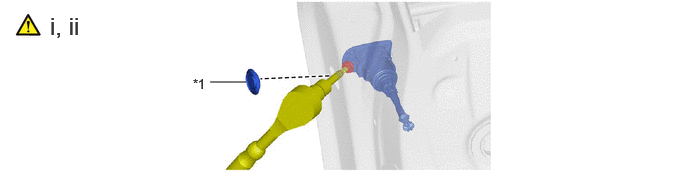 Courtesy of © TOYOTA, LICENSE AGREEMENT TMS1002 Courtesy of © TOYOTA, LICENSE AGREEMENT TMS1002
|
- Remove the hole plug.
- Using a T30 "TORX" socket wrench, loosen the screw to remove the front door lock cylinder assembly.
HINT:
The screw cannot be removed because it is integrated into the front door outside handle frame sub-assembly.
- REMOVE FRONT DOOR OUTSIDE HANDLE COVER (for Front Passenger Side)
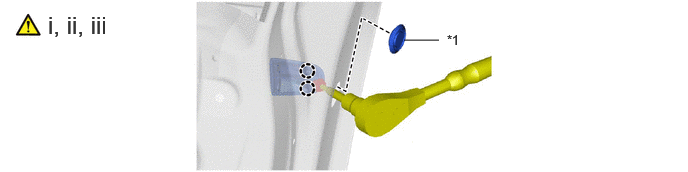 Courtesy of © TOYOTA, LICENSE AGREEMENT TMS1002 Courtesy of © TOYOTA, LICENSE AGREEMENT TMS1002
|
- Remove the hole plug.
- Using a T30 "TORX" socket wrench, loosen the screw.
HINT:
The screw cannot be removed because it is integrated into the front door outside handle frame sub-assembly.
- Disengage the 2 claws to remove the front door outside handle cover.
- REMOVE FRONT DOOR OUTSIDE HANDLE FRONT PAD
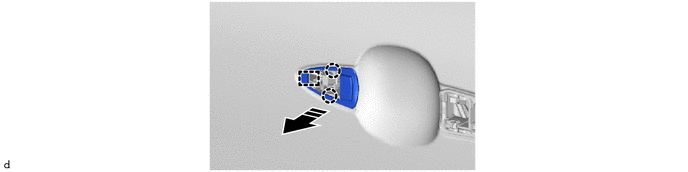 Courtesy of © TOYOTA, LICENSE AGREEMENT TMS1002 Courtesy of © TOYOTA, LICENSE AGREEMENT TMS1002
|
|
Remove in this Direction |
- |
- |
- REMOVE FRONT DOOR OUTSIDE HANDLE REAR PAD
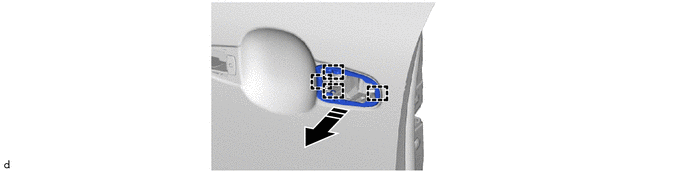 Courtesy of © TOYOTA, LICENSE AGREEMENT TMS1002 Courtesy of © TOYOTA, LICENSE AGREEMENT TMS1002
|
|
Remove in this Direction |
- |
- |
- REMOVE FRONT DOOR LOCK WITH MOTOR ASSEMBLY
Courtesy of © TOYOTA, LICENSE AGREEMENT TMS1002
|
Refer to PROCEDURE - Step 15 |
- REMOVE FRONT DOOR OUTSIDE HANDLE FRAME SUB-ASSEMBLY
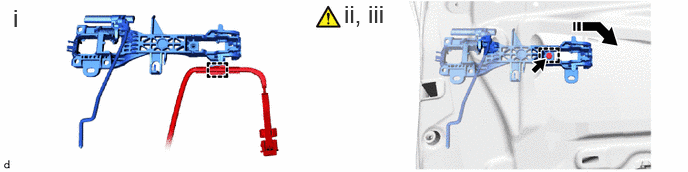 Courtesy of © TOYOTA, LICENSE AGREEMENT TMS1002 Courtesy of © TOYOTA, LICENSE AGREEMENT TMS1002
|
|
Remove in this Direction |
- |
- |
- Disengage the clamp to separate the wire harness.
- Using a T30 "TORX" socket wrench, loosen the screw.
- Disengage the guide to remove the front door outside handle frame sub-assembly as shown in the illustration.
- REMOVE FRONT DOOR LOCK OPEN ROD
 Courtesy of © TOYOTA, LICENSE AGREEMENT TMS1002 Courtesy of © TOYOTA, LICENSE AGREEMENT TMS1002
|
| *1 |
Snap |
- |
- |
|
Remove in this Direction (1) |
 |
Remove in this Direction (2) |
- Disengage the snap to remove the front door lock open rod as shown in the illustration.
- REMOVE HOLE PLUG
Refer to PROCEDURE - Step 1
- REMOVE FRONT DOOR OUTSIDE LOWER MOULDING SUB-ASSEMBLY
Courtesy of © TOYOTA, LICENSE AGREEMENT TMS1002
|
Refer to PROCEDURE - Step 2 |
- REMOVE FRONT DOOR BELT MOULDING ASSEMBLY
Courtesy of © TOYOTA, LICENSE AGREEMENT TMS1002
|
Refer to PROCEDURE - Step 12 |
- REMOVE FRONT DOOR WINDOW FRAME MOULDING (CENTER PILLAR SIDE)
Courtesy of © TOYOTA, LICENSE AGREEMENT TMS1002
|
Refer to PROCEDURE - Step 4 |
- REMOVE FRONT DOOR WINDOW FRAME UPPER MOULDING
Courtesy of © TOYOTA, LICENSE AGREEMENT TMS1002
|
Refer to PROCEDURE - Step 5 |
- REMOVE FRONT DOOR PANEL CUSHION
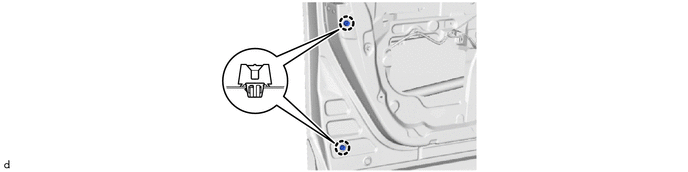 Courtesy of © TOYOTA, LICENSE AGREEMENT TMS1002 Courtesy of © TOYOTA, LICENSE AGREEMENT TMS1002
|
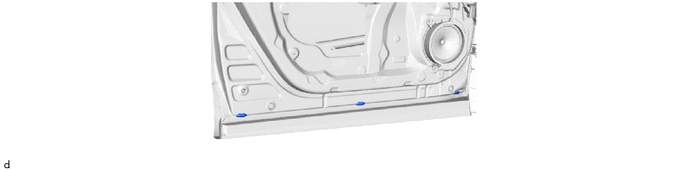
- REMOVE FRONT DOOR DUST PROOF SEAL
 Courtesy of © TOYOTA, LICENSE AGREEMENT TMS1002 Courtesy of © TOYOTA, LICENSE AGREEMENT TMS1002
|
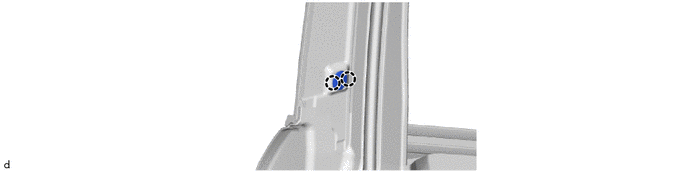
- REMOVE DOOR WINDOW FRAME MOULDING CLIP
 Courtesy of © TOYOTA, LICENSE AGREEMENT TMS1002 Courtesy of © TOYOTA, LICENSE AGREEMENT TMS1002
|
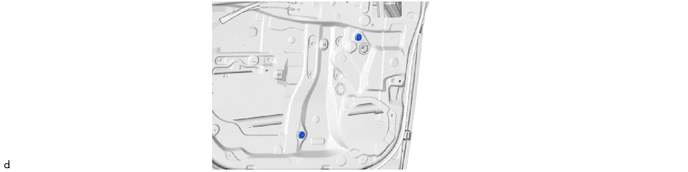
- REMOVE NO. 2 HOLE PLUG
 Courtesy of © TOYOTA, LICENSE AGREEMENT TMS1002 Courtesy of © TOYOTA, LICENSE AGREEMENT TMS1002
|