D-Pillar Trim Removal/Installation
- Disconnect the negative battery terminal. (See NEGATIVE BATTERY TERMINAL DISCONNECTION/CONNECTION
.)
- Remove the following parts:
- Trunk covering (See TRUNK COVERING REMOVAL/INSTALLATION .)
- Trunk board (See TRUNK BOARD REMOVAL/INSTALLATION .)
- Trunk side pocket (See TRUNK SIDE POCKET REMOVAL/INSTALLATION .)
- Trunk end trim (See TRUNK END TRIM REMOVAL/INSTALLATION .)
- Rear scuff plate (See REAR SCUFF PLATE REMOVAL/INSTALLATION .)
- Third-row seat cushion (See THIRD-ROW SEAT CUSHION REMOVAL/INSTALLATION
.)
- Third-row seat back component (See THIRD-ROW SEAT BACK COMPONENT REMOVAL/INSTALLATION
.)
- Trunk side trim (See TRUNK SIDE TRIM REMOVAL/INSTALLATION .)
- Lower anchor installation bolt on the third-row seat belt (See THIRD-ROW SEAT BELT REMOVAL/INSTALLATION
.)
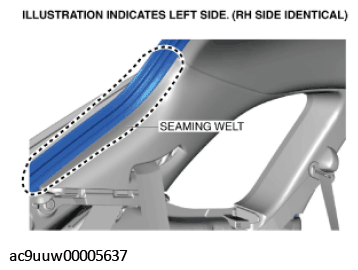
- Partially peel back the seaming welt.
 Courtesy of MAZDA MOTORS CORP.
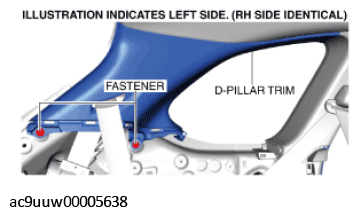
- Remove the fasteners.
 Courtesy of MAZDA MOTORS CORP.
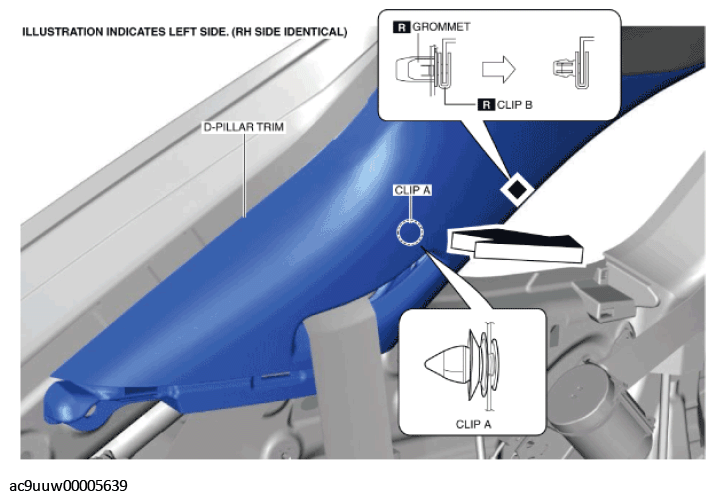
- Pull the D-pillar trim in the direction of the arrow while detaching clip A.
 Courtesy of MAZDA MOTORS CORP.
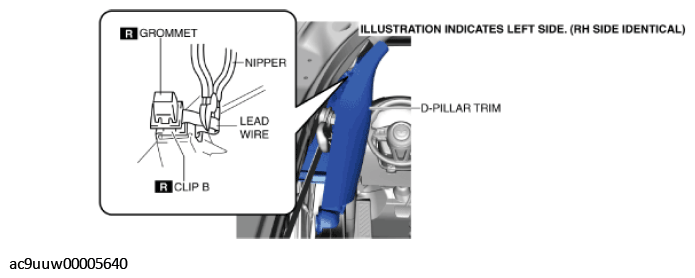
- Cut the lead wire connecting clip B and grommet using a nipper.
 Courtesy of MAZDA MOTORS CORP.
- Slide the D-pillar trim in the direction of the arrow shown in the figure and detach clip A and B from the body panel.
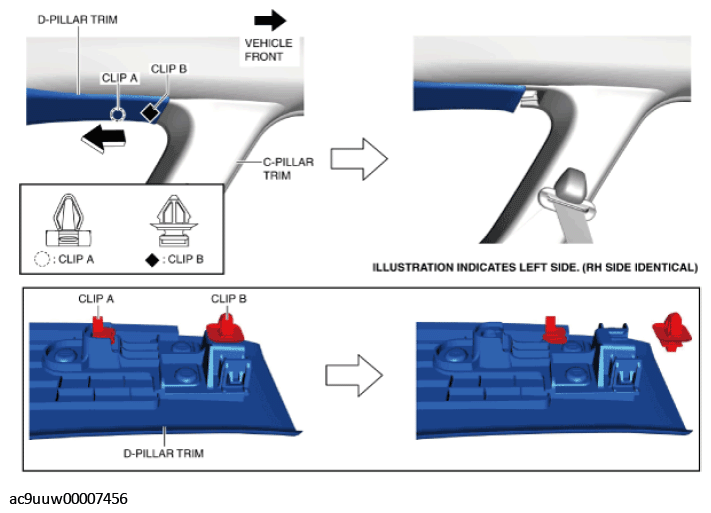 Courtesy of MAZDA MOTORS CORP.
- Remove the D-pillar trim.
- Remove the clip A.
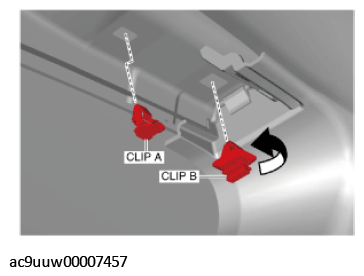 Courtesy of MAZDA MOTORS CORP.
- Rotate the clip B in the direction of the arrow shown in the figure and remove it.
- Install the clip A and clip B to the D-pillar trim.
- Move the hook in the direction of arrow shown in the figure using a tape-wrapped flathead screwdriver and detach it from the inner panel.
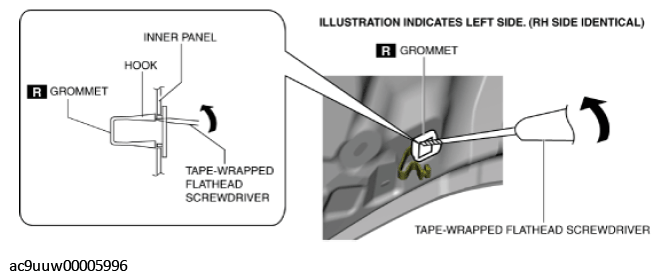 Courtesy of MAZDA MOTORS CORP.
- Move the hook in the direction of arrow (1) shown in the figure using a tape-wrapped flathead screwdriver and detach it from the inner panel.
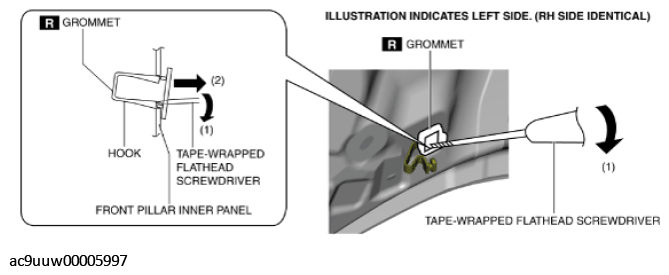 Courtesy of MAZDA MOTORS CORP.
- Remove the grommet in the direction of the arrow (2) shown in the figure.
- When installing the D-pillar trim, install new clip B and grommet to the D-pillar trim in advance.
- Install in the reverse order of removal.