- PRECAUTION
NOTE:
Make sure to select face mode before disconnecting the cable from the negative (-) auxiliary battery terminal.
- RECOVER REFRIGERANT FROM REFRIGERATION SYSTEM
See step 1
- REMOVE WINDSHIELD WIPER MOTOR AND LINK ASSEMBLY
Refer to REMOVAL [04/2018 -]
- REMOVE FRONT CENTER UPPER SUSPENSION BRACE SUB-ASSEMBLY
Refer to PROCEDURE - Step 6 [04/2018 - 08/2020]
, or refer to PROCEDURE - Step 6 [08/2020 - 08/2021]
- DISCONNECT OUTLET HEATER WATER HOSE
- Using pliers, grip the claws of the clip and slide the clip to disconnect the outlet heater water hose.
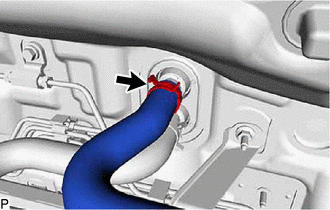 Courtesy of © TOYOTA, LICENSE AGREEMENT TMS1002 Courtesy of © TOYOTA, LICENSE AGREEMENT TMS1002
|
NOTE:
- Do not apply excessive force to the outlet heater water hose.
- Prepare a drain pan or cloth in case the coolant leaks.
- DISCONNECT INLET HEATER WATER HOSE
- Using pliers, grip the claws of the clip and slide the clip to disconnect the inlet heater water hose.
NOTE:
- Do not apply excessive force to the inlet heater water hose.
- Prepare a drain pan or cloth in case the coolant leaks.
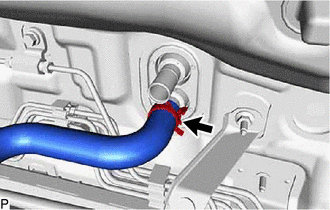 Courtesy of © TOYOTA, LICENSE AGREEMENT TMS1002 Courtesy of © TOYOTA, LICENSE AGREEMENT TMS1002
|
- DISCONNECT SUCTION PIPE SUB-ASSEMBLY
- Remove the bolt and rotate the hook connector as shown in the illustration.
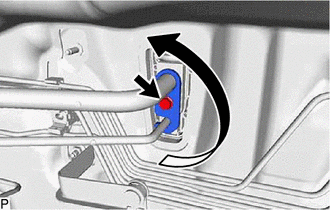 Courtesy of © TOYOTA, LICENSE AGREEMENT TMS1002 Courtesy of © TOYOTA, LICENSE AGREEMENT TMS1002
|
- Disconnect the suction pipe sub-assembly.
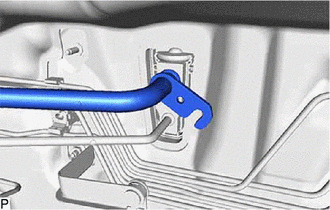 Courtesy of © TOYOTA, LICENSE AGREEMENT TMS1002 Courtesy of © TOYOTA, LICENSE AGREEMENT TMS1002
|
- Remove the O-ring from the suction pipe sub-assembly.
NOTE:
Seal the openings of the disconnected parts using vinyl tape to prevent entry of moisture and foreign matter.
- DISCONNECT AIR CONDITIONING TUBE AND ACCESSORY ASSEMBLY
- Disconnect the air conditioning tube and accessory assembly.
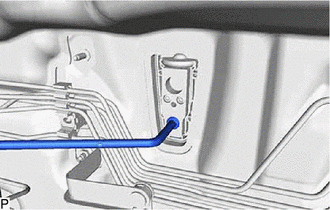 Courtesy of © TOYOTA, LICENSE AGREEMENT TMS1002 Courtesy of © TOYOTA, LICENSE AGREEMENT TMS1002
|
- Remove the O-ring from the air conditioning tube and accessory assembly.
NOTE:
Seal the openings of the disconnected parts using vinyl tape to prevent entry of moisture and foreign matter.
- REMOVE FRONT SEAT ASSEMBLY LH
Refer to REMOVAL [04/2018 - 08/2020]
, or refer to REMOVAL [08/2020 - 08/2021]
- REMOVE FRONT SEAT ASSEMBLY RH
HINT:
Use the same procedure as for the LH side.
- REMOVE TRANSMISSION FLOOR SHIFT ASSEMBLY
Refer to REMOVAL [04/2018 -]
- REMOVE STEERING COLUMN ASSEMBLY
for Manual Tilt and Manual Telescopic Steering Column:
Refer to REMOVAL [04/2018 - 08/2021]
for Power Tilt and Power Telescopic Steering Column:
Refer to REMOVAL [04/2018 - 08/2021]
- REMOVE INSTRUMENT PANEL SAFETY PAD SUB-ASSEMBLY
Refer to REMOVAL [04/2018 - 08/2021]
- REMOVE ECU INTEGRATION BOX RH
Refer to PROCEDURE - Step 3
- REMOVE VEHICLE APPROACHING SPEAKER CONTROLLER
Refer to PROCEDURE - Step 3 [04/2018 - 08/2020]
, or refer to PROCEDURE - Step 3 [08/2020 - 08/2021]
- REMOVE DCM (TELEMATICS TRANSCEIVER) WITH BRACKET
Refer to PROCEDURE - Step 10 [04/2018 - 08/2020]
, or refer to PROCEDURE - Step 10 [08/2020 -]
- REMOVE NO. 1 CLEARANCE WARNING BUZZER (w/ Intelligent Parking Assist System)
Refer to PROCEDURE - Step 9
- REMOVE DRIVING SUPPORT ECU ASSEMBLY
Refer to PROCEDURE - Step 2
- REMOVE COOLER (ROOM TEMP. SENSOR) THERMISTOR
- Disconnect the connector and aspirator to remove the cooler (room temp. sensor) thermistor.
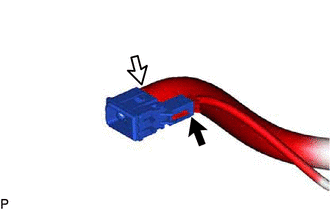 Courtesy of © TOYOTA, LICENSE AGREEMENT TMS1002 Courtesy of © TOYOTA, LICENSE AGREEMENT TMS1002
|
- REMOVE ACCELERATOR PEDAL PAD
Refer to PROCEDURE - Step 3
- REMOVE ACCELERATOR PEDAL
Refer to PROCEDURE - Step 4
- REMOVE REAR NO. 2 AIR DUCT
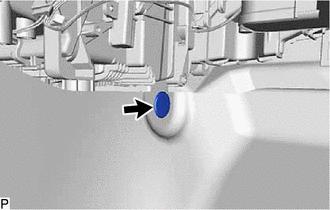 Courtesy of © TOYOTA, LICENSE AGREEMENT TMS1002 Courtesy of © TOYOTA, LICENSE AGREEMENT TMS1002
|
Remove the front floor carpet clip.
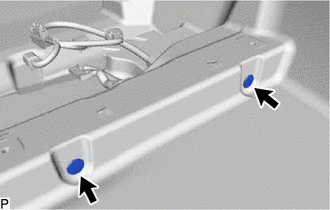 Courtesy of © TOYOTA, LICENSE AGREEMENT TMS1002 Courtesy of © TOYOTA, LICENSE AGREEMENT TMS1002
|
Remove the 2 front floor carpet clips.
- Disengage the 2 guides and turn back the front floor carpet assembly as shown in the illustration.
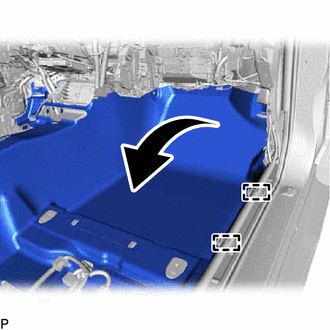 Courtesy of © TOYOTA, LICENSE AGREEMENT TMS1002 Courtesy of © TOYOTA, LICENSE AGREEMENT TMS1002
|
- Disengage the 4 claws and remove the rear No. 2 air duct as shown in the illustration.
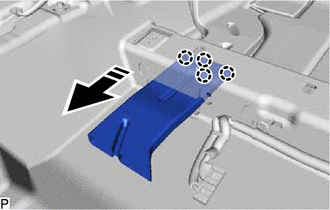 Courtesy of © TOYOTA, LICENSE AGREEMENT TMS1002 Courtesy of © TOYOTA, LICENSE AGREEMENT TMS1002
|
 |
Remove in this Direction |
- REMOVE REAR NO. 1 AIR DUCT
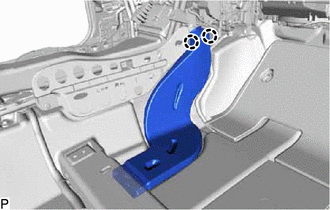 Courtesy of © TOYOTA, LICENSE AGREEMENT TMS1002 Courtesy of © TOYOTA, LICENSE AGREEMENT TMS1002
|
Disengage the 2 claws and remove the rear No. 1 air duct.
- REMOVE REAR NO. 4 AIR DUCT
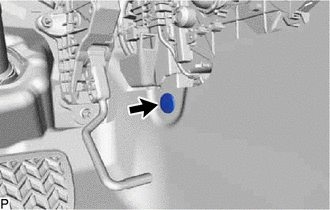 Courtesy of © TOYOTA, LICENSE AGREEMENT TMS1002 Courtesy of © TOYOTA, LICENSE AGREEMENT TMS1002
|
Remove the front floor carpet clip.
- Remove the 2 front floor carpet clips.
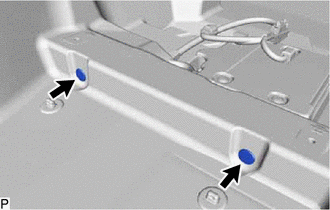 Courtesy of © TOYOTA, LICENSE AGREEMENT TMS1002 Courtesy of © TOYOTA, LICENSE AGREEMENT TMS1002
|
- Disengage the 2 guides and turn back the front floor carpet assembly as shown in the illustration.
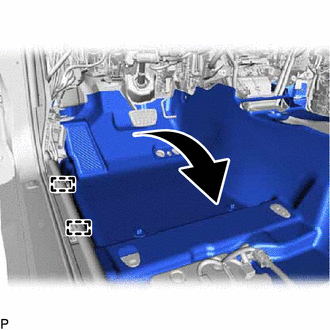 Courtesy of © TOYOTA, LICENSE AGREEMENT TMS1002 Courtesy of © TOYOTA, LICENSE AGREEMENT TMS1002
|
- Disengage the 4 claws and remove the rear No. 4 air duct as shown in the illustration.
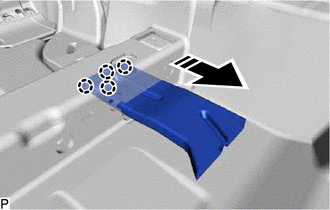 Courtesy of © TOYOTA, LICENSE AGREEMENT TMS1002 Courtesy of © TOYOTA, LICENSE AGREEMENT TMS1002
|
|
Remove in this Direction |
- REMOVE REAR NO. 3 AIR DUCT
- Disengage the 2 claws and remove the rear No. 3 air duct.
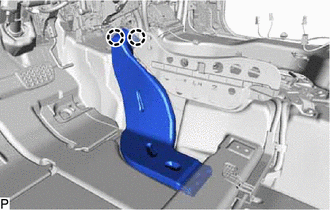 Courtesy of © TOYOTA, LICENSE AGREEMENT TMS1002 Courtesy of © TOYOTA, LICENSE AGREEMENT TMS1002
|
- REMOVE FLOOR CARPET BRACKET RH
- Remove the clip.
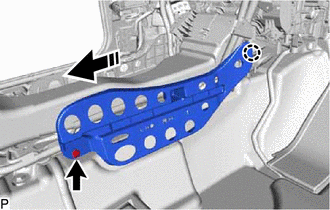 Courtesy of © TOYOTA, LICENSE AGREEMENT TMS1002 Courtesy of © TOYOTA, LICENSE AGREEMENT TMS1002
|
|
Remove in this Direction |
- Disengage the claw to remove the floor carpet bracket RH as shown in the illustration.
- REMOVE FLOOR CARPET BRACKET LH
- Remove the clip.
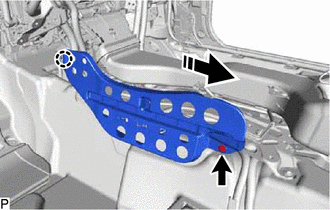 Courtesy of © TOYOTA, LICENSE AGREEMENT TMS1002 Courtesy of © TOYOTA, LICENSE AGREEMENT TMS1002
|
|
Remove in this Direction |
- Disengage the claw to remove the floor carpet bracket LH as shown in the illustration.
- REMOVE NO. 1 CONSOLE BOX DUCT
- Remove the No. 1 console box duct as shown in the illustration.
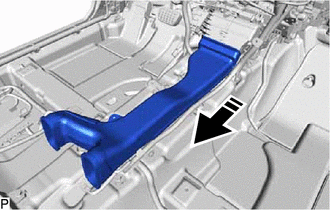 Courtesy of © TOYOTA, LICENSE AGREEMENT TMS1002 Courtesy of © TOYOTA, LICENSE AGREEMENT TMS1002
|
|
Remove in this Direction |
- REMOVE NO. 3 DASH PANEL INSULATOR PAD
- Cut each claw of the 2 clips and remove the No. 3 dash panel insulator pad.
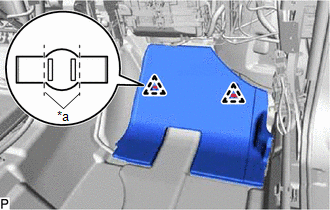 Courtesy of © TOYOTA, LICENSE AGREEMENT TMS1002 Courtesy of © TOYOTA, LICENSE AGREEMENT TMS1002
|
NOTE:
If the No. 3 dash panel insulator pad is damaged, replace it with a new one.
- Remove the 2 clips.
- REMOVE NO. 1 INSTRUMENT PANEL BRACE SUB-ASSEMBLY
See step 29 [04/2018 - 08/2020], or see step 33[08/2020 - 08/2021]
- REMOVE NO. 2 INSTRUMENT PANEL BRACE SUB-ASSEMBLY
- Remove the bolt (A) and disconnect the earth wire.
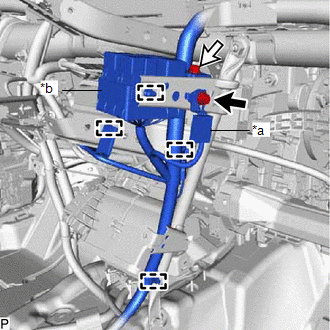 Courtesy of © TOYOTA, LICENSE AGREEMENT TMS1002 Courtesy of © TOYOTA, LICENSE AGREEMENT TMS1002
|
| *a |
Earth Wire |
| *b |
Relay Block Holder |
 |
Bolt (A) |
 |
Bolt (B) |
- Remove the bolt (B).
- Disengage each clamp to separate the relay block holder.
- Remove the bolt, screw, nut and No. 2 instrument panel brace sub-assembly.
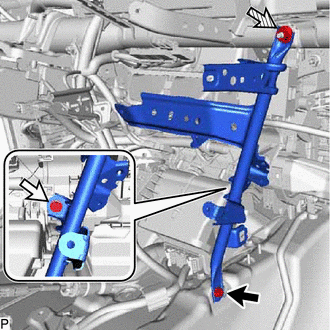 Courtesy of © TOYOTA, LICENSE AGREEMENT TMS1002 Courtesy of © TOYOTA, LICENSE AGREEMENT TMS1002
|
- REMOVE NO. 3 INSTRUMENT PANEL TO COWL BRACE SUB-ASSEMBLY
- Disengage each clamp.
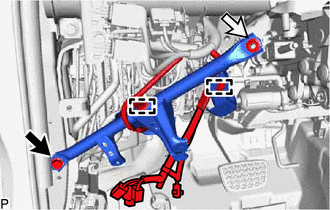 Courtesy of © TOYOTA, LICENSE AGREEMENT TMS1002 Courtesy of © TOYOTA, LICENSE AGREEMENT TMS1002
|
|
Bolt |
|
Nut |
- Remove the bolt, nut and No. 3 instrument panel to cowl brace sub-assembly.
- REMOVE HYBRID VEHICLE CONTROL ECU
Refer to PROCEDURE - Step 3
- REMOVE INSTRUMENT PANEL JUNCTION BLOCK ASSEMBLY WITH MAIN BODY ECU
Refer to PROCEDURE - Step 3
- REMOVE INSTRUMENT PANEL REINFORCEMENT ASSEMBLY WITH AIR CONDITIONER UNIT ASSEMBLY
See step 33[04/2018 - 08/2020], or see step 38[08/2020 - 08/2021]
- REMOVE AIR CONDITIONER UNIT ASSEMBLY
- Remove the 3 bolts.
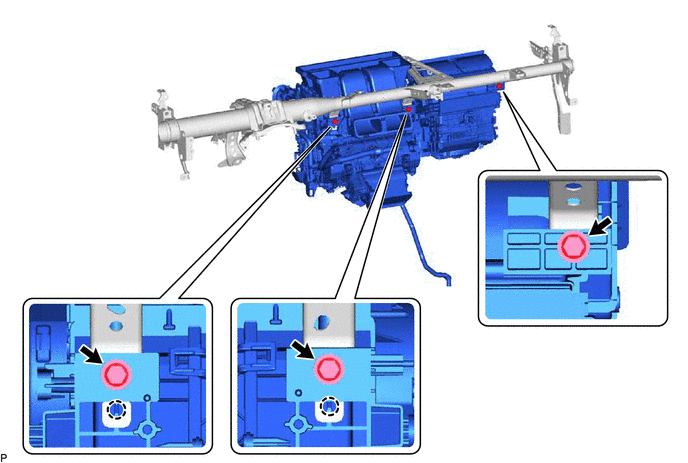 Courtesy of © TOYOTA, LICENSE AGREEMENT TMS1002 Courtesy of © TOYOTA, LICENSE AGREEMENT TMS1002
|
- Disengage the 2 claws and remove the air conditioner unit assembly from the instrument panel reinforcement assembly.