Rear Spoiler Installation
- Install the side spoiler. (See SIDE SPOILER REMOVAL/INSTALLATION .)
- Install the high-mount brake light. (See HIGH-MOUNT BRAKE LIGHT REMOVAL/INSTALLATION
.)
- When a rear spoiler is to be reused, perform the following procedure:
- Remove the packing remaining on the rear spoiler.
- Affix new packing to the position shown in the figure.
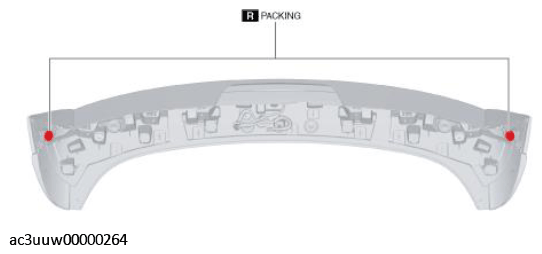 Courtesy of MAZDA MOTORS CORP.
- If the protector is damaged, replace the part that is damaged with a new protector.
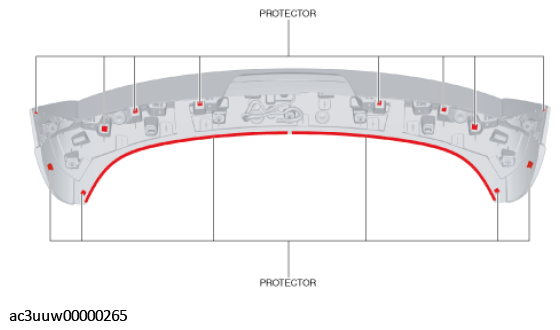 Courtesy of MAZDA MOTORS CORP.
- Connect the high-mount brake light connector.
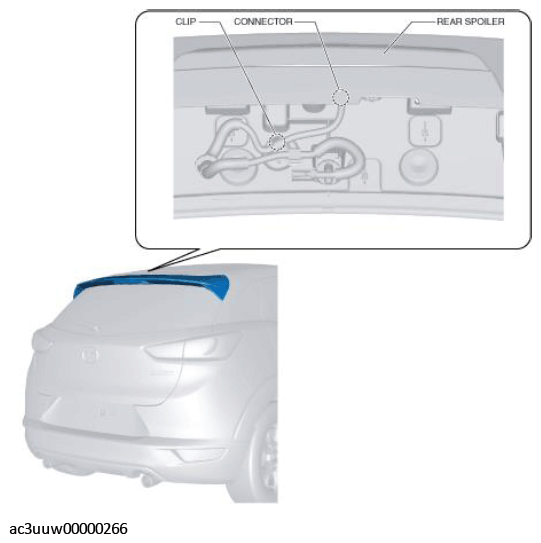 Courtesy of MAZDA MOTORS CORP.
- Push down the rear spoiler and side spoiler in the order shown in the figure and attach the rear spoiler pins and clips to the liftgate.
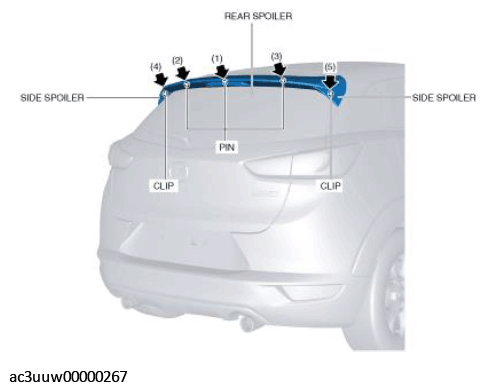 Courtesy of MAZDA MOTORS CORP.
- Install the nuts.
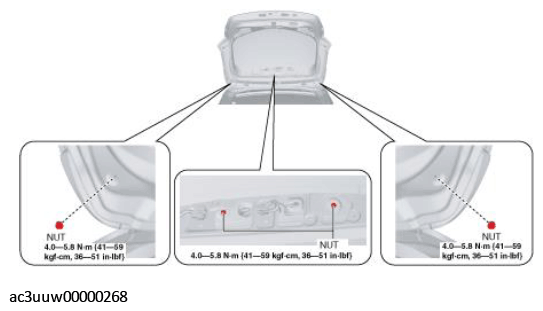 Courtesy of MAZDA MOTORS CORP.
- Install the service hole covers.
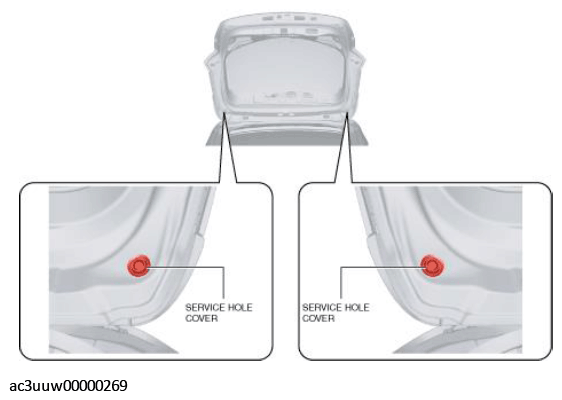 Courtesy of MAZDA MOTORS CORP.
- Install the liftgate upper trim. (See LIFTGATE UPPER TRIM REMOVAL/INSTALLATION
.)
- Connect the negative battery cable. (See NEGATIVE BATTERY CABLE DISCONNECTION/CONNECTION
.)