Instrument Panel Trim Pad Replacement (Acadia w/o RPO UV6)
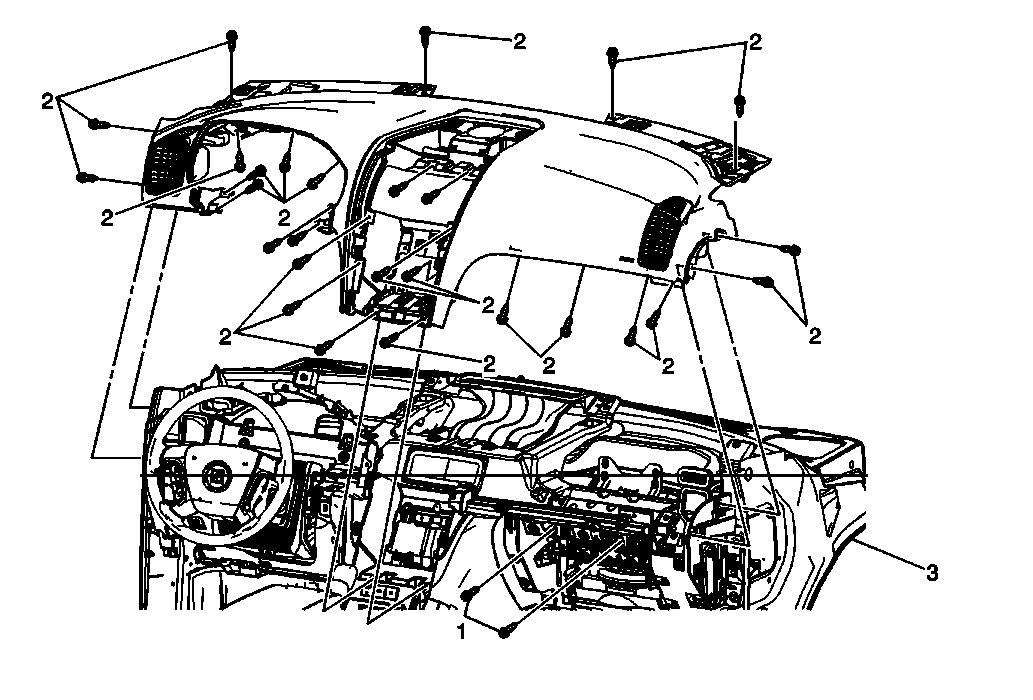 Courtesy of GENERAL MOTORS CORP.
 Instrument Panel Trim Pad Replacement (Acadia w/o RPO UV6)
| Callout |
Component Name |
|
Preliminary Procedures
- Disable the SIR system. Refer to SIR Disabling and Enabling
.
- Remove the instrument panel upper trim panel with defroster nozzle. Refer to Instrument Panel Upper Trim Panel with Windshield Defroster Nozzle Grille Replacement (Acadia w/RPO UV6) , Instrument Panel Upper Trim Panel with Windshield Defroster Nozzle Grille Replacement (Traverse) , Instrument Panel Upper Trim Panel with Windshield Defroster Nozzle Grille Replacement (Enclave) , Instrument Panel Upper Trim Panel with Windshield Defroster Nozzle Grille Replacement (Acadia w/o RPO UV6) .
- Remove the instrument panel outer trim covers. Refer to Instrument Panel Compartment Access Hole Cover Replacement (Traverse) , Instrument Panel Compartment Access Hole Cover Replacement (Acadia) , Instrument Panel Compartment Access Hole Cover Replacement (Enclave) .
- Remove the instrument panel cluster trim plate. Refer to Instrument Panel Cluster Trim Plate Replacement (Acadia) , Instrument Panel Cluster Trim Plate Replacement (Traverse) .
- Remove the radio. Refer to Radio Replacement
.
- Remove the radio front speaker. Refer to Radio Front Speaker Replacement
.
- Remove the instrument panel compartment trim panel. Refer to Instrument Panel Compartment Trim Plate Replacement (Traverse) , Instrument Panel Compartment Trim Plate Replacement (Enclave) , Instrument Panel Compartment Trim Plate Replacement (Acadia) .
|
| 1 |
Instrument Panel Inflatable Restraint Bolt (Qty: 2)
Tighten
9 N.m (80 lb in) |
| 2 |
Instrument Panel Trim Pad Screw (Qty: 22)
Tighten
2 N.m (18 lb in) |
| 3 |
Instrument Panel Trim Pad Assembly Procedure
- Prior to removing the trim pad from the instrument panel assembly, note the routing of the wiring to ensure proper reinstallation.
- Disconnect all electrical connections.
- With the aid of an assistant, remove the trim panel from the vehicle.
- When replacing the instrument panel trim pad, transfer all necessary components.
|