Roof Front Header Garnish Molding Replacement - Lower (Convertible)
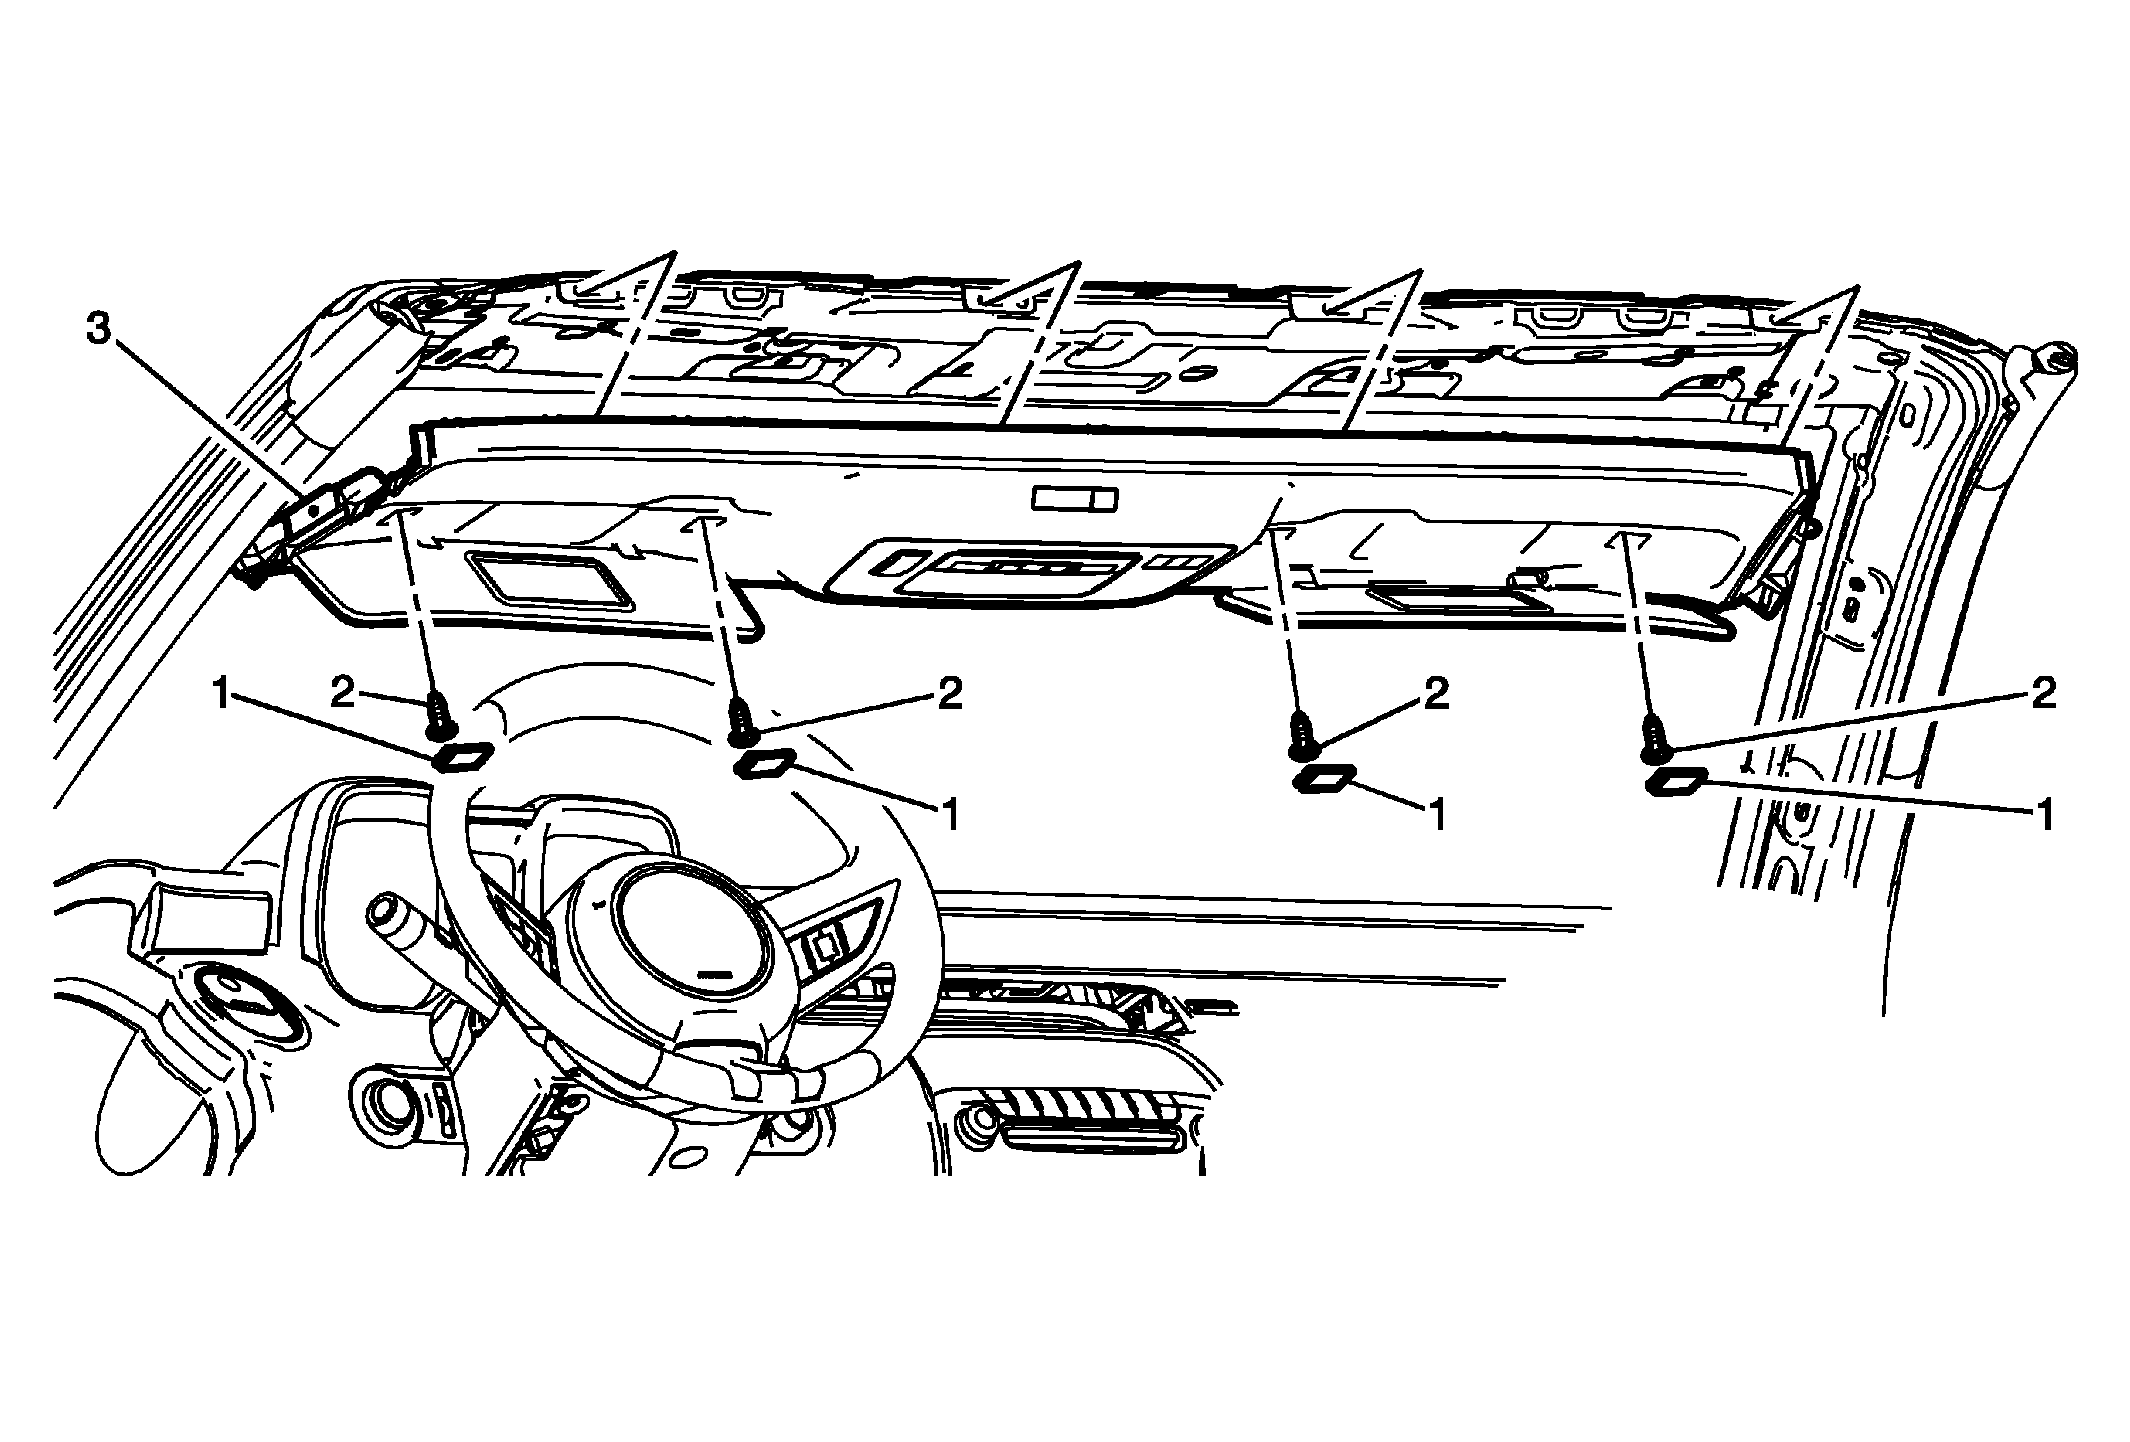 Courtesy of GENERAL MOTORS COMPANY
 Roof Front Header Garnish Molding Replacement - Lower (Convertible)
| Callout |
Component Name |
|
Preliminary Procedures
- Remove the windshield garnish molding. Refer to Windshield Side Garnish Molding Replacement (Coupe) , Windshield Side Garnish Molding Replacement (Convertible) .
- Remove the roof front header garnish molding upper. Refer to Roof Front Header Garnish Molding Replacement - Upper (Convertible) .
- Remove the right side body hinge pillar trim panel. Refer to Body Hinge Pillar Trim Panel Replacement .
- Disconnect inline electrical connector at right hinge pillar, unclip harness from hinge pillar and windshield frame.
|
| 1 |
Headlining Front Trim Panel Bolt Hole Cover (Qty: 4) Procedure
- Tilt the sunshade down toward the windshield to access covers.
- When removing the left side covers, insert a small flat bladed tool on the left side. When removing the right side covers, insert a small flat bladed tool on the right side.
|
| 2 |
Removable Top Front Side Door Opening Garnish Molding Fastener (Qty: 4)
|
| 3 |
Roof Front Header Garnish Molding Assembly Procedure
- Disconnect electrical as necessary.
- Transfer parts as necessary.
|