Removal Procedure
- Remove the air cleaner assembly. Refer to Air Cleaner Assembly Replacement
.
- Remove the air cleaner outlet duct. Refer to Air Cleaner Outlet Duct Replacement (LTG)
.
- Recover the refrigerant from the air conditioning system. Refer to Refrigerant Recovery and Recharging .
- Remove the right engine mount. Refer to Engine Mount Replacement
.
- Remove the front bumper fascia assembly. Refer to Front Bumper Fascia Replacement
.
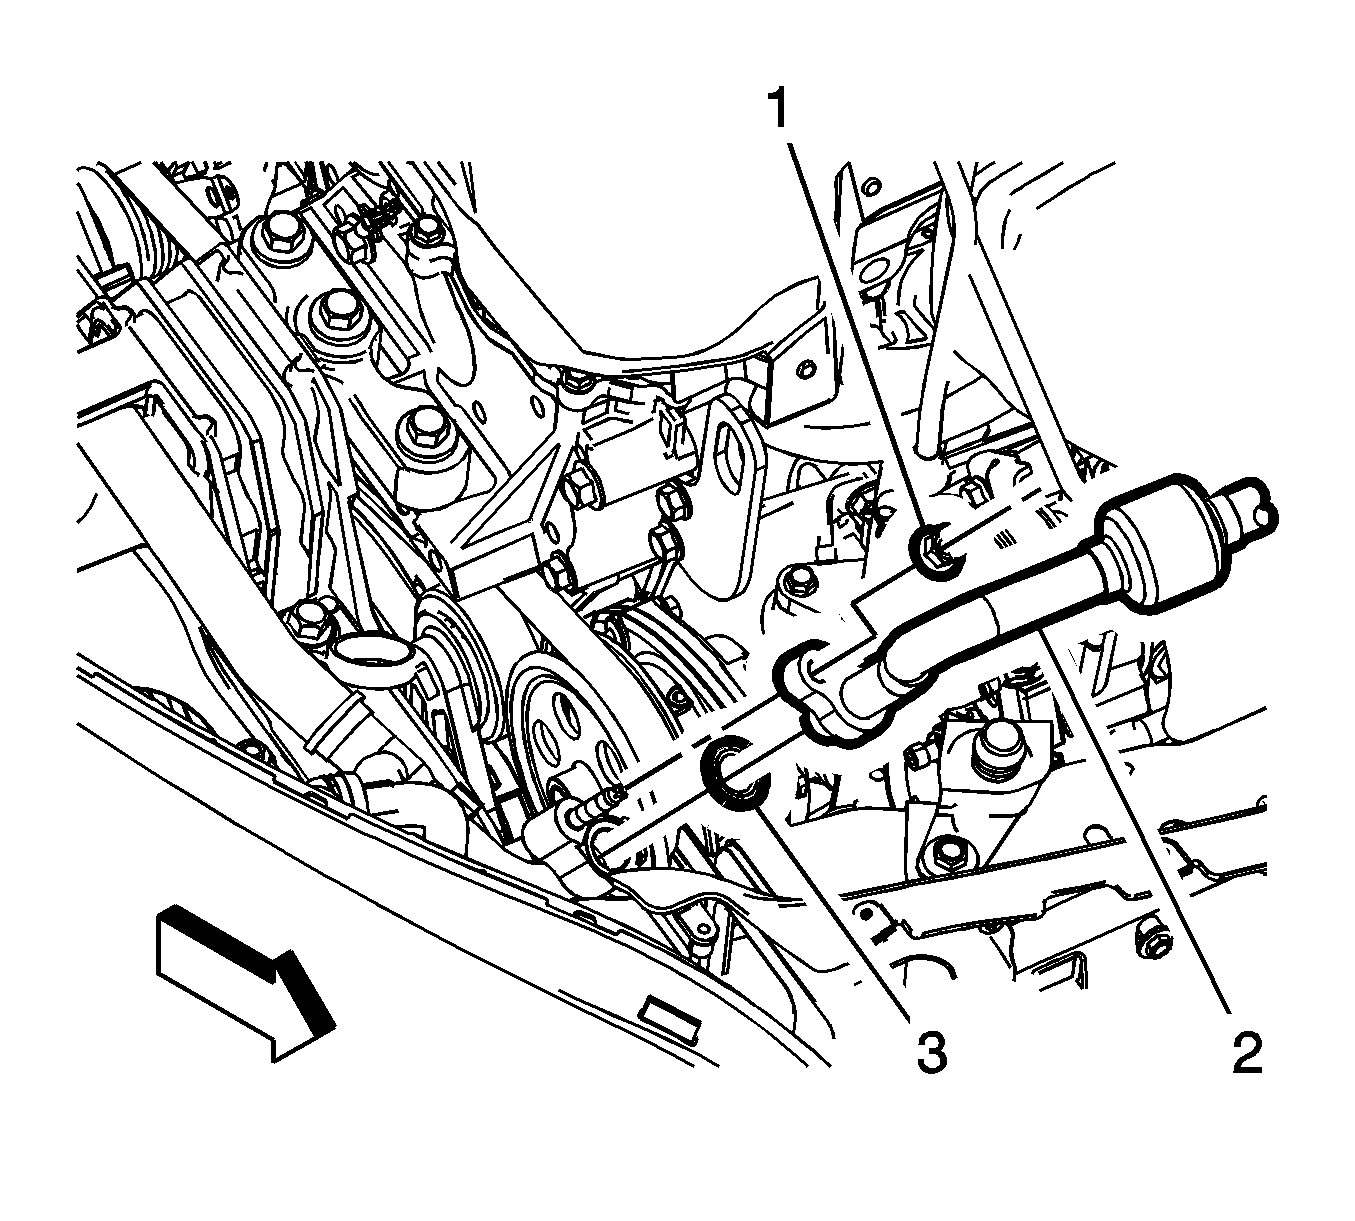 Courtesy of GENERAL MOTORS COMPANY
- Remove the air conditioning compressor hose assembly nut (1) from the evaporator hose assembly (2).
- Remove the air conditioning compressor hose assembly (2) from the evaporator hose assembly and reposition out of the way.
- Remove and discard the old sealing washers (3) and replace with NEW sealing washers.
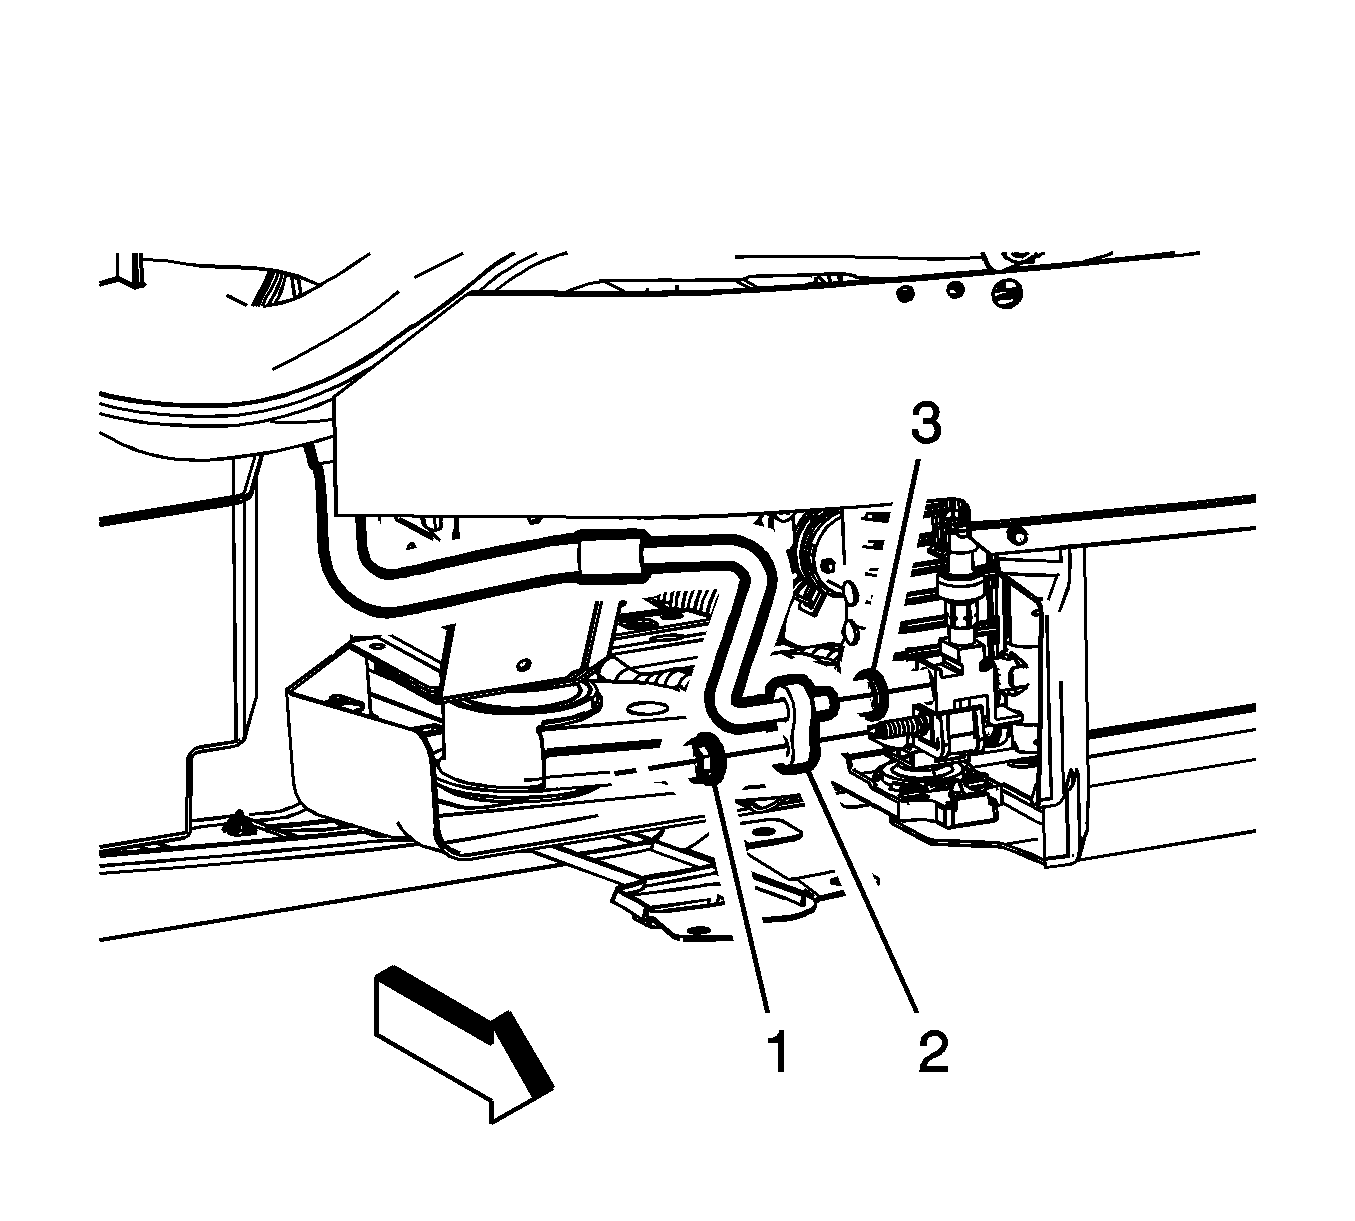 Courtesy of GENERAL MOTORS COMPANY
- Remove the air conditioning evaporator hose assembly nut (1) at condenser.
- Remove the air conditioning evaporator hose assembly (2) from condenser.
- Remove and discard the old sealing washers (3) and replace with NEW sealing washers.
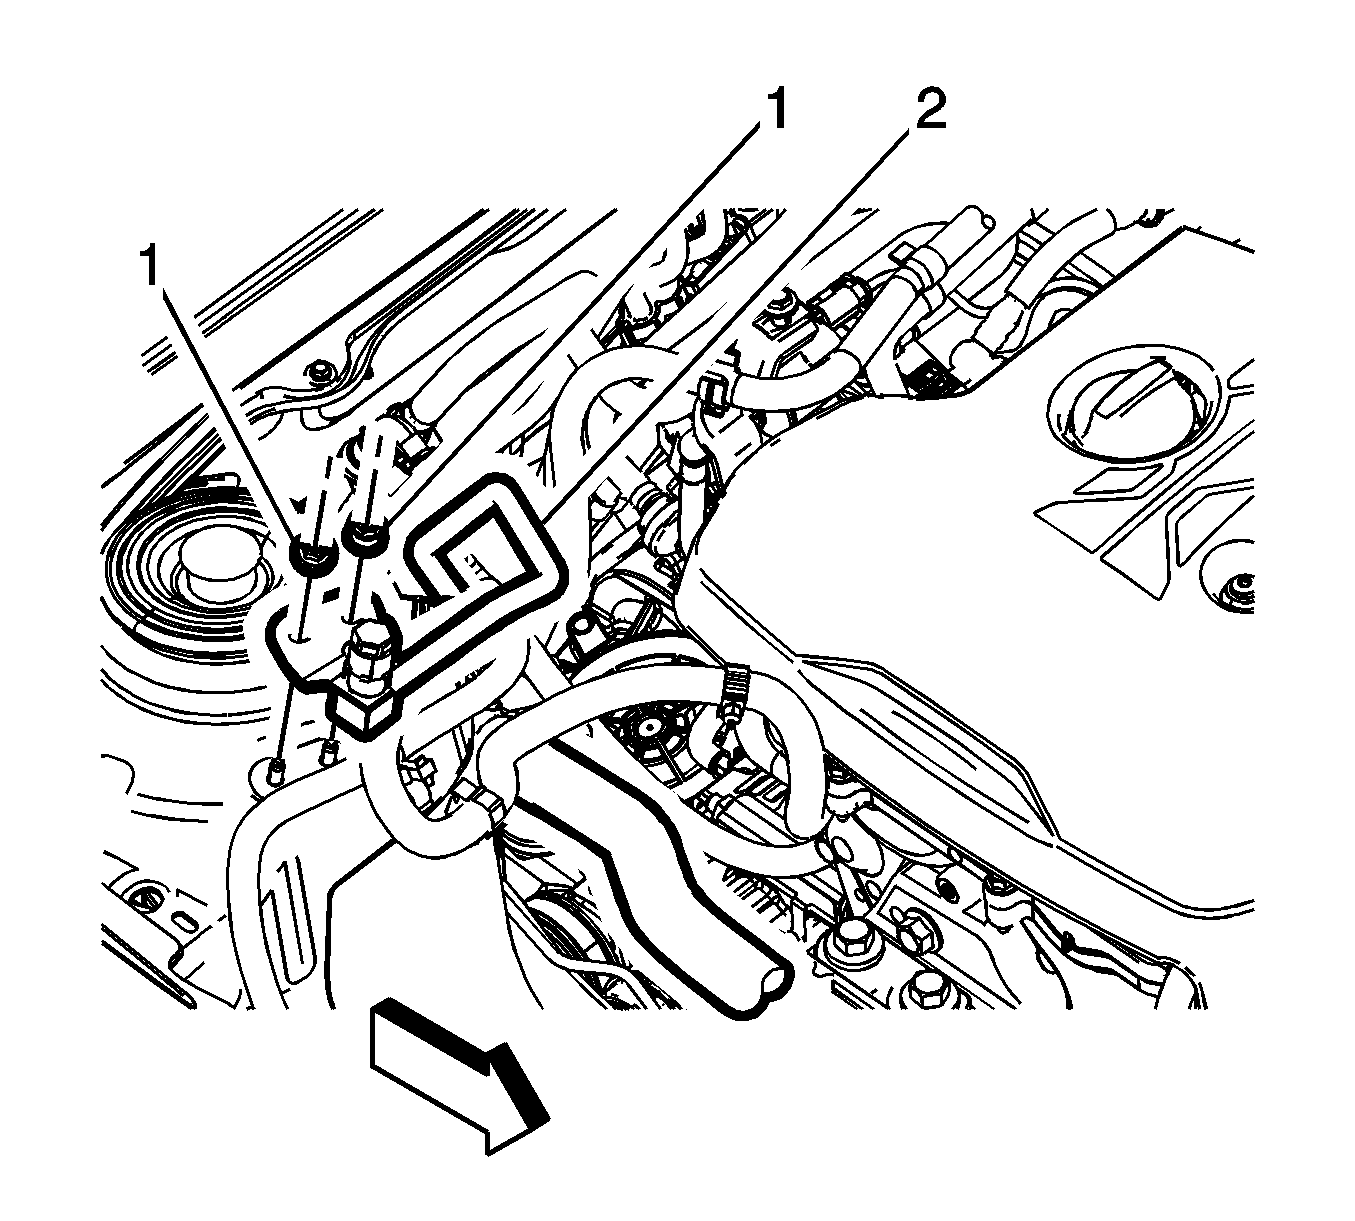 Courtesy of GENERAL MOTORS COMPANY
- Remove the air conditioning evaporator hose assembly retaining fasteners (1) from the front suspension strut housing.
- Remove the air conditioning evaporator hose assembly (2) from the front suspension strut housing.
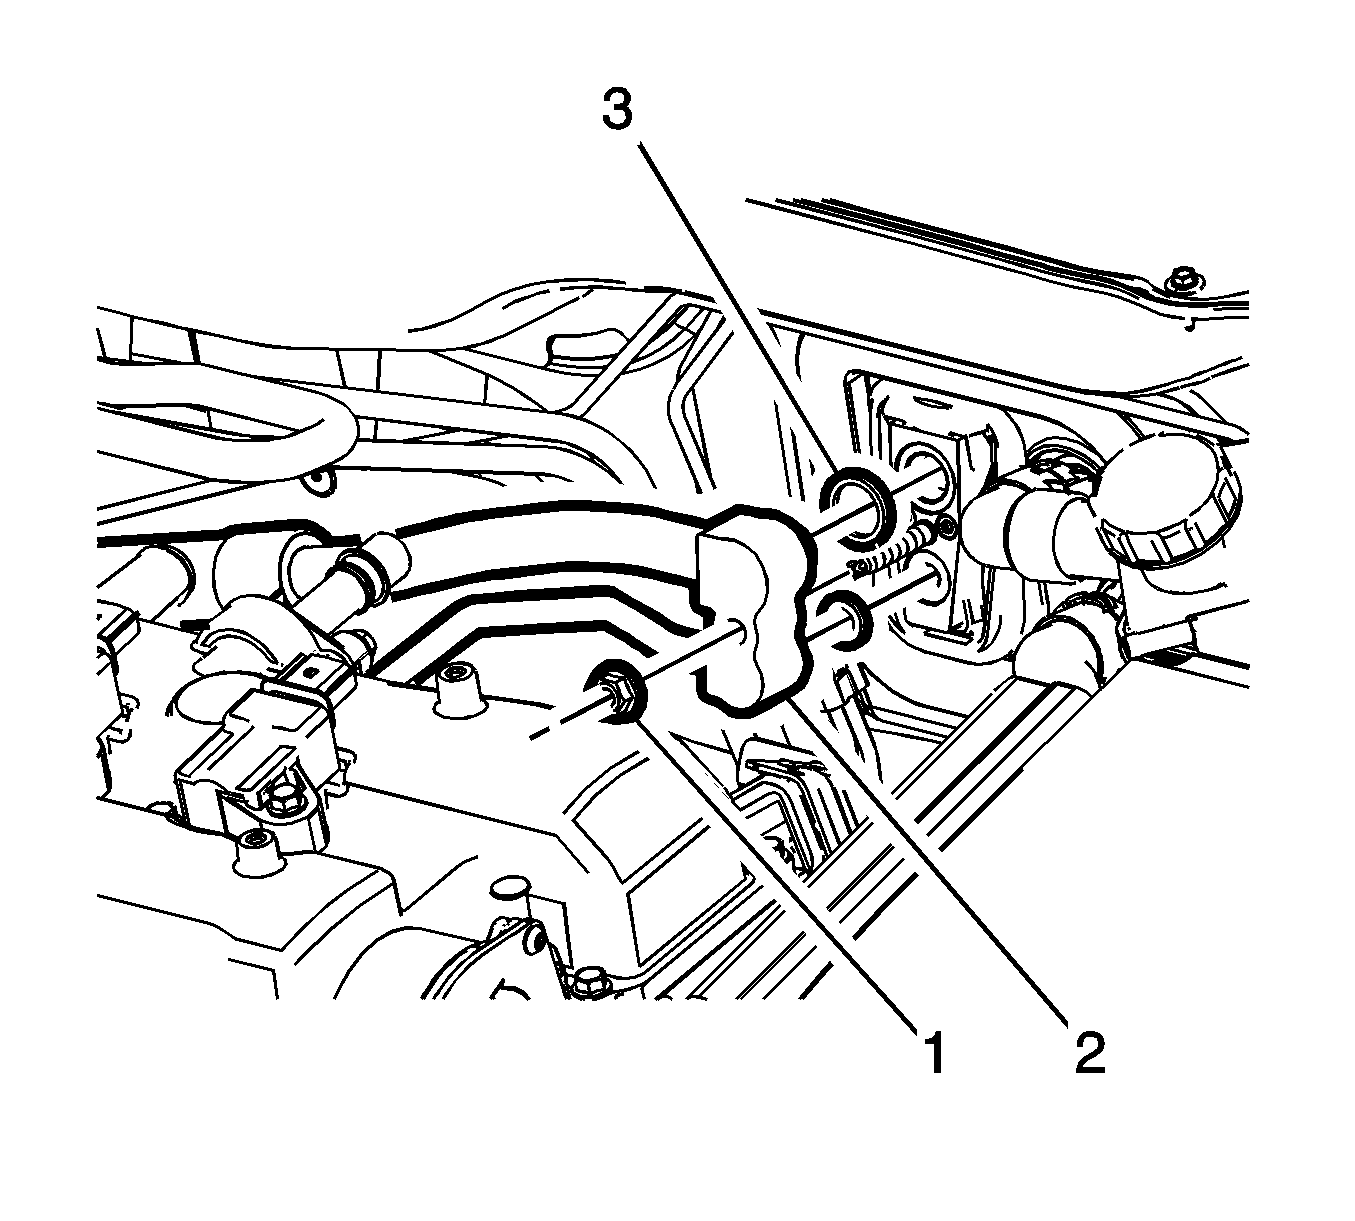 Courtesy of GENERAL MOTORS COMPANY
- Remove the air conditioning evaporator hose assembly nut (1) at thermal expansion valve.
- Remove the air conditioning evaporator hose assembly (2) from thermal expansion valve.
- Remove and discard the old sealing washers (3) and replace with NEW sealing washers.
- Remove the air conditioning evaporator hose from the retainers.
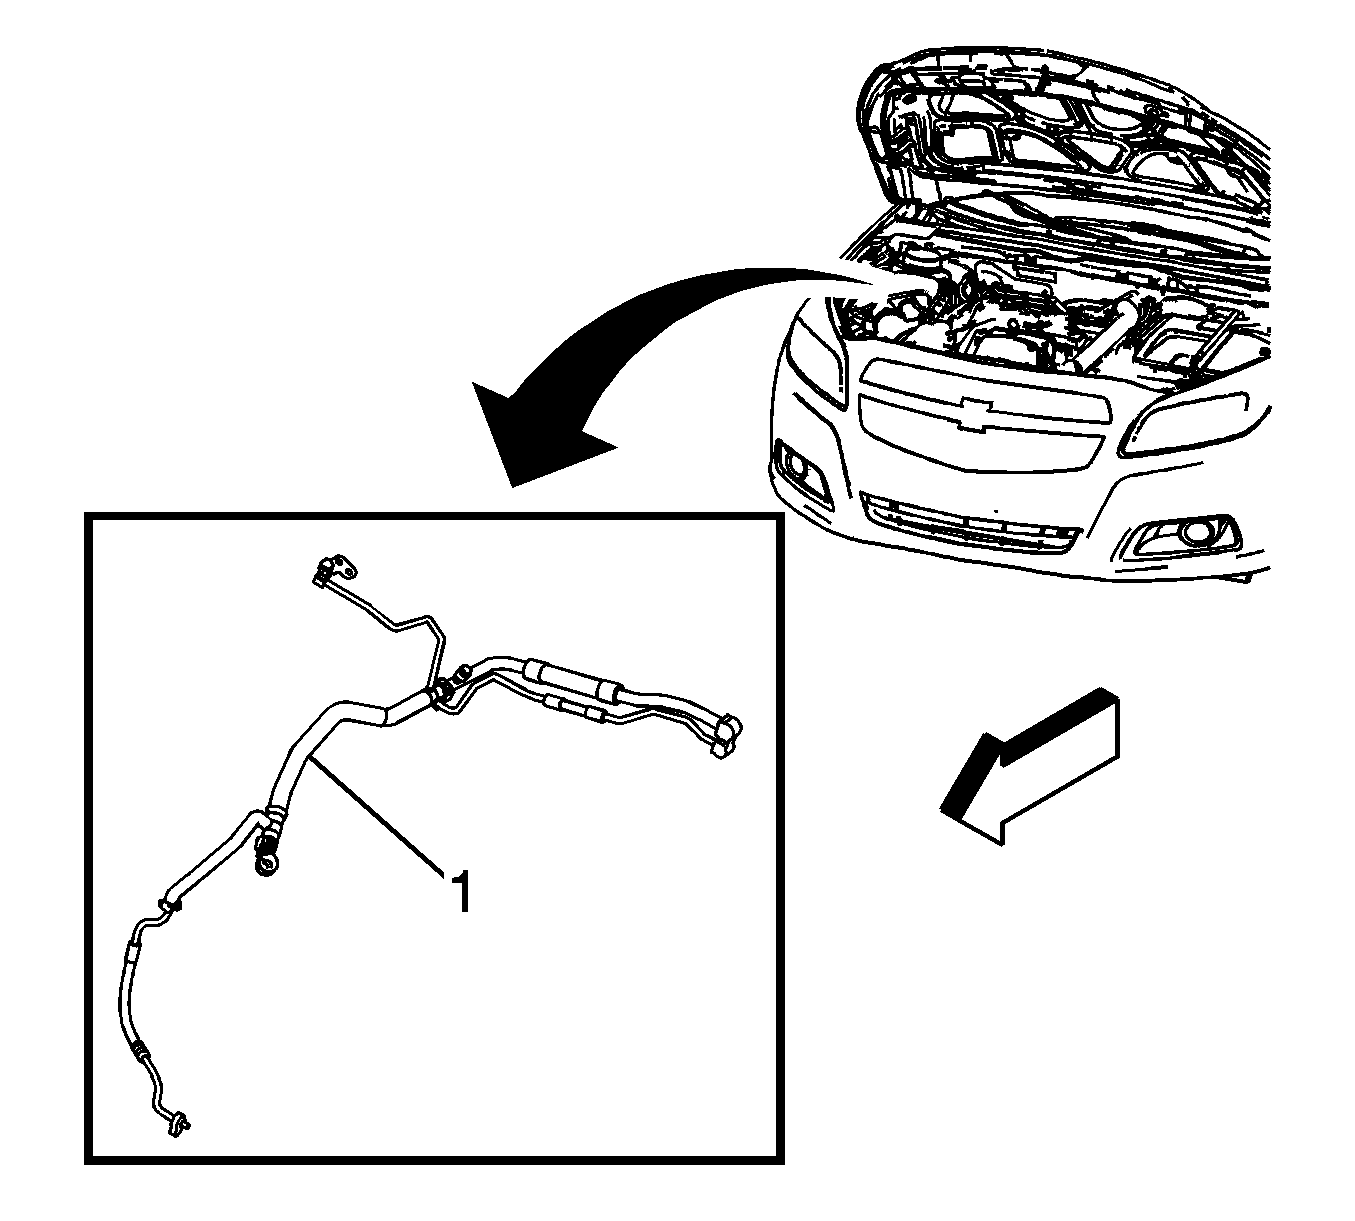 Courtesy of GENERAL MOTORS COMPANY
- Remove the air conditioning evaporator hose assembly (1) from vehicle.