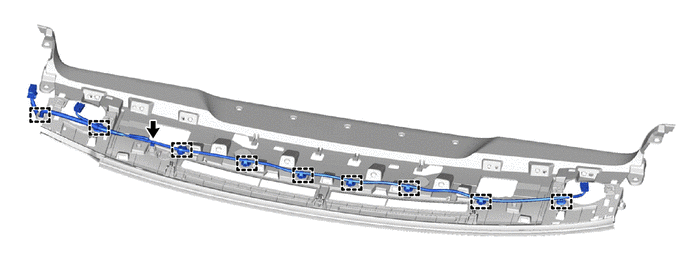
- REMOVE NO. 2 INSTRUMENT PANEL WIRE
- Disconnect the connector.
 Courtesy of © TOYOTA, LICENSE AGREEMENT TMS1002 Courtesy of © TOYOTA, LICENSE AGREEMENT TMS1002
|
- Disengage the clamps to remove the No. 2 instrument panel wire.
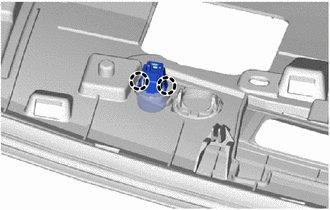
- REMOVE AUTOMATIC LIGHT CONTROL SENSOR
- Disengage the claws to remove the automatic light control sensor.
 Courtesy of © TOYOTA, LICENSE AGREEMENT TMS1002 Courtesy of © TOYOTA, LICENSE AGREEMENT TMS1002
|
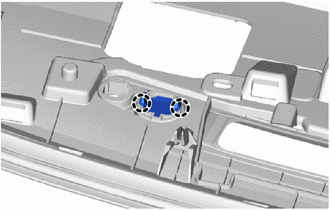
- REMOVE SPARE SWITCH HOLE COVER
- Disengage the claws to remove the spare switch hole cover.
 Courtesy of © TOYOTA, LICENSE AGREEMENT TMS1002 Courtesy of © TOYOTA, LICENSE AGREEMENT TMS1002
|
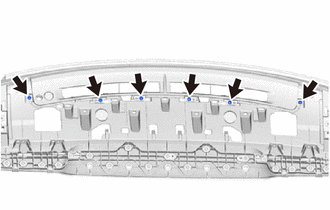
- REMOVE INSTRUMENT MAIN PANEL
- Remove the 6 screws <E>.
 Courtesy of © TOYOTA, LICENSE AGREEMENT TMS1002 Courtesy of © TOYOTA, LICENSE AGREEMENT TMS1002
|
- Disengage the guides to remove the instrument main panel.
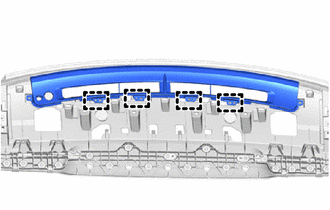 Courtesy of © TOYOTA, LICENSE AGREEMENT TMS1002 Courtesy of © TOYOTA, LICENSE AGREEMENT TMS1002
|
- REMOVE INSTRUMENT PANEL PASSENGER WITHOUT DOOR AIRBAG ASSEMBLY
Refer to PROCEDURE - Step 5
- REMOVE NO. 1 HEATER TO REGISTER DUCT
- Remove the 5 screws <H>.
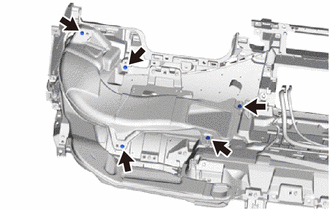 Courtesy of © TOYOTA, LICENSE AGREEMENT TMS1002 Courtesy of © TOYOTA, LICENSE AGREEMENT TMS1002
|
- Disengage the guides to remove the No. 1 heater to register duct.
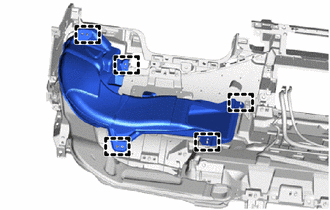 Courtesy of © TOYOTA, LICENSE AGREEMENT TMS1002 Courtesy of © TOYOTA, LICENSE AGREEMENT TMS1002
|
- REMOVE NO. 3 HEATER TO REGISTER DUCT
- Remove the 5 screws <H>.
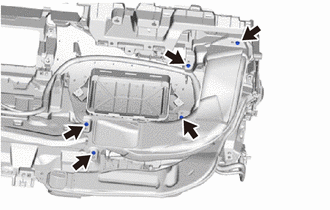 Courtesy of © TOYOTA, LICENSE AGREEMENT TMS1002 Courtesy of © TOYOTA, LICENSE AGREEMENT TMS1002
|
- Disengage the guides to remove the No. 3 heater to register duct.
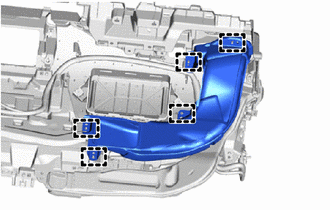 Courtesy of © TOYOTA, LICENSE AGREEMENT TMS1002 Courtesy of © TOYOTA, LICENSE AGREEMENT TMS1002
|
- REMOVE NO. 1 SIDE DEFROSTER NOZZLE DUCT
HINT:
Use the same procedures for the opposite side.
- Remove the 3 screws <H>.
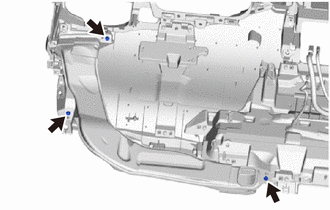 Courtesy of © TOYOTA, LICENSE AGREEMENT TMS1002 Courtesy of © TOYOTA, LICENSE AGREEMENT TMS1002
|
- Disengage the guides to remove the No. 1 side defroster nozzle duct.
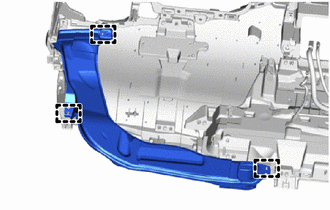 Courtesy of © TOYOTA, LICENSE AGREEMENT TMS1002 Courtesy of © TOYOTA, LICENSE AGREEMENT TMS1002
|
- REMOVE ANTENNA CORD SUB-ASSEMBLY (w/ Satellite Radio)
Refer to PROCEDURE - Step 4 [06/2015 - 01/2018]
, or refer to PROCEDURE - Step 4 [01/2018 - 11/2018]
- REMOVE ANTENNA CORD SUB-ASSEMBLY (w/o Satellite Radio)
Refer to PROCEDURE - Step 5 [06/2015 - 01/2018]
, or refer to PROCEDURE - Step 5 [01/2018 - 11/2018]
- REMOVE NO. 4 INSTRUMENT PANEL CUSHION
- Remove the No. 4 instrument panel cushion.
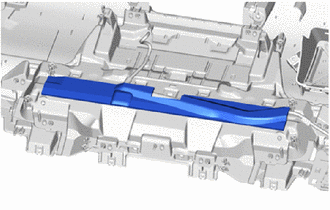 Courtesy of © TOYOTA, LICENSE AGREEMENT TMS1002 Courtesy of © TOYOTA, LICENSE AGREEMENT TMS1002
|
- REMOVE NAVIGATION ANTENNA ASSEMBLY
Refer to PROCEDURE - Step 4
- REMOVE NAVIGATION ANTENNA CORD
Refer to PROCEDURE - Step 5 [06/2015 - 01/2018]
, or refer to PROCEDURE - Step 5 [01/2018 - 11/2018]
- REMOVE NO. 3 SIDE DEFROSTER NOZZLE DUCT
HINT:
Use the same procedure as for the No. 4 side.
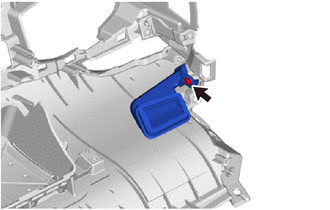
- REMOVE NO. 4 SIDE DEFROSTER NOZZLE DUCT
- Remove the screw <H> and No. 4 side defroster nozzle duct.
 Courtesy of © TOYOTA, LICENSE AGREEMENT TMS1002 Courtesy of © TOYOTA, LICENSE AGREEMENT TMS1002
|