RADIO RECEIVER (w/o Multi-display): Removal
- DISCONNECT CABLE FROM NEGATIVE BATTERY TERMINAL
- REMOVE NO. 1 SPEAKER OPENING COVER ASSEMBLY
(See INSPECTION
)
- REMOVE NO. 3 INSTRUMENT PANEL REGISTER ASSEMBLY
(See
REMOVAL
)
- REMOVE NO. 4 INSTRUMENT PANEL REGISTER ASSEMBLY
(See
REMOVAL
)
- REMOVE RADIO RECEIVER ASSEMBLY WITH BRACKET
- Remove the 2 screws and 2 bolts.
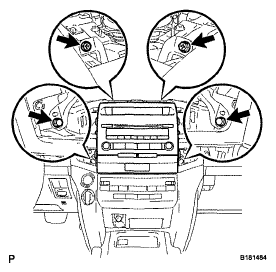 Courtesy of © TOYOTA, LICENSE AGREEMENT TMS1002
- Pull the radio receiver to detach the 10 claws on the backside of the radio receiver.
- Disconnect the connectors and remove the radio receiver.
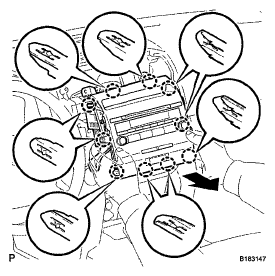 Courtesy of © TOYOTA, LICENSE AGREEMENT TMS1002
- REMOVE NO. 1 RADIO BRACKET
- Remove the 3 bolts and bracket.
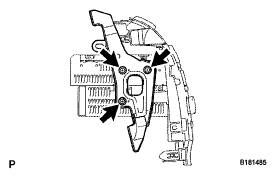 Courtesy of © TOYOTA, LICENSE AGREEMENT TMS1002
- REMOVE NO. 2 RADIO BRACKET
- Remove the 3 bolts and bracket.
- REMOVE CLOCK ASSEMBLY
(See
REMOVAL
)
- REMOVE HAZARD WARNING SIGNAL SWITCH ASSEMBLY
(See
REMOVAL
)