PCV Hose Assembly No. 1
- Disconnect the ground cable from battery.
- Remove the radiator. Ref. to COOLING(H4DOTC)>Radiator>REMOVAL
.
- Remove the condenser. Ref. to HVAC SYSTEM (HEATER, VENTILATOR AND A/C)>Condenser>REMOVAL
.
- Unlock the blow-by diagnosis connector, and disconnect the PCV hose assembly No. 2 from the PCV hose assembly No. 1.
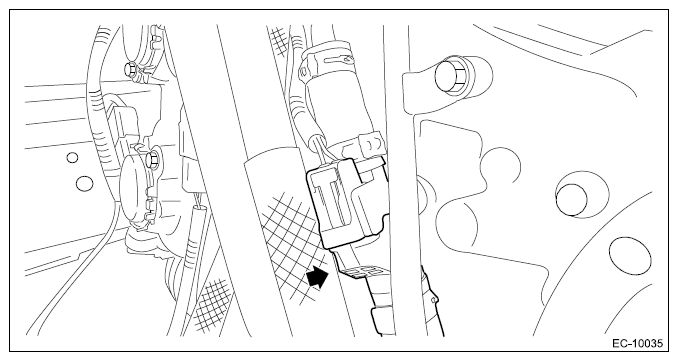 Courtesy of SUBARU OF AMERICA, INC.
- Remove the blow-by diagnosis connector harness from the PCV hose assembly No. 1.
- Break the clamp, and remove the PCV hose assembly No. 1 from the chain cover.
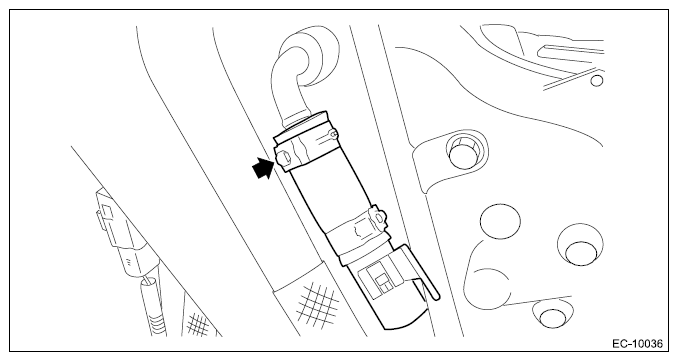 Courtesy of SUBARU OF AMERICA, INC.
- Break the clamp, and remove the hose connector from the PCV hose No. 1.
- Install the hose connector to the PCV hose No. 1, and install the clamp using the Clamp pincer (14100134).
NOTE:
Use a new clamp.
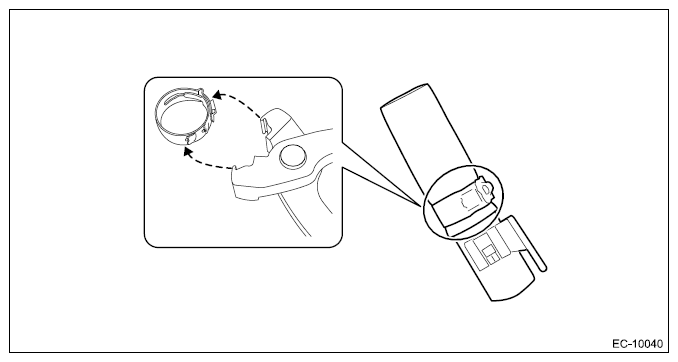 Courtesy of SUBARU OF AMERICA, INC.
- Install the PCV hose assembly No. 1 to the chain cover, and install the clamp using the Clamp pincer (14100134).
NOTE:
Use a new clamp.
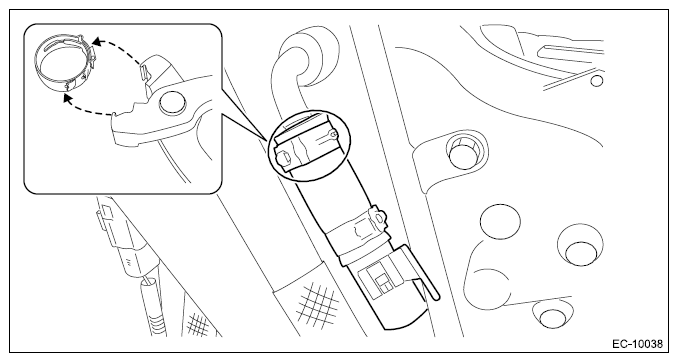 Courtesy of SUBARU OF AMERICA, INC.
- Install the blow-by diagnosis connector harness to the PCV hose assembly No. 1, and connect the PCV hose assembly No. 2 to the PCV hose assembly No. 1.
NOTE:
- There are multiple blow-by diagnosis connectors. Be careful not to connect incorrectly.
- Make sure that the blow-by diagnosis connector is connected securely.
Courtesy of SUBARU OF AMERICA, INC.
- Install the condenser. Ref. to HVAC SYSTEM (HEATER, VENTILATOR AND A/C)>Condenser>INSTALLATION
.
- Install the radiator. Ref. to COOLING(H4DOTC)>Radiator>INSTALLATION
.
- Connect the battery ground terminal.
- Charge the A/C system with refrigerant. Ref. to HVAC SYSTEM (HEATER, VENTILATOR AND A/C)>Refrigerant Charging Procedure>PROCEDURE
.
- Fill engine coolant. Ref. to COOLING(H4DOTC)>Engine Coolant>REPLACEMENT>FILLING OF ENGINE COOLANT
.