Rear Spoiler Removal
- Disconnect the negative battery terminal. (See NEGATIVE BATTERY TERMINAL DISCONNECTION/CONNECTION
.)
- Remove the liftgate upper trim. (See LIFTGATE UPPER TRIM REMOVAL/INSTALLATION
.)
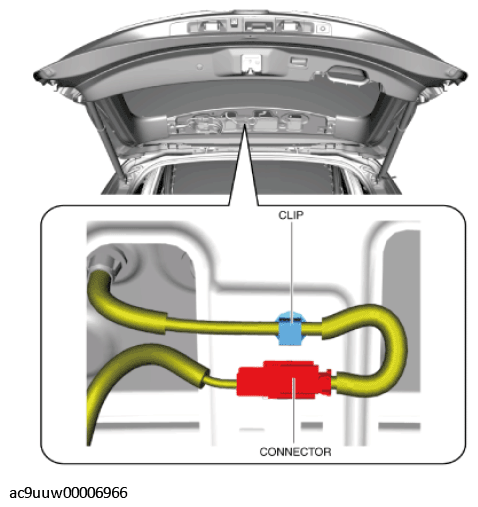
- Disconnect the connector.
 Courtesy of MAZDA MOTORS CORP.
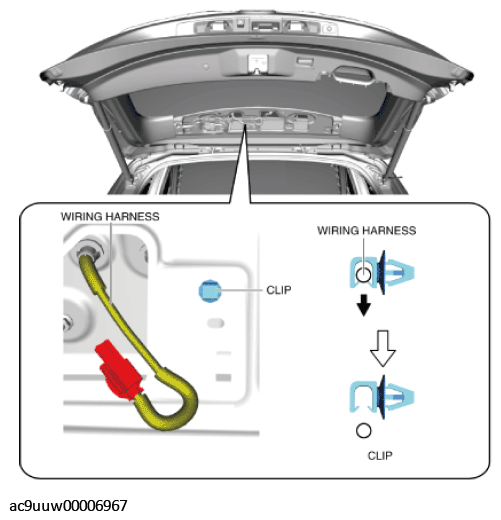
- Remove the wiring harness from the clip.
 Courtesy of MAZDA MOTORS CORP.
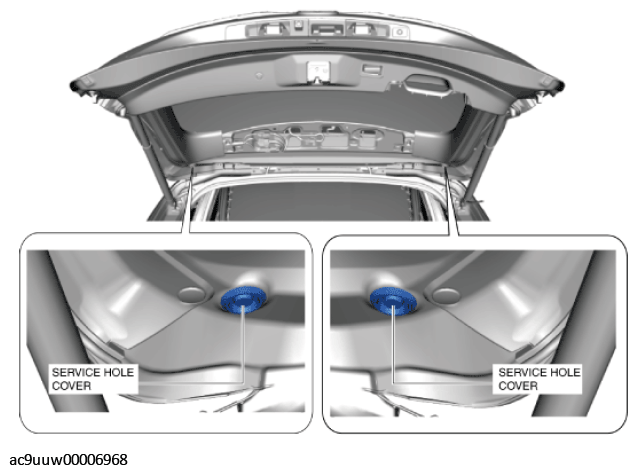
- Remove the service hole covers.
 Courtesy of MAZDA MOTORS CORP.
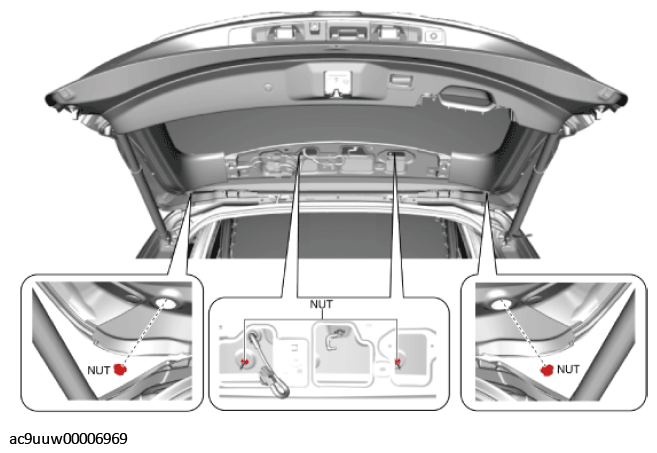
- Remove the nuts.
 Courtesy of MAZDA MOTORS CORP.
- Attach a piece of wire between the liftgate striker and liftgate latch to hold the liftgate in the half-opened position as shown below.
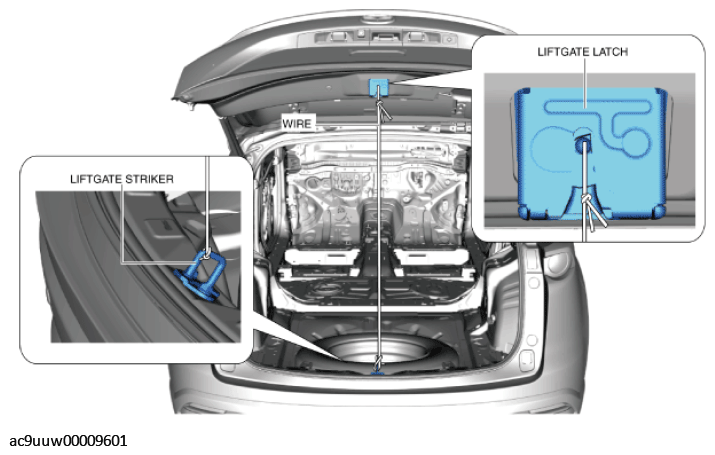 Courtesy of MAZDA MOTORS CORP.
WARNING:
- Always wear gloves when using a utility knife. Using a utility knife with bare hands can cause injury.
- Peeling off the double-sided adhesive tape shown in the figure using a utility knife.
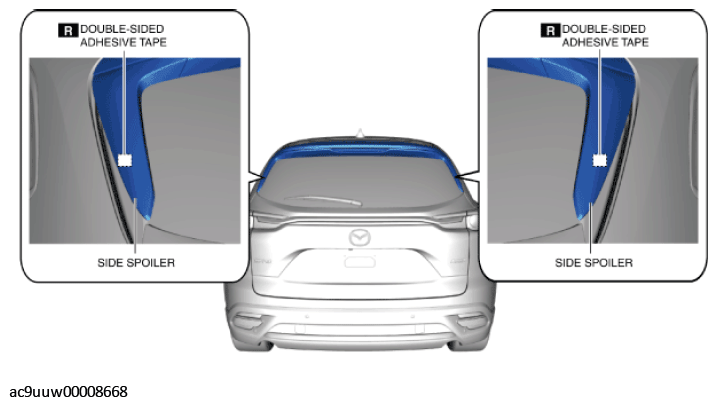 Courtesy of MAZDA MOTORS CORP.
- Insert a flathead screwdriver into the position shown in the figure, move it in the directions of the arrow and detach the side spoiler clips.
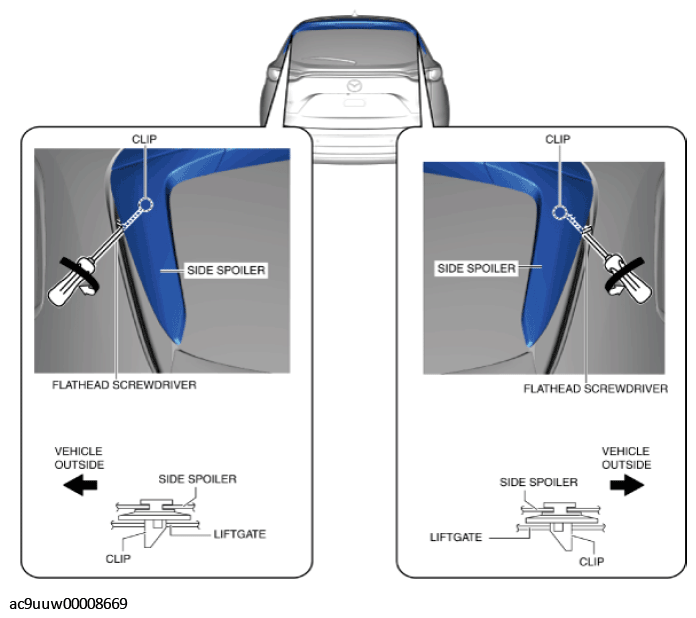 Courtesy of MAZDA MOTORS CORP.
- Insert a remover tool into the position shown in the figure, move it in the directions of the arrow and detach the side spoiler clips.
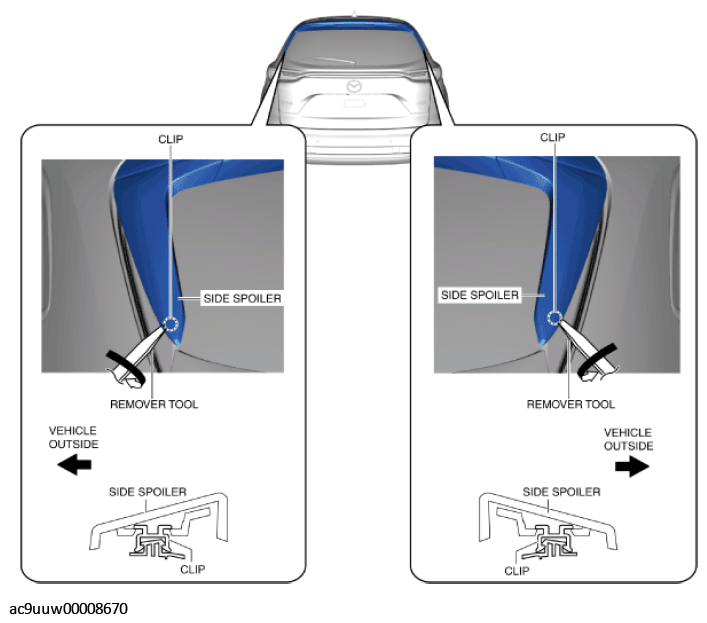 Courtesy of MAZDA MOTORS CORP.
- Insert a flathead screwdriver into the position shown in the figure, move it in the directions of the arrow and detach the side spoiler clips.
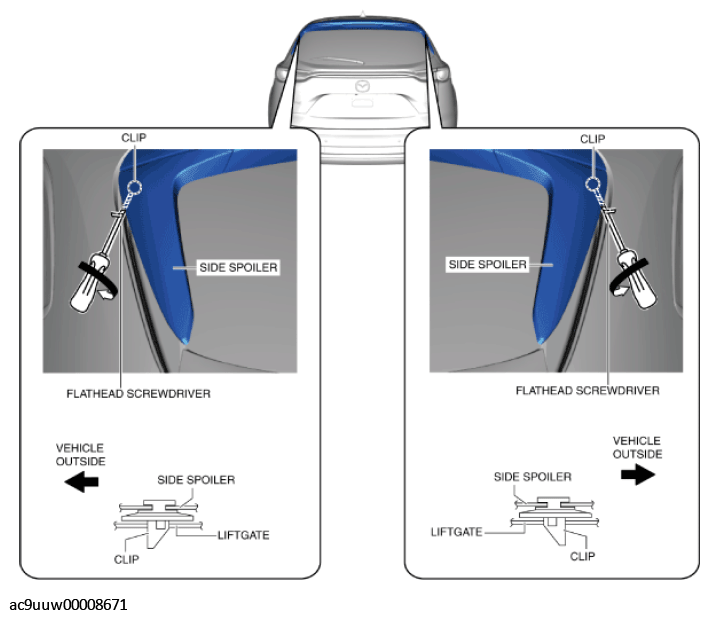 Courtesy of MAZDA MOTORS CORP.
- Affix rag using tape to the position shown in the figure.
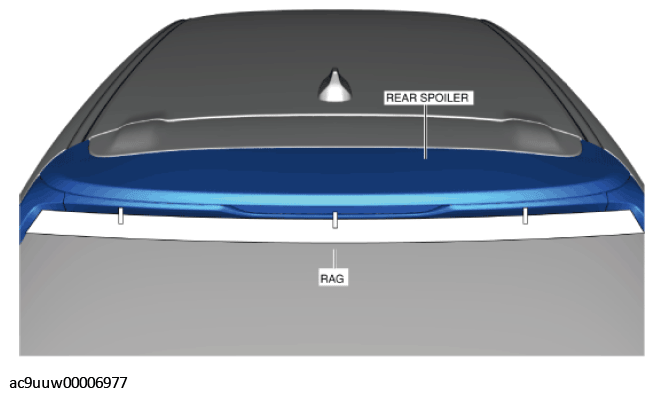 Courtesy of MAZDA MOTORS CORP.
- Insert a remover tool into the position shown in the figure, move it in the directions of the arrow and detach the rear spoiler clips.
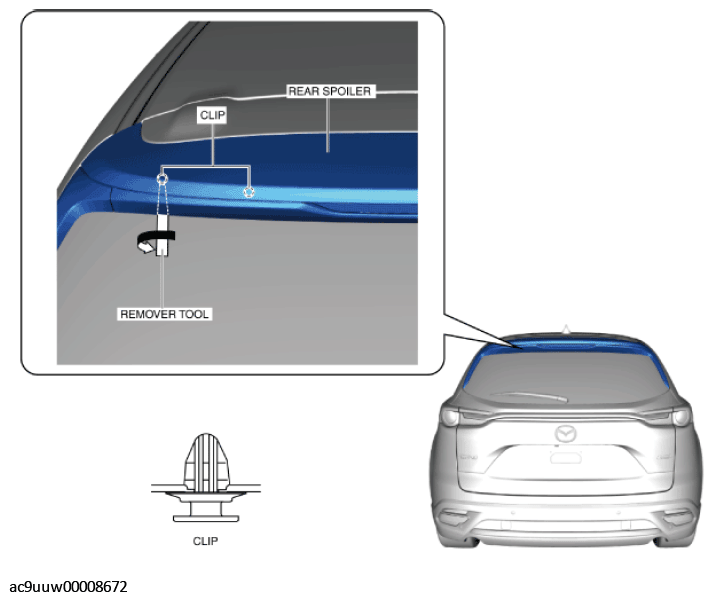 Courtesy of MAZDA MOTORS CORP.
- Insert a remover tool into the position shown in the figure, move it in the directions of the arrow and detach the rear spoiler clips.
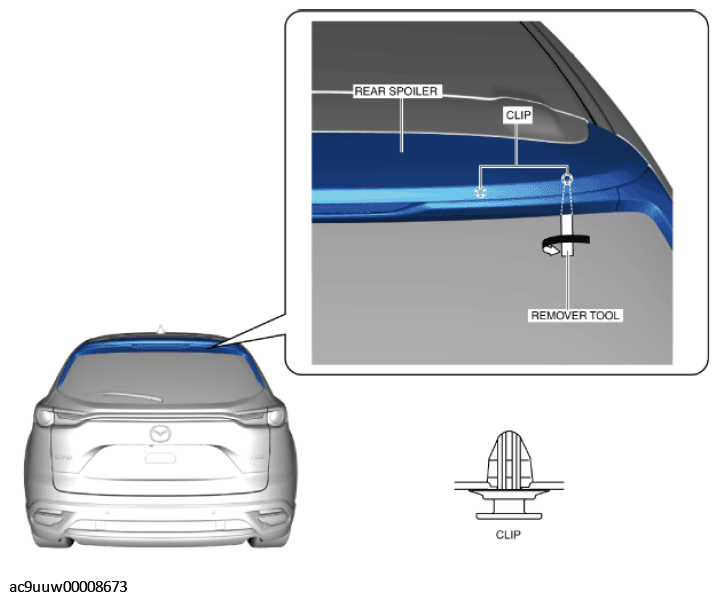 Courtesy of MAZDA MOTORS CORP.
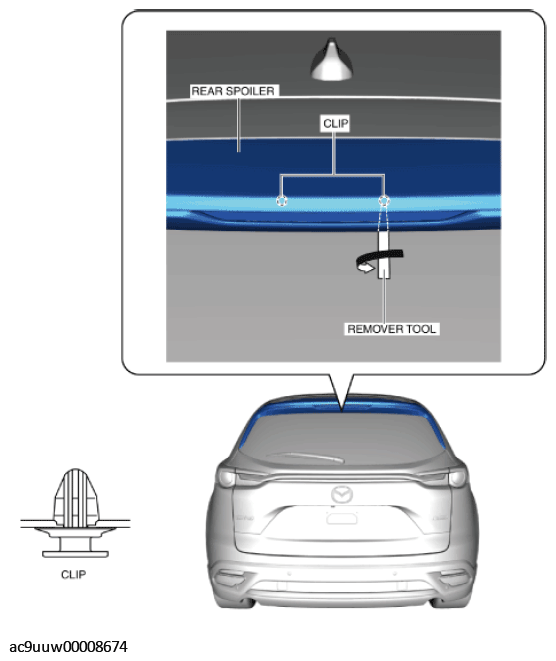
- Insert a remover tool into the position shown in the figure, move it in the directions of the arrow and detach the rear spoiler clips.
 Courtesy of MAZDA MOTORS CORP.
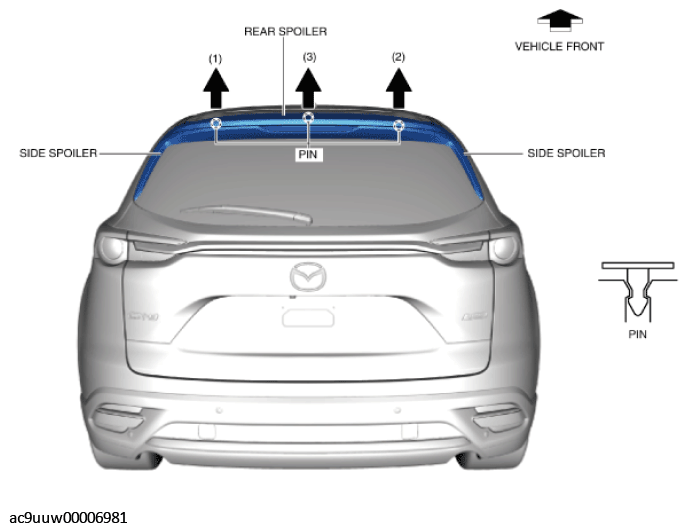
- Pull the rear spoiler in the order of the arrows shown in the figure and detach the rear spoiler pins from the liftgate.
 Courtesy of MAZDA MOTORS CORP.
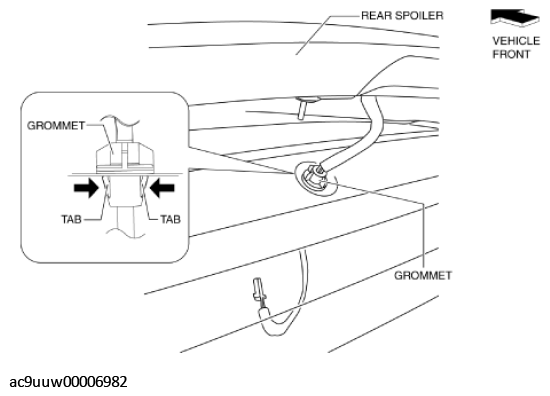
- While holding the rear spoiler by hand, press the tabs of the grommet from the underside of the liftgate shown in the figure, and disengage the grommet tabs from the liftgate.
 Courtesy of MAZDA MOTORS CORP.
- Remove the rear spoiler and the side spoiler as a single unit.
- Remove the side spoilers. (See SIDE SPOILER REMOVAL .)
- Remove the high-mount brake light. (See HIGH-MOUNT BRAKE LIGHT REMOVAL/INSTALLATION
.)