Liftgate Upper Trim Removal/Installation
- Take the shaded area shown in the figure, detach tab while pulling the liftgate upper trim in the direction of the arrow (1) shown in the figure, then detach clip A, clips B, tab, and pin while pulling in the direction of the arrow (2).
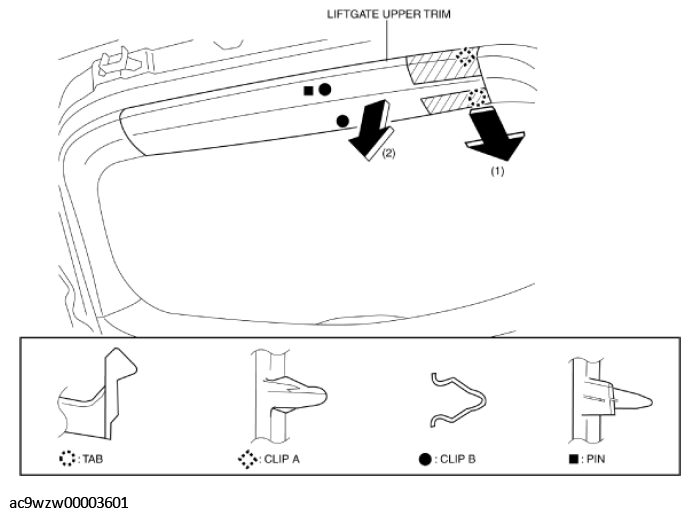 Courtesy of MAZDA MOTORS CORP.
- Take the shaded area shown in the figure, detach tab while pulling the liftgate upper trim in the direction of the arrow (1) shown in the figure, then detach the clip A, clip B, and tab while pulling in the direction of the arrow (2).
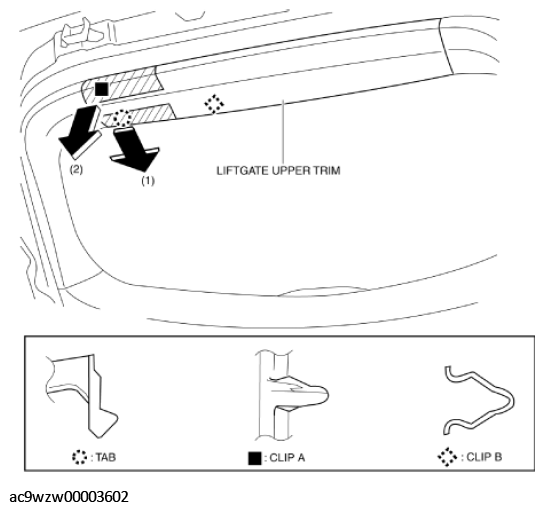 Courtesy of MAZDA MOTORS CORP.
- Install in the reverse order of removal.