Rear Spoiler Installation
- When a rear spoiler is to be reused, perform the following procedure:
- Replace the clips and bolts shown in the figure with new ones.
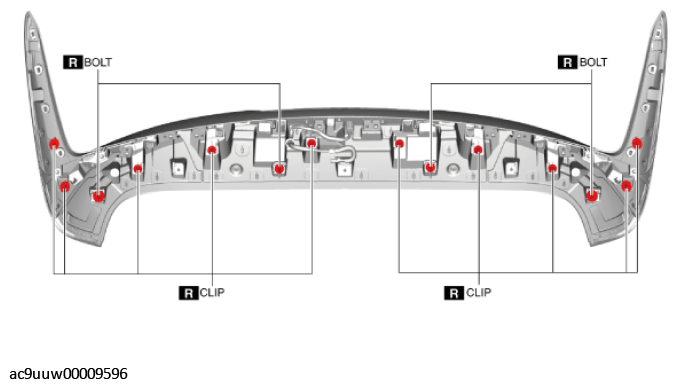 Courtesy of MAZDA MOTORS CORP.
- If the protector is damaged, replace the part that is damaged with a new protector.
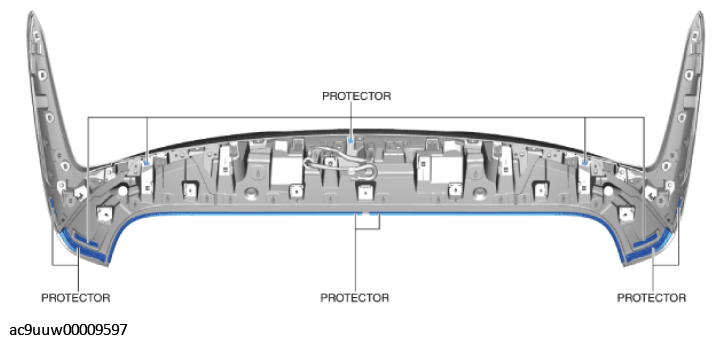 Courtesy of MAZDA MOTORS CORP.
- If a liftgate spoiler clip has been damaged, perform the following procedure:
- Using a scraper, peel off the spoiler clip from the liftgate.
NOTE:
- If double-sided adhesive tape remains on the liftgate, warm the tape using a drier and then remove it using a resin spatula.
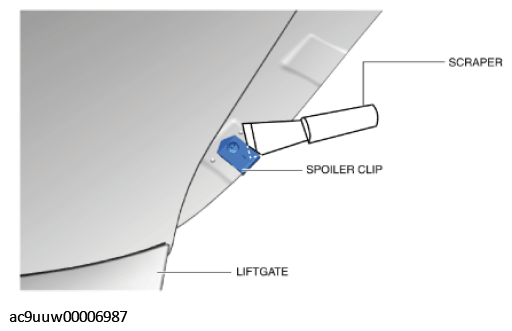 Courtesy of MAZDA MOTORS CORP.
- Remove any grease and dirt from the spoiler clip affixing area on the liftgate.
- Peel off the backing of the double-sided adhesive tape.
- While holding the spoiler clip flange against the hem of the liftgate, affix it between the alignment marks shown in the figure.
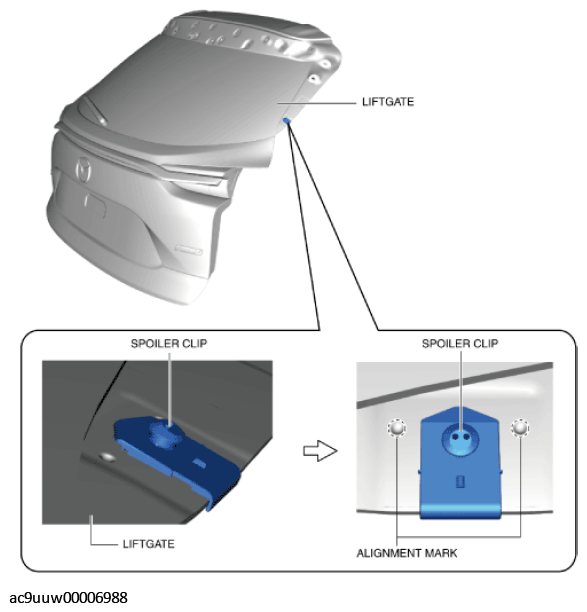 Courtesy of MAZDA MOTORS CORP.
- Press the contact point using fingers and apply pressure to the spoiler clip to affix it to the liftgate.
- Apply adhesive to the area shown in the figure.
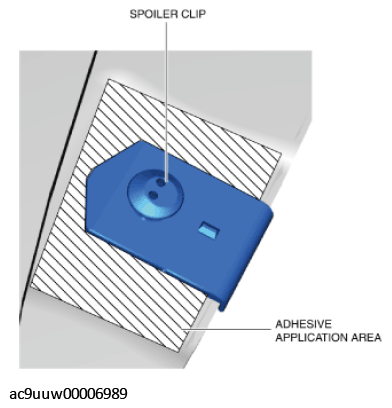 Courtesy of MAZDA MOTORS CORP.
- Use pando 156A-type adhesive agent or equivalent.
- Follow the instructions for the product being used to determine the adhesive drying time.
- Install the high-mount brake light. (See HIGH-MOUNT BRAKE LIGHT REMOVAL/INSTALLATION
.)
- Install the side spoiler. (See SIDE SPOILER INSTALLATION .)
- Peel off the backing of the double-sided adhesive tape.
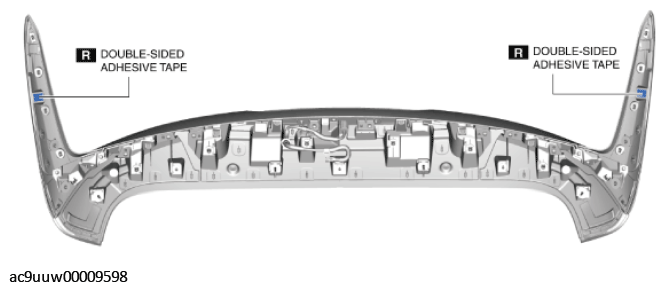 Courtesy of MAZDA MOTORS CORP.
- Install the grommet of the high-mount brake light wiring harness.
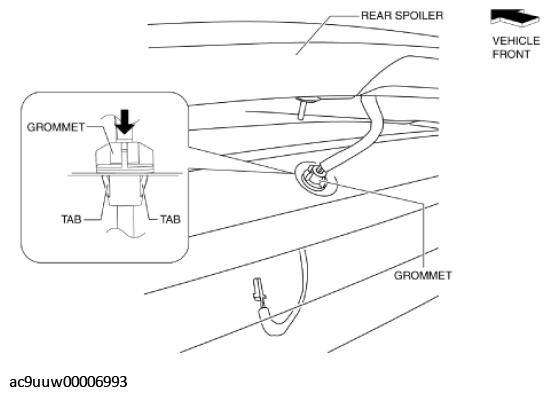 Courtesy of MAZDA MOTORS CORP.
- Press in the rear spoiler in the direction of the arrows shown in the figure and install the pins to the liftgate.
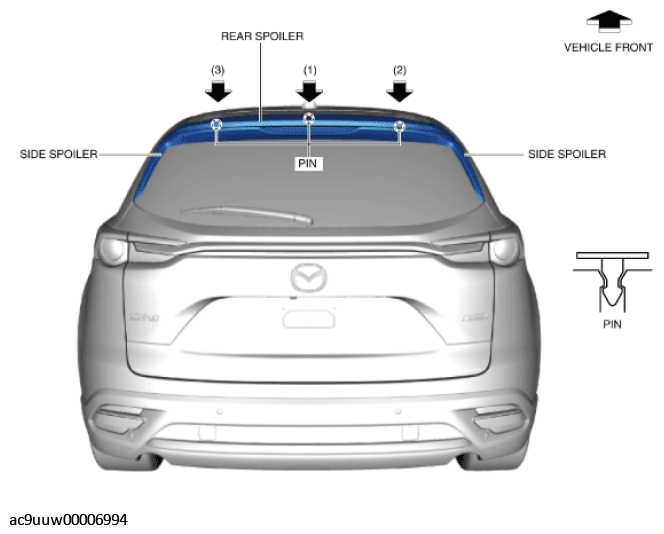 Courtesy of MAZDA MOTORS CORP.
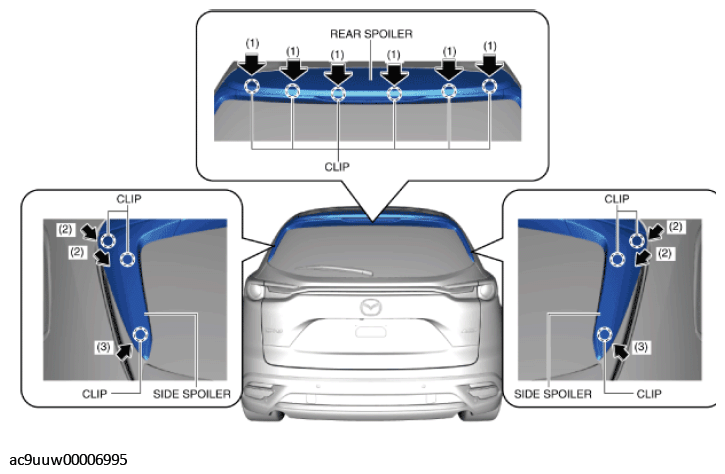
- Press in the rear spoiler in the direction of the arrows shown in the figure and install the clips to the liftgate.
 Courtesy of MAZDA MOTORS CORP.
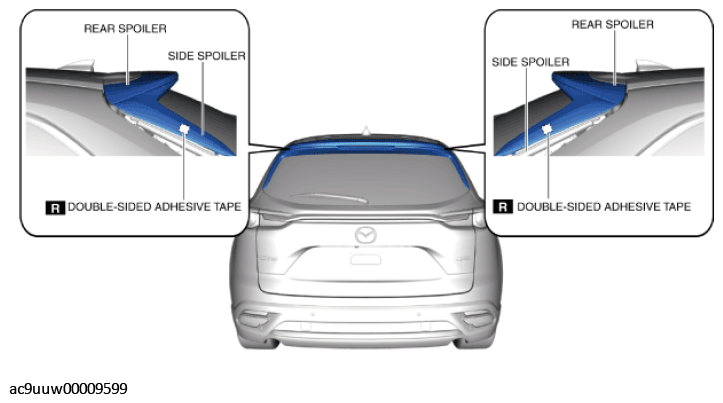
- Press the side spoiler to adhere the double-sided adhesive tape.
 Courtesy of MAZDA MOTORS CORP.
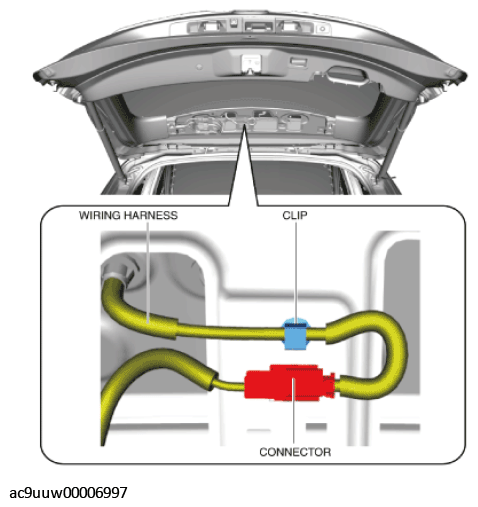
- Install the wiring harness to the clip.
 Courtesy of MAZDA MOTORS CORP.
- Connect the connector.
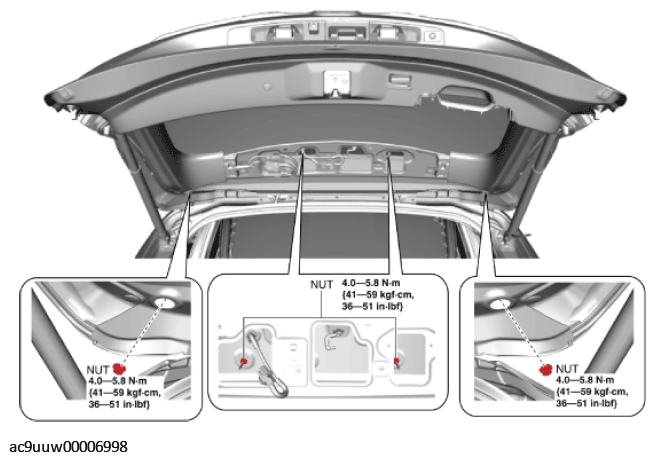
- Install the nuts.
 Courtesy of MAZDA MOTORS CORP.
- Install the service hole covers.
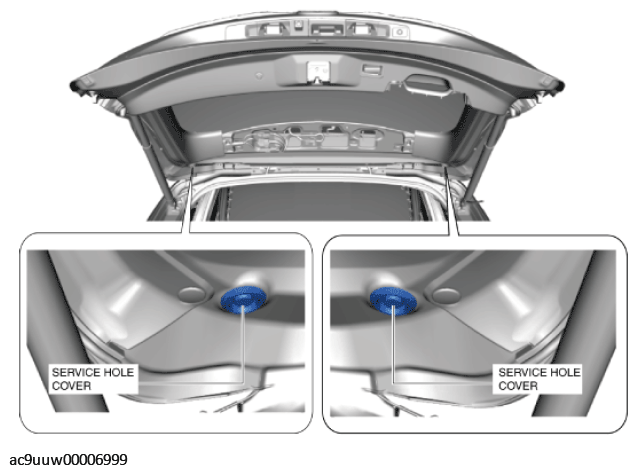 Courtesy of MAZDA MOTORS CORP.
- Install the liftgate upper trim. (See LIFTGATE UPPER TRIM REMOVAL/INSTALLATION
.)
- Connect the negative battery terminal. (See NEGATIVE BATTERY TERMINAL DISCONNECTION/CONNECTION
.)