Trunk Side Trim Removal/Installation
- Disconnect the negative battery terminal. (See NEGATIVE BATTERY TERMINAL DISCONNECTION/CONNECTION
.)
- Remove the following parts:
- Trunk board (See TRUNK BOARD REMOVAL/INSTALLATION .)
- Bass-box (With Bose ®) (See BASS-BOX REMOVAL/INSTALLATION
.)
- Sub-trunk (See SUB-TRUNK REMOVAL/INSTALLATION .)
- Trunk end trim (See TRUNK END TRIM REMOVAL/INSTALLATION .)
- Rear scuff plate (See REAR SCUFF PLATE REMOVAL/INSTALLATION .)
- Insert a tape-wrapped flathead screwdriver into the position shown in the figure, move it in the direction of arrow (1), and while detaching the hooks of the remote handle lever, open the cover in the direction of arrow (2). (With remote handle lever)
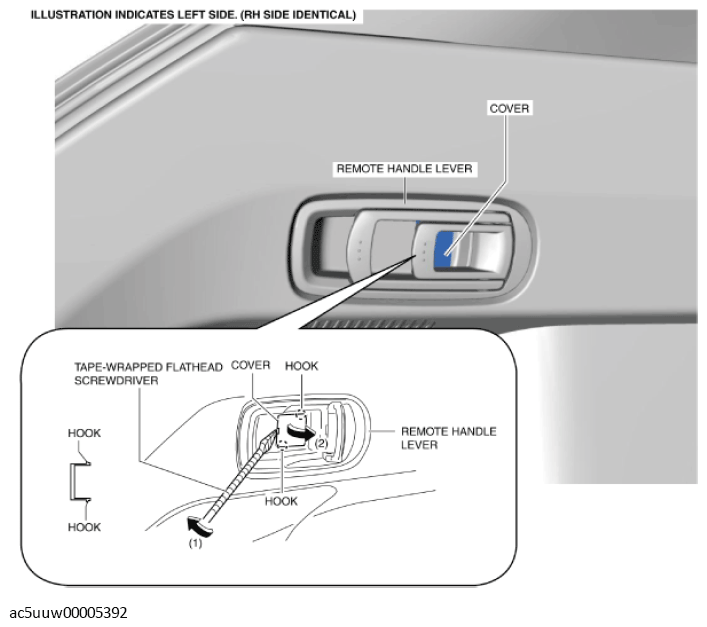 Courtesy of MAZDA MOTORS CORP.
- Remove the screw. (With remote handle lever)
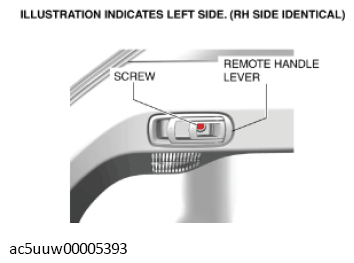 Courtesy of MAZDA MOTORS CORP.
- Remove the screw.
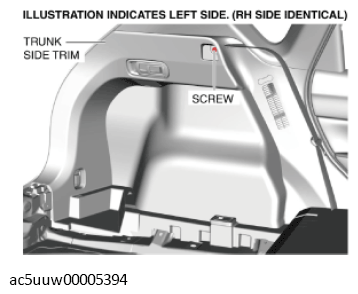 Courtesy of MAZDA MOTORS CORP.
- Remove the fastener.
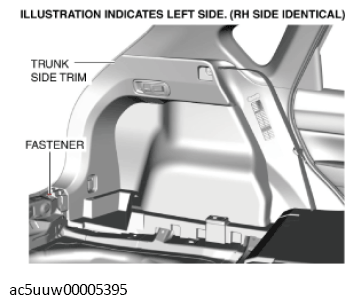 Courtesy of MAZDA MOTORS CORP.
- Remove the bolts.
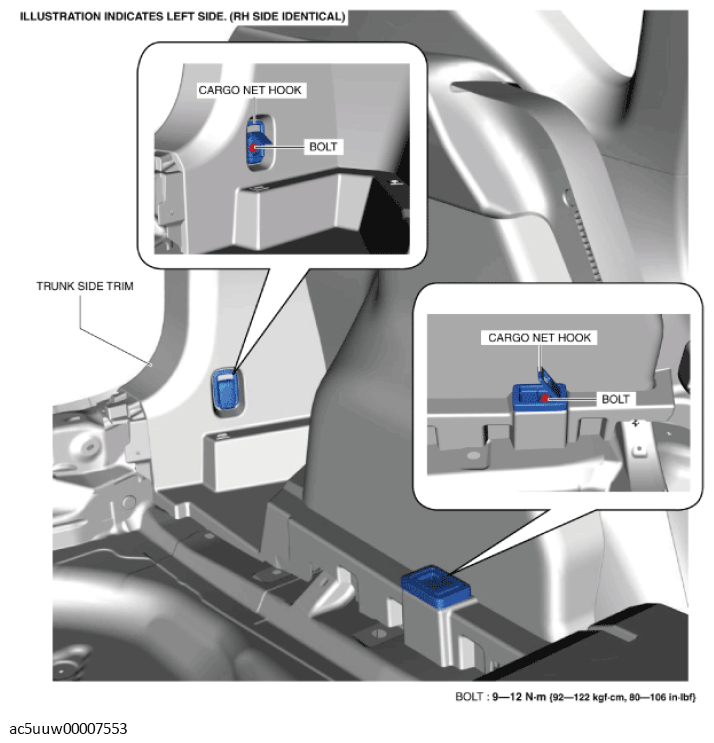 Courtesy of MAZDA MOTORS CORP.
- Remove the cargo net hooks.
- Partially peel back the weatherstrips.
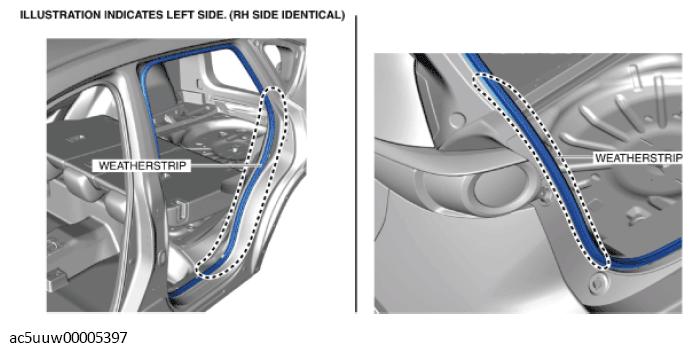 Courtesy of MAZDA MOTORS CORP.
- Remove the rear seat cushion.
- Fold the rear seat back.
- Insert a tape-wrapped flathead screwdriver into the position shown in the figure, move it in the direction of the arrows, and remove the clips.
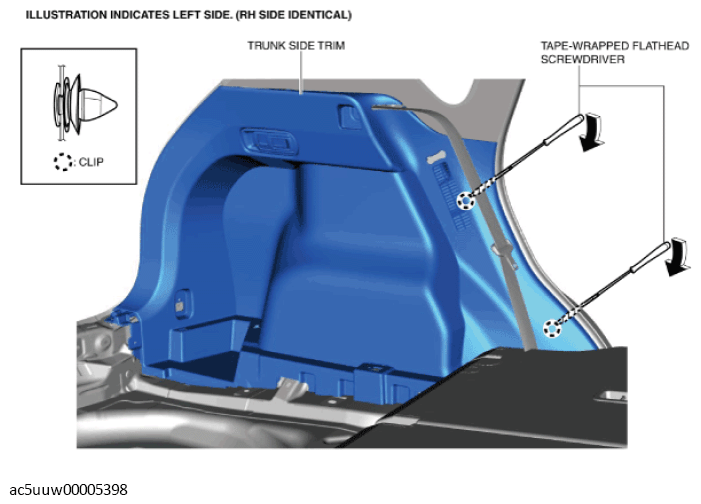 Courtesy of MAZDA MOTORS CORP.
- Move the trunk side trim in the order of arrows (1) and (2) shown in the figure, and detach the hook from the body panel.
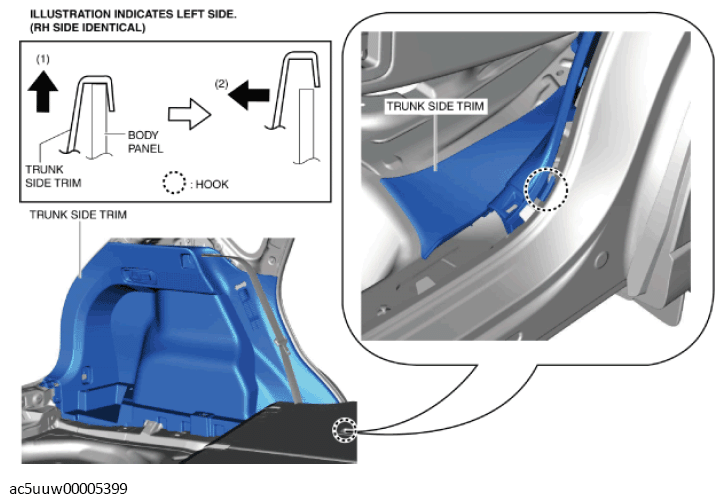 Courtesy of MAZDA MOTORS CORP.
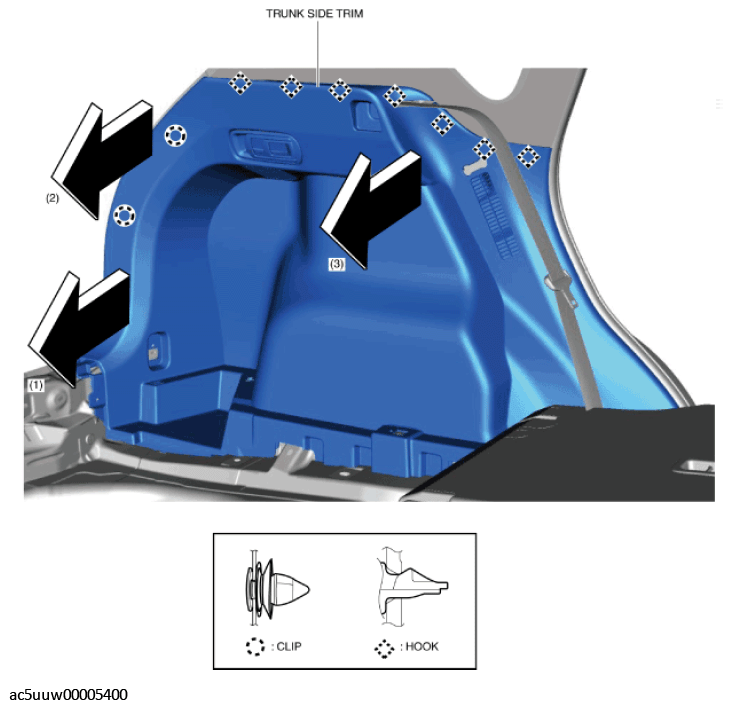
- Move the trunk side trim in the order of arrows (1), (2), and (3) shown in the figure, and remove the clips and hooks. (Left side) (With remote handle lever)
 Courtesy of MAZDA MOTORS CORP.
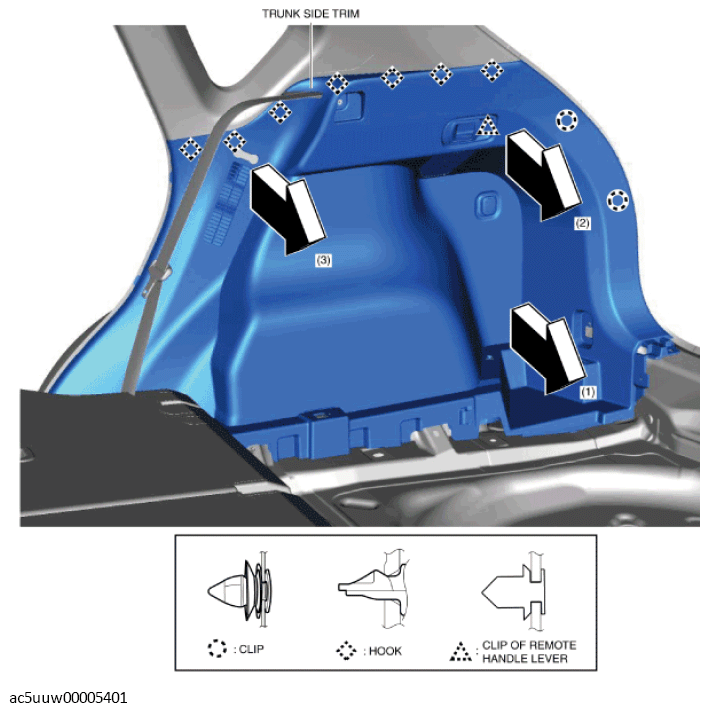
- Move the trunk side trim in the order of arrows (1), (2), and (3) shown in the figure, and remove the clips and hooks. (Left side and Right side) (Without remote handle lever)
- Move the trunk side trim in the order of arrows (1), (2), and (3) shown in the figure, and remove the clips, hooks, and the clip of the remote handle lever. (Right side) (With remote handle lever)
 Courtesy of MAZDA MOTORS CORP.
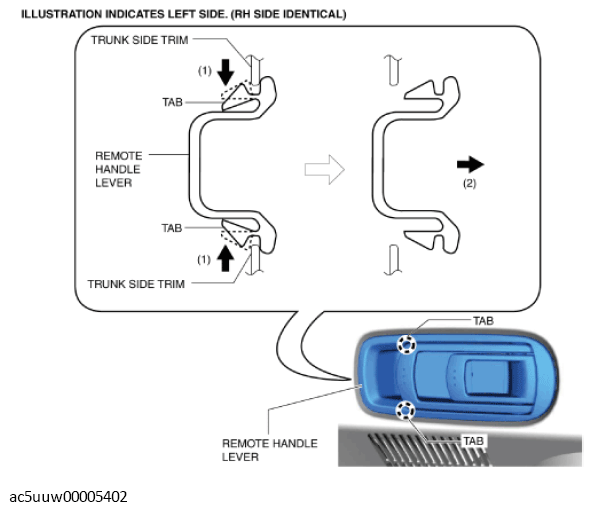
- Insert a hand into the back side of the trunk side trim, press the tabs of the remote handle lever in the direction of arrows (1) shown in the figure, and remove the remote handle lever in the direction of arrow (2). (With remote handle lever)
 Courtesy of MAZDA MOTORS CORP.
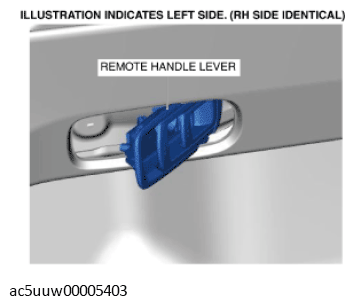
- Set the remote handle lever aside. (With remote handle lever)
 Courtesy of MAZDA MOTORS CORP.
- Move the position of the rear seat back in the direction of arrows (1) and (2) shown in the figure, while adjusting it at a position where the trunk side trim can be removed, move the trunk side trim in the direction of arrow (3) shown in the figure, and remove it in the direction of arrow (4).
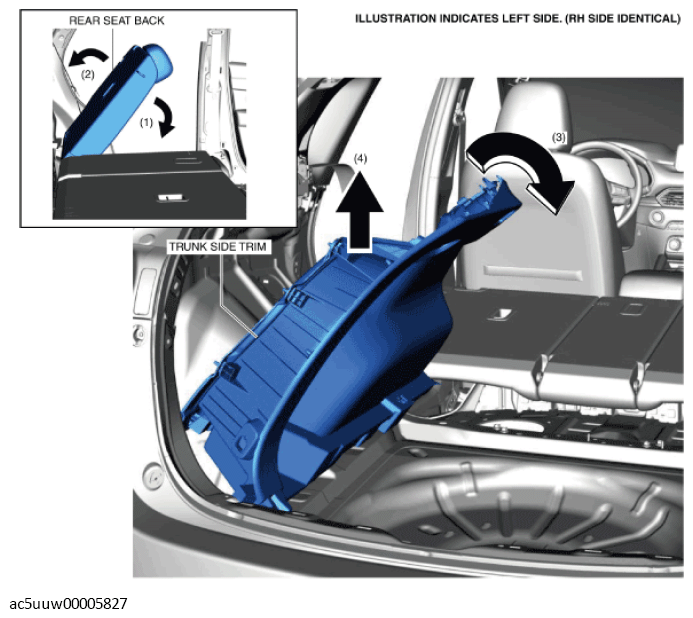 Courtesy of MAZDA MOTORS CORP.
- Disconnect the rear accessory socket connector. (Right side only)
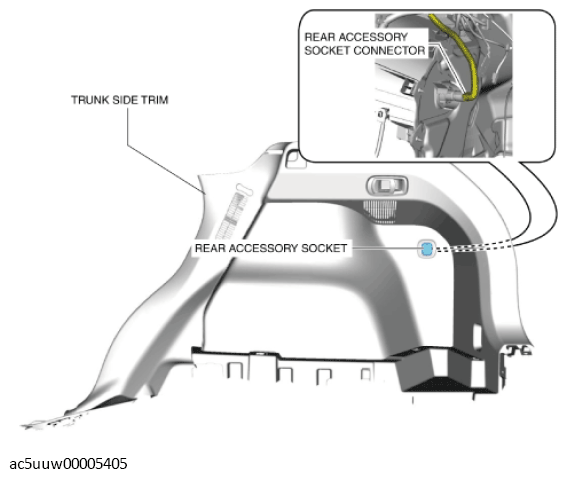 Courtesy of MAZDA MOTORS CORP.
- Install in the reverse order of removal.