Rear Scuff Plate Removal/Installation
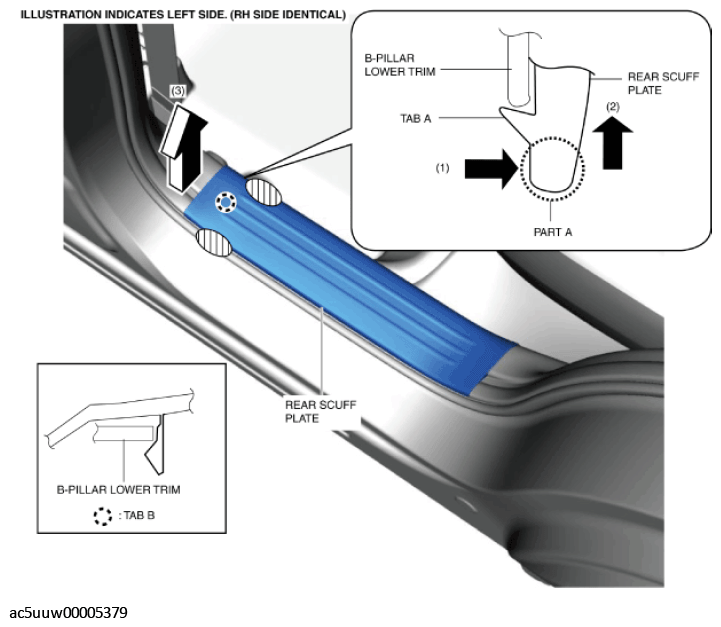
- Hold part A shown in the figure, open the rear scuff plate in the direction of arrow (1), move it in the direction of arrow (2), and detach tab A of the rear scuff plate from the B-pillar lower trim.
 Courtesy of MAZDA MOTORS CORP.
- Hold the shaded areas shown in the figure, move the rear scuff plate in the direction of arrow (3), and detach tab B of the rear scuff plate from the B-pillar lower trim.
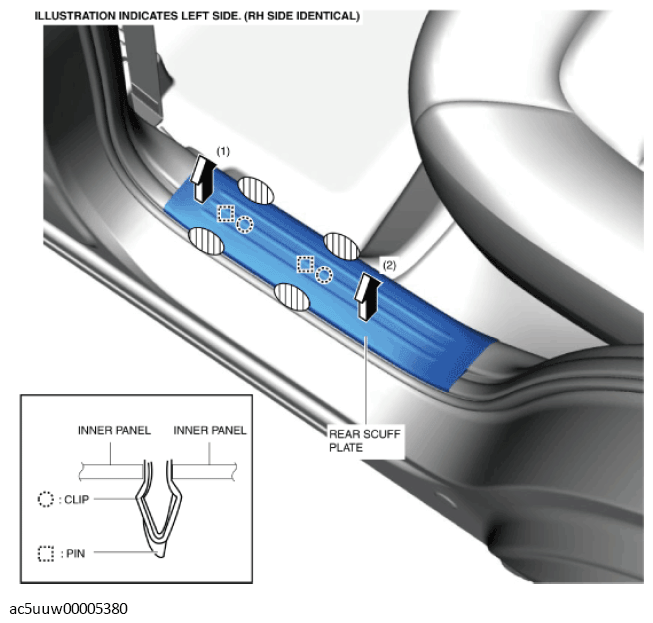
- Hold the shaded areas shown in the figure, move the rear scuff plate in the direction of arrow (1), detach the clip from the inner panel, and pull out the pin.
 Courtesy of MAZDA MOTORS CORP.
- Hold the shaded areas shown in the figure, move the rear scuff plate in the direction of arrow (2), detach the clip from the inner panel, and pull out the pin.
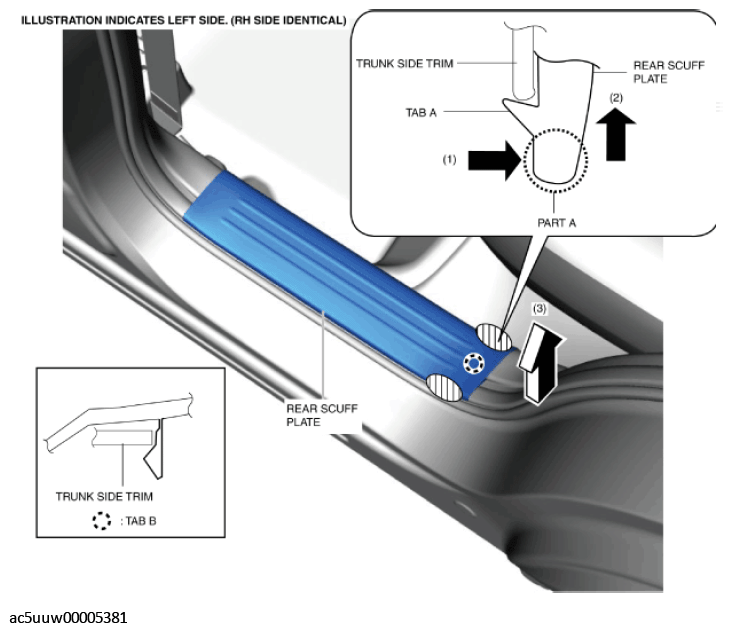
- Hold part A shown in the figure, open the rear scuff plate in the direction of arrow (1), move it in the direction of arrow (2), and detach tab A of the rear scuff plate from the trunk side trim.
 Courtesy of MAZDA MOTORS CORP.
- Hold the shaded areas shown in the figure, move the rear scuff plate in the direction of arrow (3), and remove it while detaching tab B of the rear scuff plate from the trunk side trim.
- Install in the reverse order of removal.