Liftgate Lower Trim Removal/Installation
- Disconnect the negative battery terminal. (See NEGATIVE BATTERY TERMINAL DISCONNECTION/CONNECTION
.)
- Remove the following parts:
- Liftgate upper trim (See LIFTGATE UPPER TRIM REMOVAL/INSTALLATION .)
- Liftgate side trim (See LIFTGATE SIDE TRIM REMOVAL/INSTALLATION .)
- Liftgate recess (See LIFTGATE RECESS REMOVAL/INSTALLATION .)
- Power liftgate (PLG) rear switch (With power liftgate system) (See POWER LIFTGATE (PLG) REAR SWITCH REMOVAL/INSTALLATION
.)
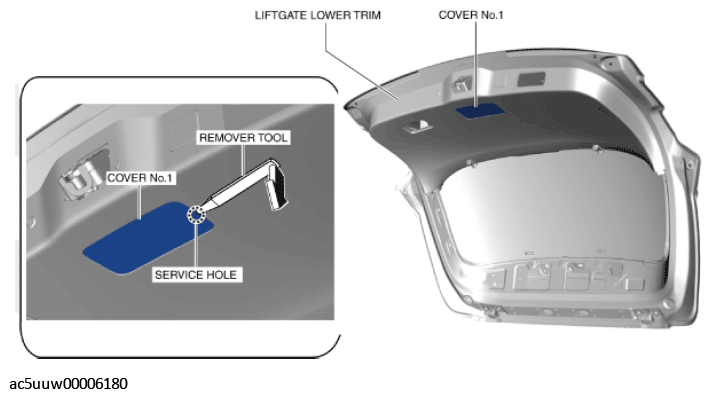
- Insert a remover tool into the service hole, move it in the direction of the arrow shown in the figure and remove cover No. 1. (Without power liftgate system)
 Courtesy of MAZDA MOTORS CORP.
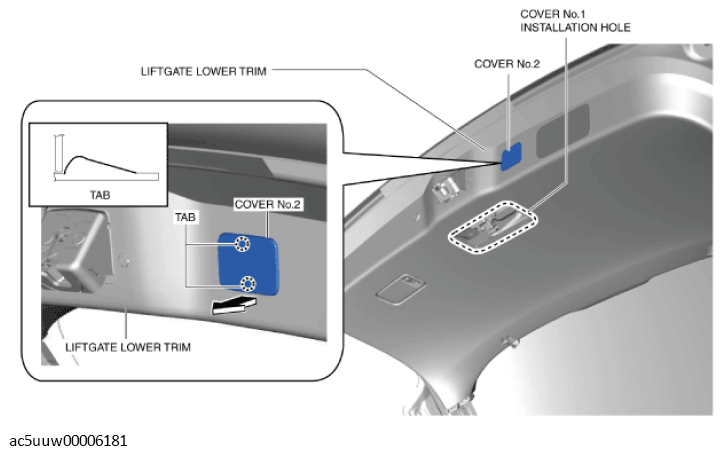
- Insert your hand into the cover No. 1 installation hole and remove cover No. 2 in the direction of the arrow shown in the figure while detaching the tabs with the inserted hand. (Without power liftgate system)
 Courtesy of MAZDA MOTORS CORP.
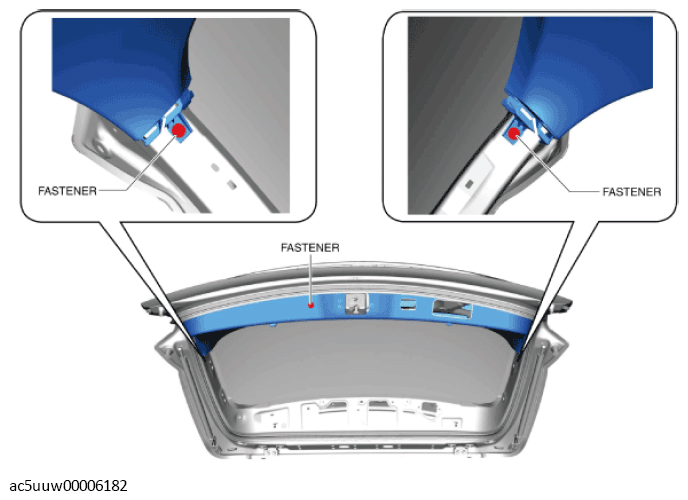
- Remove the fasteners.
 Courtesy of MAZDA MOTORS CORP.
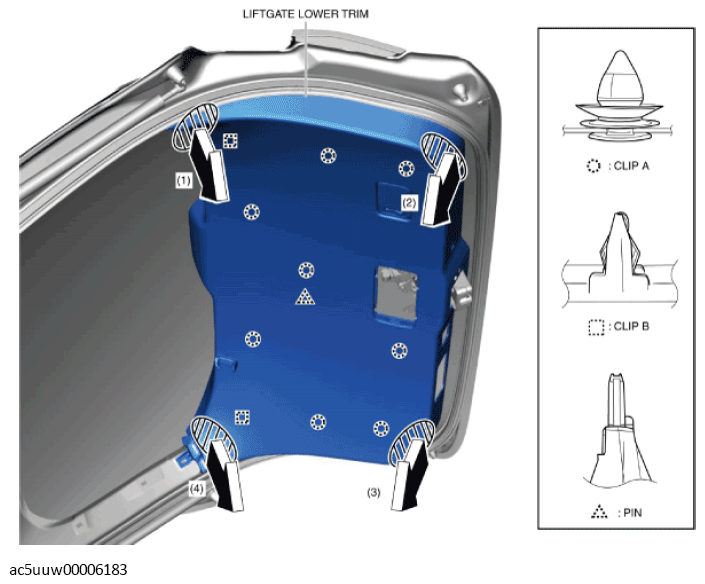
- Hold each shaded area and pull the liftgate lower trim in the order of arrows (1), (2), (3), and (4), and remove it while detaching clips A, clips B, and the pin.
 Courtesy of MAZDA MOTORS CORP.
- Disconnect the cargo compartment light connector.
- Install in the reverse order of removal.