Power Liftgate (PLG) Rear Switch Removal/Installation
- Disconnect the negative battery terminal. (See NEGATIVE BATTERY TERMINAL DISCONNECTION/CONNECTION
.)
- Insert a remover tool into the service hole, move it in the direction of the arrow shown in the figure, and remove cover No. 1.
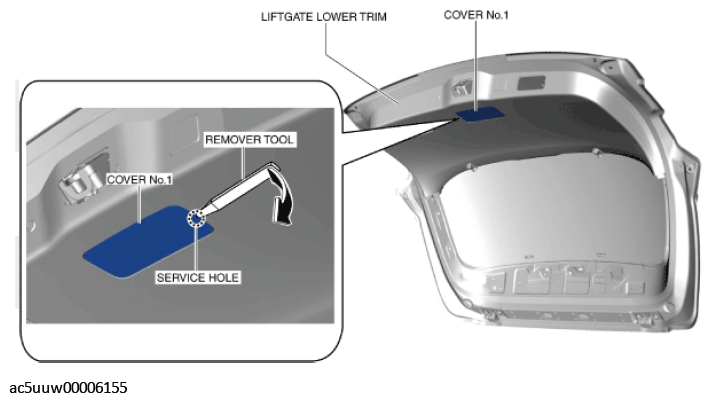 Courtesy of MAZDA MOTORS CORP.
- Insert your hand from the cover No. 1 installation hole, and remove the power liftgate (PLG) rear switch in the direction of the arrow shown in the figure while detaching the tabs from the liftgate lower trim.
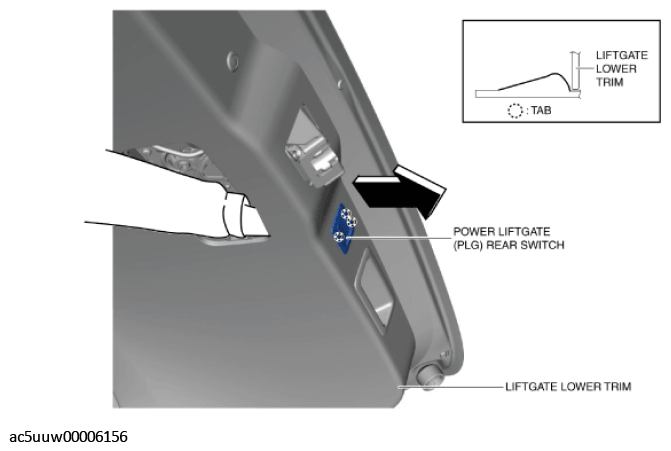 Courtesy of MAZDA MOTORS CORP.
- Disconnect the power liftgate (PLG) rear switch connector.
- Install in the reverse order of removal.