Removal
3UR-FE LUBRICATION: ENGINE OIL COOLER: REMOVAL
1. REMOVE ENGINE ROOM SIDE COVER LH Removal
2. REMOVE ENGINE ROOM SIDE COVER RH Removal
3. DISCONNECT CABLE FROM NEGATIVE BATTERY TERMINAL
NOTICE:
- w/ Navigation System:
After the engine switch is turned off, the HDD navigation system requires approximately 6 minutes to record various types of memory and settings. As a result, after turning the engine switch off, wait 6 minutes or more before disconnecting the cable from the negative (-) battery terminal.
- When disconnecting the cable, some systems need to be initialized after the cable is reconnected Repair Instruction - Initialization.
4. REMOVE FRONT FENDER SPLASH SHIELD SUB-ASSEMBLY LH Removal
5. REMOVE FRONT FENDER SPLASH SHIELD SUB-ASSEMBLY RH Removal
6. REMOVE UPPER RADIATOR SUPPORT SEAL Removal
7. REMOVE NO. 1 ENGINE UNDER COVER SUB-ASSEMBLY Removal
8. DRAIN ENGINE OIL Replacement
9. DRAIN ENGINE COOLANT Service and Repair
10. REMOVE V-BANK COVER SUB-ASSEMBLY Removal
11. REMOVE FAN AND GENERATOR V BELT Removal
12. REMOVE OIL FILTER ELEMENT Replacement
13. REMOVE OIL PRESSURE SENDER GAUGE ASSEMBLY Removal
14. DISCONNECT COOLER COMPRESSOR ASSEMBLY [1][2]Removal
15. REMOVE NO. 2 WATER BY-PASS PIPE SUB-ASSEMBLY
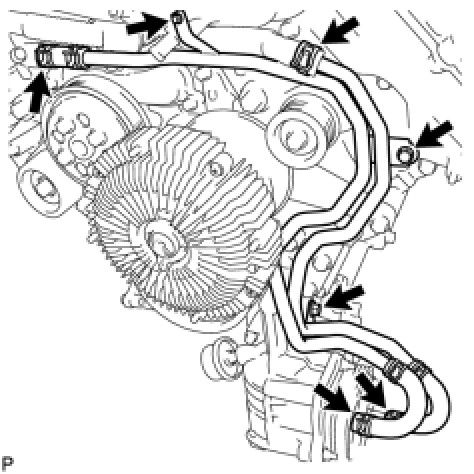
(a) Remove the 3 bolts.
(b) Disconnect the 4 hoses and remove the water by-pass pipe.
16. REMOVE NO. 1 OIL COOLER BRACKET
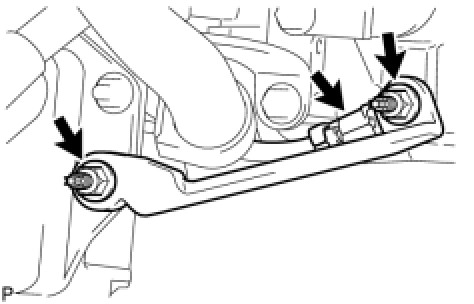
(a) Remove the 2 nuts and bracket.
(b) Disconnect the ground wire from the cylinder block.
17. REMOVE OIL FILTER BRACKET
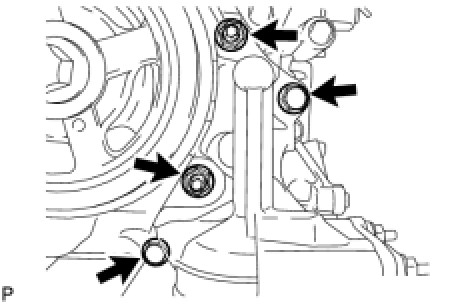
(a) Remove the 2 bolts, 2 nuts and filter bracket.
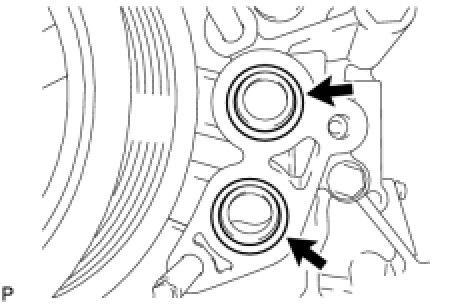
(b) Remove the 2 O-rings.
18. REMOVE OIL COOLER ASSEMBLY
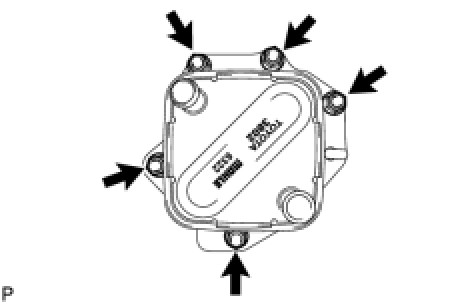
(a) Remove the 5 nuts and oil cooler from the oil filter bracket.
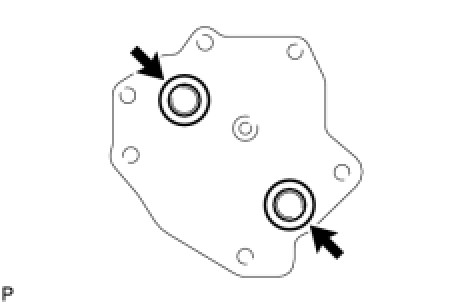
(b) Remove the 2 O-rings.
19. REMOVE OIL COOLER SPACER
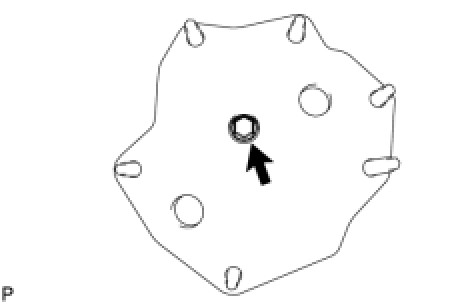
(a) Remove the bolt and oil cooler spacer from the oil filter bracket.
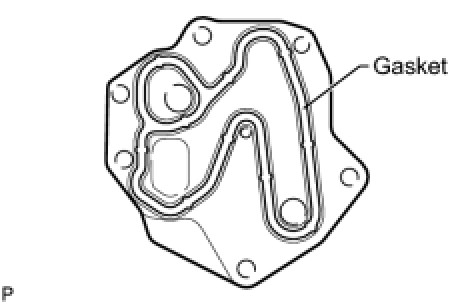
(b) Remove the gasket.