Removal
AUDIO / VIDEO: INSTRUMENT PANEL SPEAKER: REMOVAL
HINT:
- Use the same procedures for the LH side and RH side.
- The procedures listed below are for the LH side.
1. REMOVE ENGINE ROOM SIDE COVER LH Removal
2. DISCONNECT CABLE FROM NEGATIVE BATTERY TERMINAL
NOTICE:
- w/ Navigation System:
After the engine switch is turned off, the HDD navigation system requires approximately 6 minutes to record various types of memory and settings. As a result, after turning the engine switch off, wait 6 minutes or more before disconnecting the cable from the negative (-) battery terminal.
- When disconnecting the cable, some systems need to be initialized after the cable is reconnected Repair Instruction - Initialization.
3. REMOVE NO. 3 INSTRUMENT PANEL REGISTER ASSEMBLY Removal
4. REMOVE NO. 4 INSTRUMENT PANEL REGISTER ASSEMBLY Removal
5. REMOVE MULTI-DISPLAY ASSEMBLY WITH BRACKET (w/o Navigation System) Removal
6. REMOVE DISPLAY AND NAVIGATION MODULE DISPLAY WITH BRACKET (w/ Navigation System) Removal
7. REMOVE NO. 1 SPEAKER OPENING COVER ASSEMBLY
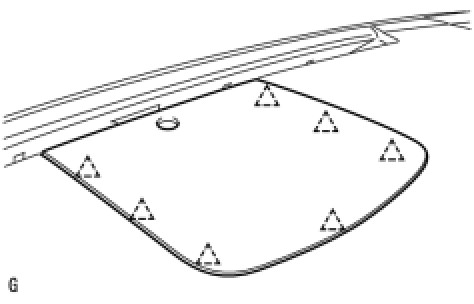
(a) Detach the 7 clips and remove the opening cover.
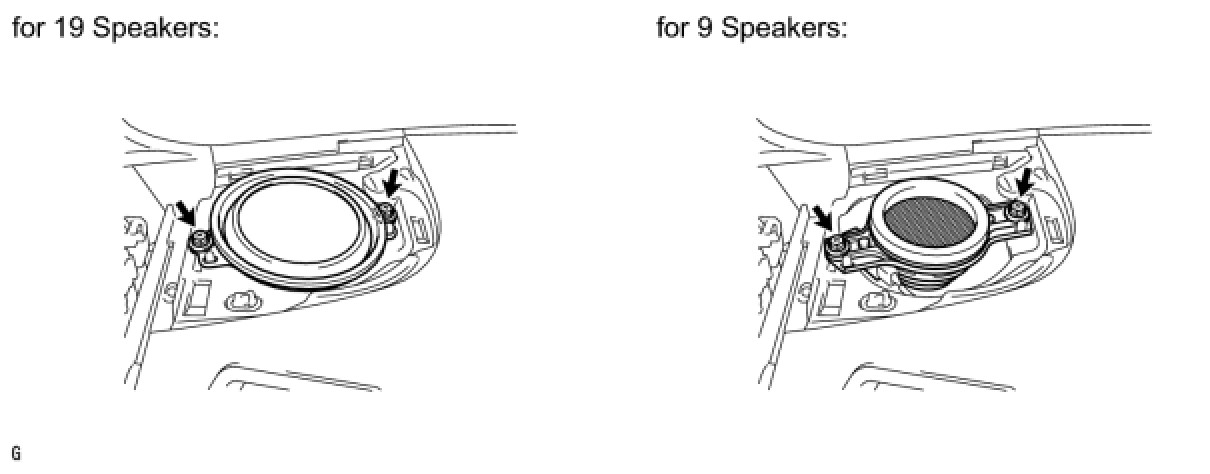
8. REMOVE FRONT NO. 4 SPEAKER ASSEMBLY
(a) Remove the 2 bolts.
(b) Remove the speaker and disconnect the speaker connector.
NOTICE:
Do not touch the cone part of the speaker.
9. REMOVE FRONT ASSIST GRIP SUB-ASSEMBLY Removal
10. REMOVE FRONT PILLAR GARNISH LH Removal
11. REMOVE NO. 1 INSTRUMENT PANEL SPEAKER PANEL SUB-ASSEMBLY
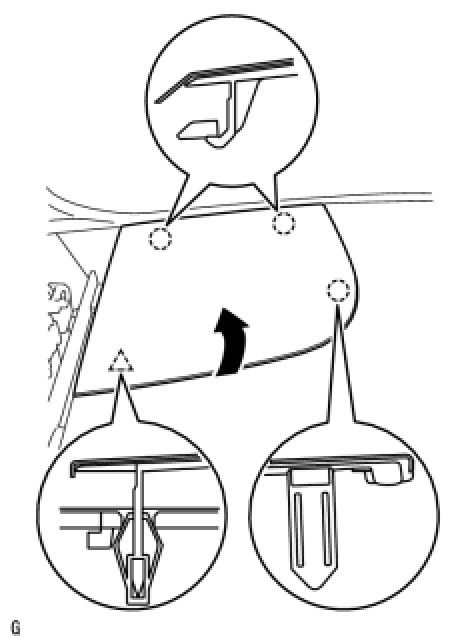
(a) Detach the claw and clip on the near side. Then, raise the panel towards the front of the vehicle in the direction of the arrow and detach the 2 claws to remove the panel.
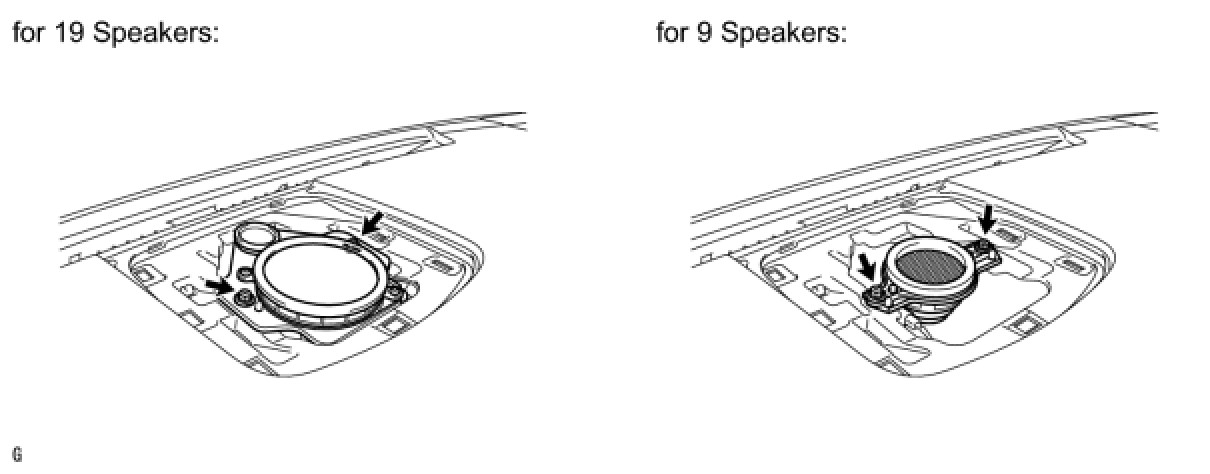
12. REMOVE FRONT NO. 2 SPEAKER ASSEMBLY
(a) Remove the 2 bolts.
(b) Remove the speaker and disconnect the speaker connector.
NOTICE:
Do not touch the cone part of the speaker.