Radiator and Fan Replacement
- Drain the engine coolant (see COOLANT REPLACEMENT ).
- Remove the front bulkhead cover (see FRONT BULKHEAD COVER REPLACEMENT
).
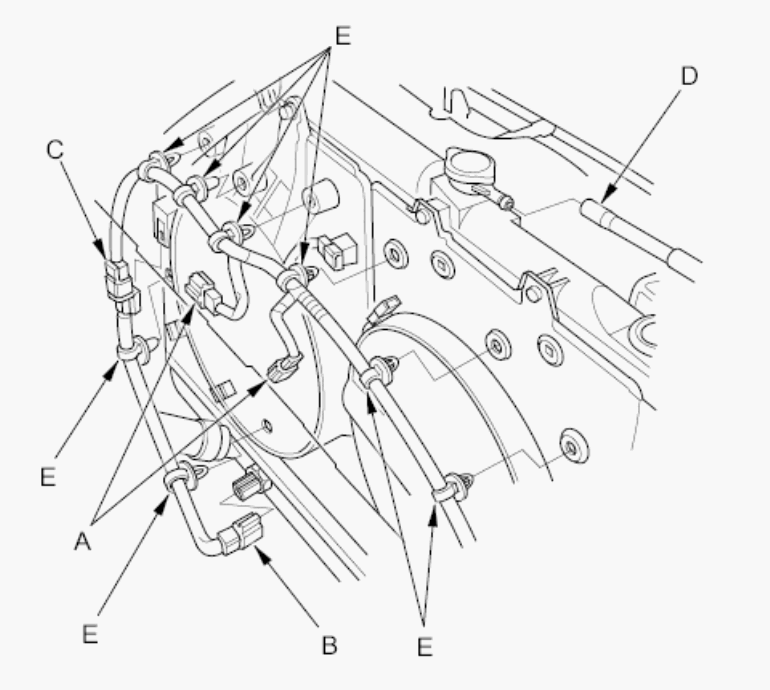
- Disconnect the fan motor connectors (A), the ECT sensor 2 connector (B), the harness connector (C) and the coolant reservoir hose (D), then remove the harness clamps (E).
 Courtesy of AMERICAN HONDA MOTOR CO., INC.
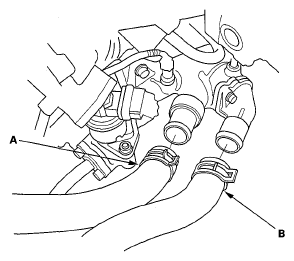
- Disconnect the upper radiator hose (A) and the lower radiator hose (B).
 Courtesy of AMERICAN HONDA MOTOR CO., INC.
- Raise the vehicle on the lift.
- Remove the front splash shield (see FRONT SPLASH SHIELD REPLACEMENT
).
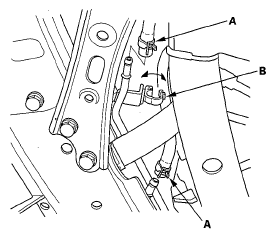
- Disconnect the ATF cooler hoses (A) from the radiator, then plug the line and the hose.
 Courtesy of AMERICAN HONDA MOTOR CO., INC.
- Unclamp the ATF cooler hose clamp (B) on the ATF cooler line.
- Lower the vehicle on the lift.
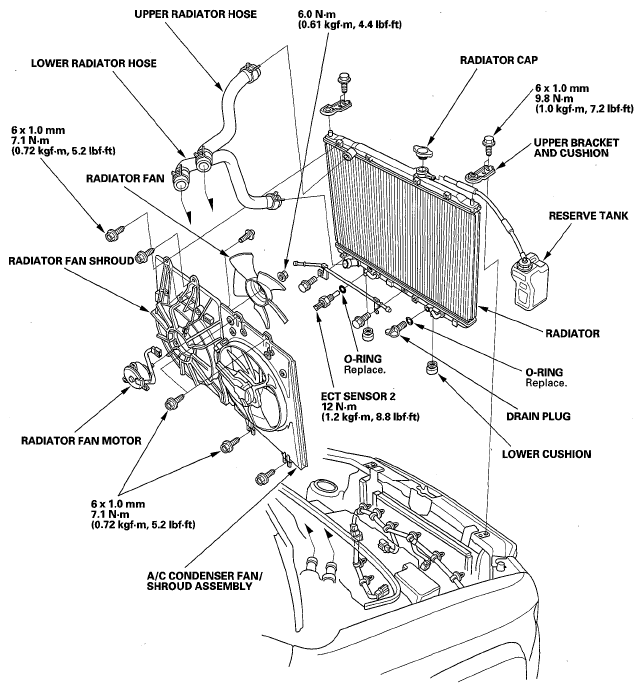
- Remove the upper bracket and cushions, then pull up the radiator.
 Courtesy of AMERICAN HONDA MOTOR CO., INC.
- Remove the fan shroud assemblies and other parts from the radiator.
- Install the radiator in the reverse order of removal. Make sure the upper and lower cushions are set securely.
- Connect the ATF cooler hoses on the radiator (see ATF COOLER HOSE REPLACEMENT
).
- Fill the radiator with engine coolant, then bleed the air from the cooling system (see COOLANT REPLACEMENT ).