Rear Side Door Window Weatherstrip Replacement
WARNING: This page is about a different car, the 2017 Cadillac ATS. However, it is still accessible from the selected car via links, so may be relevant.
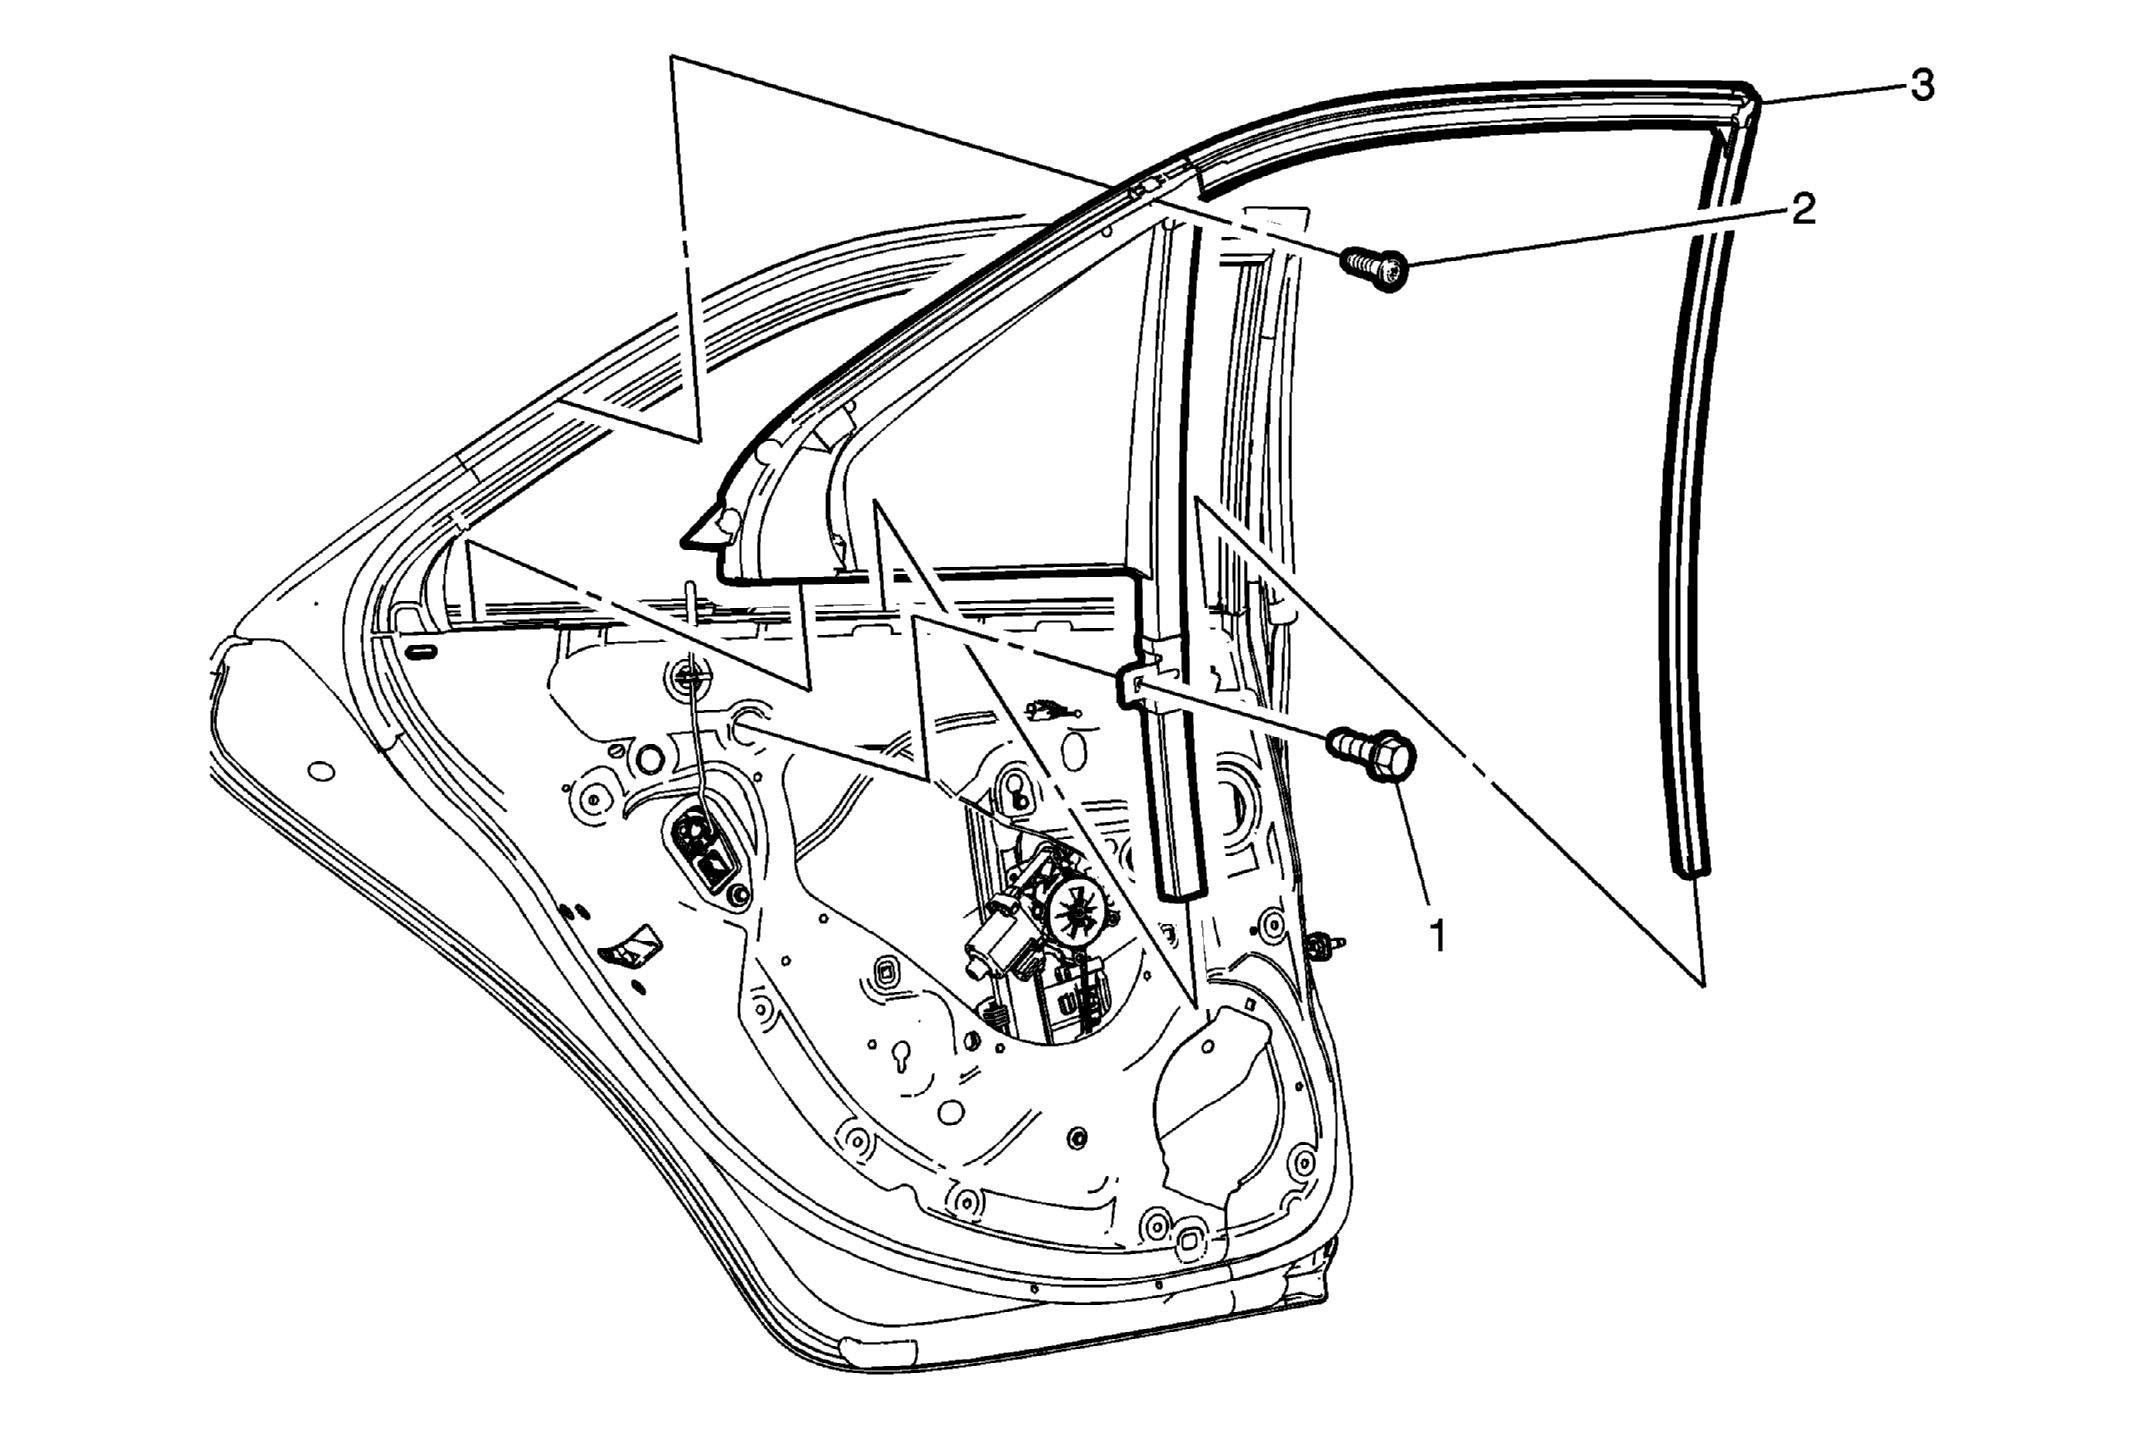 Courtesy of GENERAL MOTORS COMPANY
| Callout |
Component Name |
|
Preliminary Procedures
- Remove the rear side door garnish molding. Refer to Rear Side Door Garnish Molding Replacement
.
- Remove the rear side door window inner strip. Refer to Rear Side Door Window Inner Sealing Strip Replacement .
- Remove the rear side door window reveal molding. Refer to Rear Side Door Window Belt Reveal Molding Replacement .
|
| 1 |
Rear Side Door Window Weatherstrip Bolt
Procedure
- Apply masking tape to the applique, outer belt reveal molding and door frame.
- Remove the rear side door armrest plate bolts and plate from the inner door panel.
- Remove the rear side door water deflector.
- Position the window all the way down in the door.
Tighten
10 N.m (89 lb in) |
| 2 |
Rear Side Door Window Weatherstrip Screw |
| 3 |
Rear Side Door Window Weatherstrip Procedure
- Start in the top upper rear corner of the door frame, pull the weatherstrip out of the door frame and rear window channel.
- Install the window weatherstrip to the top upper rear corner of the door frame, work the weatherstrip around the upper door frame and then down both front lower channels.
- Ensure that the weatherstrip is fully seated into the upper door frame and down both front lower channels.
NOTE:
Inspect the door window for proper operation before installing the door trim.
|