- REMOVE FRONT DOOR SCUFF PLATE LH
Refer to PROCEDURE - Step 7
- REMOVE COWL SIDE TRIM SUB-ASSEMBLY LH
Refer to PROCEDURE - Step 8
- REMOVE NO. 1 INSTRUMENT PANEL UNDER COVER SUB-ASSEMBLY
Refer to PROCEDURE - Step 17
- REMOVE FRONT WHEEL LH
- REMOVE FRONT FENDER WHEEL OPENING MOULDING SUB-ASSEMBLY LH
Refer to REMOVAL [12/2013 - ]
- REMOVE FRONT WHEEL OPENING EXTENSION PAD LH
HINT:
Use the same procedure as for the RH side.
Refer to PROCEDURE - Step 3
- REMOVE FRONT FENDER LINER LH
HINT:
Use the same procedure as for the RH side.
Refer to PROCEDURE - Step 4
- DISCONNECT HOOD LOCK CONTROL LEVER SUB-ASSEMBLY
Refer to PROCEDURE - Step 18
- REMOVE HOOD LOCK CONTROL LEVER SUB-ASSEMBLY
- Disconnect the hood lock control cable assembly and remove the hood lock control lever sub-assembly.
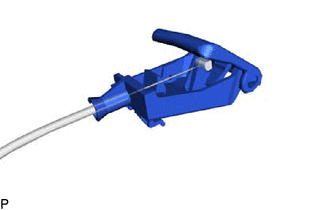 Courtesy of © TOYOTA, LICENSE AGREEMENT TMS1002 Courtesy of © TOYOTA, LICENSE AGREEMENT TMS1002
|
- REMOVE RADIATOR GRILLE
Refer to REMOVAL [11/2016 - ]
- REMOVE HOOD LOCK ASSEMBLY
- Using a screwdriver, remove the hood lock nut cap.
HINT:
Tape the screwdriver tip before use.
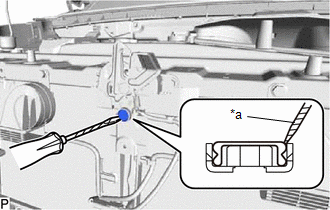 Courtesy of © TOYOTA, LICENSE AGREEMENT TMS1002 Courtesy of © TOYOTA, LICENSE AGREEMENT TMS1002
|
- w/ Engine Hood Courtesy Switch:
- Disconnect the connector.
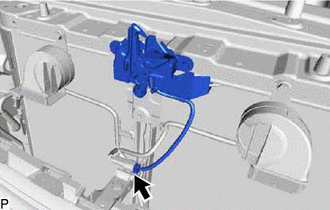 Courtesy of © TOYOTA, LICENSE AGREEMENT TMS1002 Courtesy of © TOYOTA, LICENSE AGREEMENT TMS1002
|
- Remove the 2 bolts and hood lock bolt.
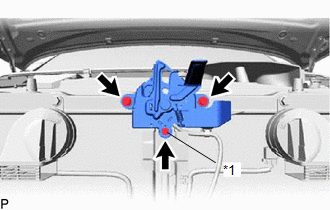 Courtesy of © TOYOTA, LICENSE AGREEMENT TMS1002 Courtesy of © TOYOTA, LICENSE AGREEMENT TMS1002
|
- Disconnect the hood lock control cable assembly and remove the hood lock assembly.
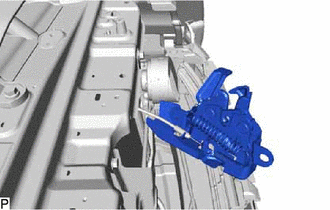 Courtesy of © TOYOTA, LICENSE AGREEMENT TMS1002 Courtesy of © TOYOTA, LICENSE AGREEMENT TMS1002
|
- REMOVE HOOD LOCK CONTROL CABLE ASSEMBLY
- Using a screwdriver, disengage the 5 clamps and hood cable grommet as shown in the illustration.
 Courtesy of © TOYOTA, LICENSE AGREEMENT TMS1002 Courtesy of © TOYOTA, LICENSE AGREEMENT TMS1002
|
| *1 |
Hood Lock Control Cable Assembly |
- |
- |
| *a |
Clamp |
*b |
Hood Cable Grommet |
HINT:
Tape the screwdriver tip before use.
- Pull the hood lock control cable assembly from the engine compartment and remove it.