Radio Receiver: Installation
- INSTALL RADIO RECEIVER ASSEMBLY
- INSTALL INTEGRATION CONTROL AND PANEL ASSEMBLY
(See
INSPECTION
)
- INSTALL NO. 2 RADIO BRACKET (w/o Multi-information Display)
- Install the No. 2 radio bracket with the 4 screws.
 Courtesy of © TOYOTA, LICENSE AGREEMENT TMS1002
- INSTALL NO. 2 RADIO BRACKET (w/ Multi-information Display)
- Install the No. 2 radio bracket with the 5 screws.
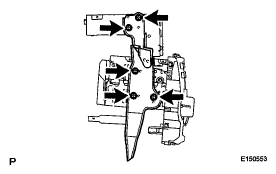 Courtesy of © TOYOTA, LICENSE AGREEMENT TMS1002
- INSTALL NO. 1 RADIO BRACKET (w/o Multi-information Display)
- Install the No. 1 radio bracket with the 4 screws.
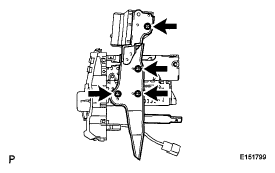 Courtesy of © TOYOTA, LICENSE AGREEMENT TMS1002
- Engage the claw and install the connector.
 Courtesy of © TOYOTA, LICENSE AGREEMENT TMS1002
- INSTALL NO. 1 RADIO BRACKET (w/ Multi-information Display)
- Install the No. 1 radio bracket with the 5 screws.
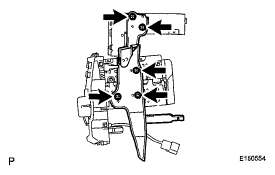 Courtesy of © TOYOTA, LICENSE AGREEMENT TMS1002
- Engage the claw and install the connector.
- INSTALL RADIO RECEIVER ASSEMBLY WITH BRACKET
- Connect each connector.
Courtesy of © TOYOTA, LICENSE AGREEMENT TMS1002
- Engage the 4 clips.
 Courtesy of © TOYOTA, LICENSE AGREEMENT TMS1002
- Install the radio receiver assembly with bracket with the 4 bolts.
- INSTALL HEATER CONTROL AND ACCESSORY ASSEMBLY (for Manual Air Conditioning System)
(See
AIR CONDITIONING PANEL (FOR MANUAL AIR CONDITIONING SYSTEM)
)
- INSTALL AIR CONDITIONING CONTROL ASSEMBLY (for Automatic Air Conditioning System)
(See
REMOVAL
)
 Courtesy of © TOYOTA, LICENSE AGREEMENT TMS1002
- INSTALL CENTER INSTRUMENT CLUSTER FINISH PANEL ASSEMBLY (w/o Smart Key System)
(See
INSTALLATION
)
- INSTALL CENTER INSTRUMENT CLUSTER FINISH PANEL ASSEMBLY (w/ Smart Key System)
(See
INSTALLATION
)
- INSTALL CENTER INSTRUMENT PANEL REGISTER ASSEMBLY
(See
INSTALLATION
)