Radio Receiver: Removal
- REMOVE INSTRUMENT CLUSTER FINISH PANEL GARNISH NO. 1 (See step 9 under
REMOVAL
)
- REMOVE INSTRUMENT CLUSTER FINISH PANEL GARNISH NO. 2 (See step 10 under
REMOVAL
)
- REMOVE INSTRUMENT PANEL FINISH PLATE (w/o Smart Key System) (See step 11 under
REMOVAL
)
- REMOVE INSTRUMENT PANEL SUB-ASSEMBLY (See step 12 under
REMOVAL
)
- REMOVE INSTRUMENT CLUSTER FINISH PANEL SUB-ASSEMBLY CENTER (See step 4 under
REMOVAL
)
- REMOVE RADIO RECEIVER ASSEMBLY WITH BRACKET
- Remove the 4 bolts and pull the radio receiver assembly w/ bracket toward you.
- Disconnect all connectors and remove the radio receiver assembly w/ bracket.
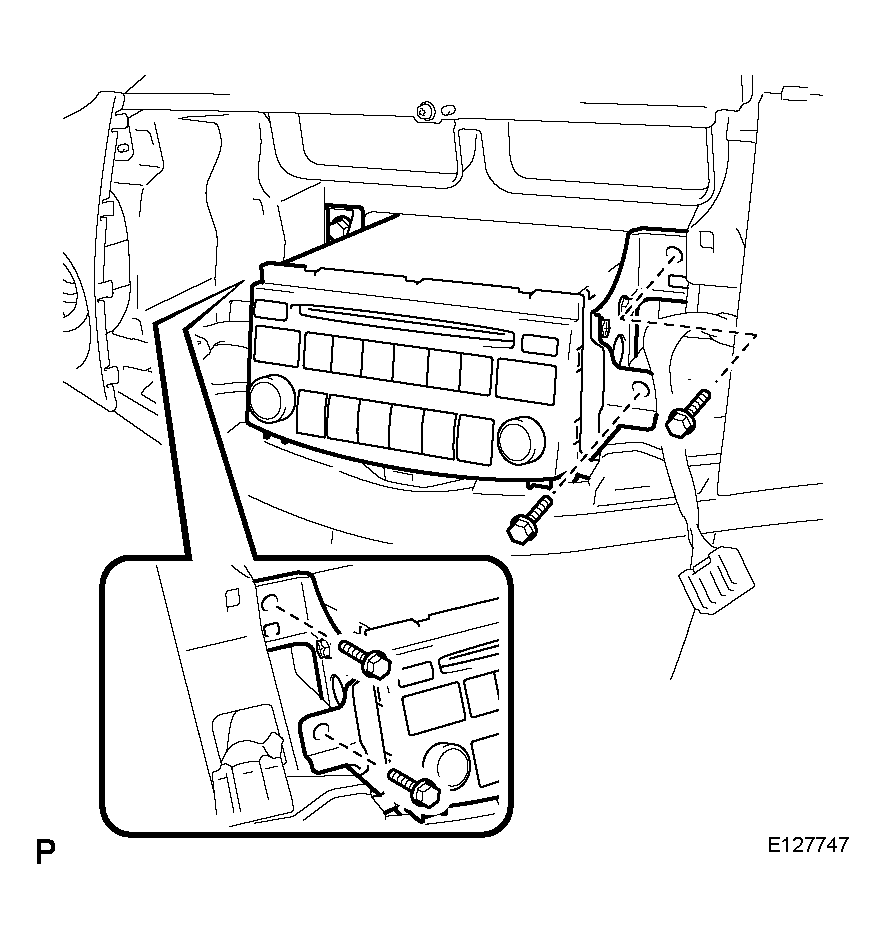 Courtesy of © TOYOTA, LICENSE AGREEMENT TMS1002
- REMOVE RADIO BRACKET NO. 1
- Remove the 3 bolts and radio bracket No. 1 from the radio receiver assembly w/ bracket.
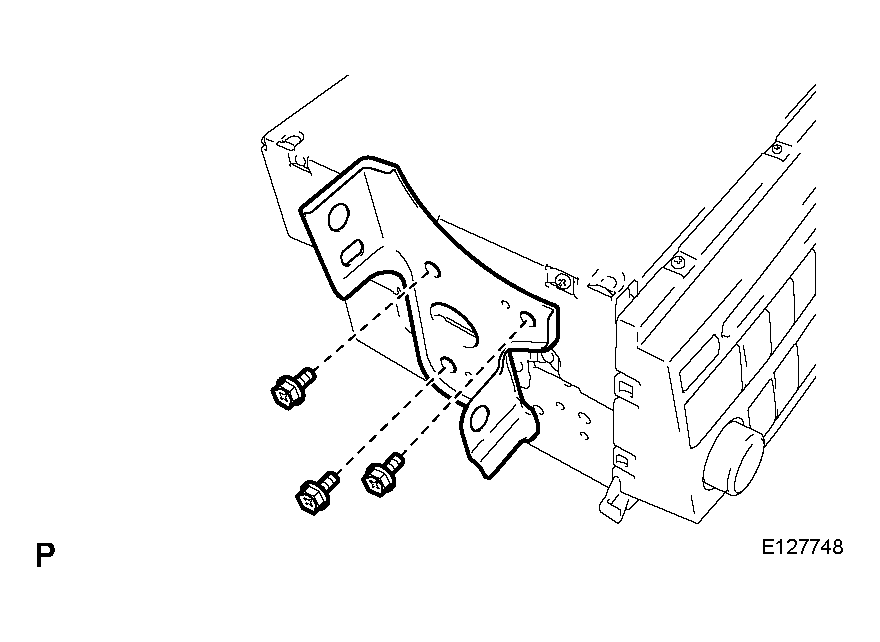 Courtesy of © TOYOTA, LICENSE AGREEMENT TMS1002
- REMOVE RADIO BRACKET NO. 2
- Remove the 3 bolts and radio bracket No. 2 from the radio receiver assembly w/ bracket.
- REMOVE RADIO RECEIVER ASSEMBLY
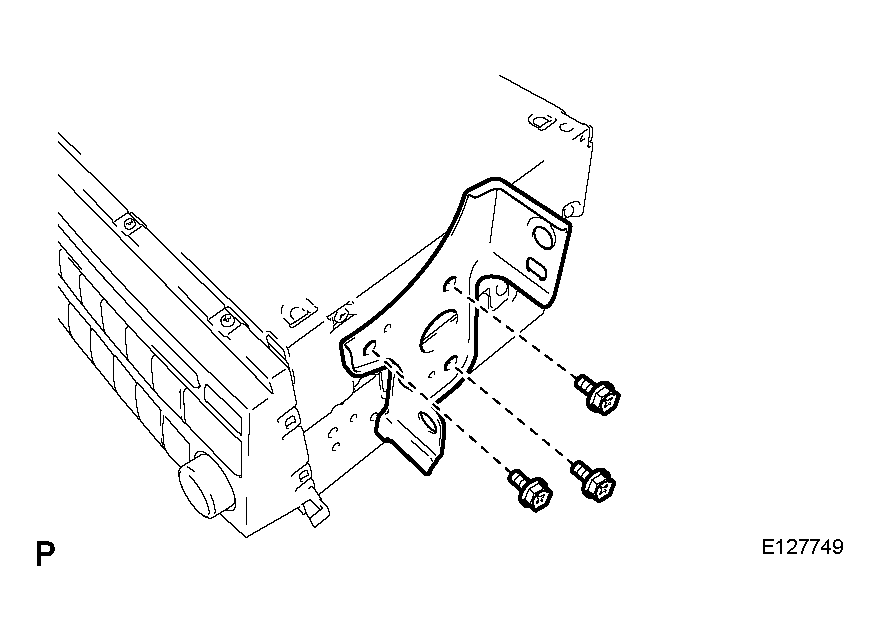 Courtesy of © TOYOTA, LICENSE AGREEMENT TMS1002