Timing Belt (SOHC): Installation
- Loosen all valve adjusting screws fully before installing timing belt. Camshaft must be permitted to rotate freely during belt tension adjustment. Align timing mark on camshaft sprocket with "V" mark on timing belt inner cover. See Fig 1
.
- Turn crankshaft clockwise until punch mark on crankshaft sprocket is aligned with arrow mark on oil pump. With timing marks aligned, install timing belt. Ensure drive side of belt is free of slack.
- Move tensioner plate up with finger pressure and loosely secure tensioner bolt. Turn crankshaft 2 revolutions clockwise to ensure all slack is removed from belt. Tighten tensioner stud nut first, then tensioner bolt. See TORQUE SPECIFICATIONS
.
- Ensure timing marks are aligned. Install timing belt outer cover and tighten to specification. See TORQUE SPECIFICATIONS
. Reverse removal procedure to complete installation. Adjust valve clearance. See VALVE CLEARANCE ADJUSTMENT
.
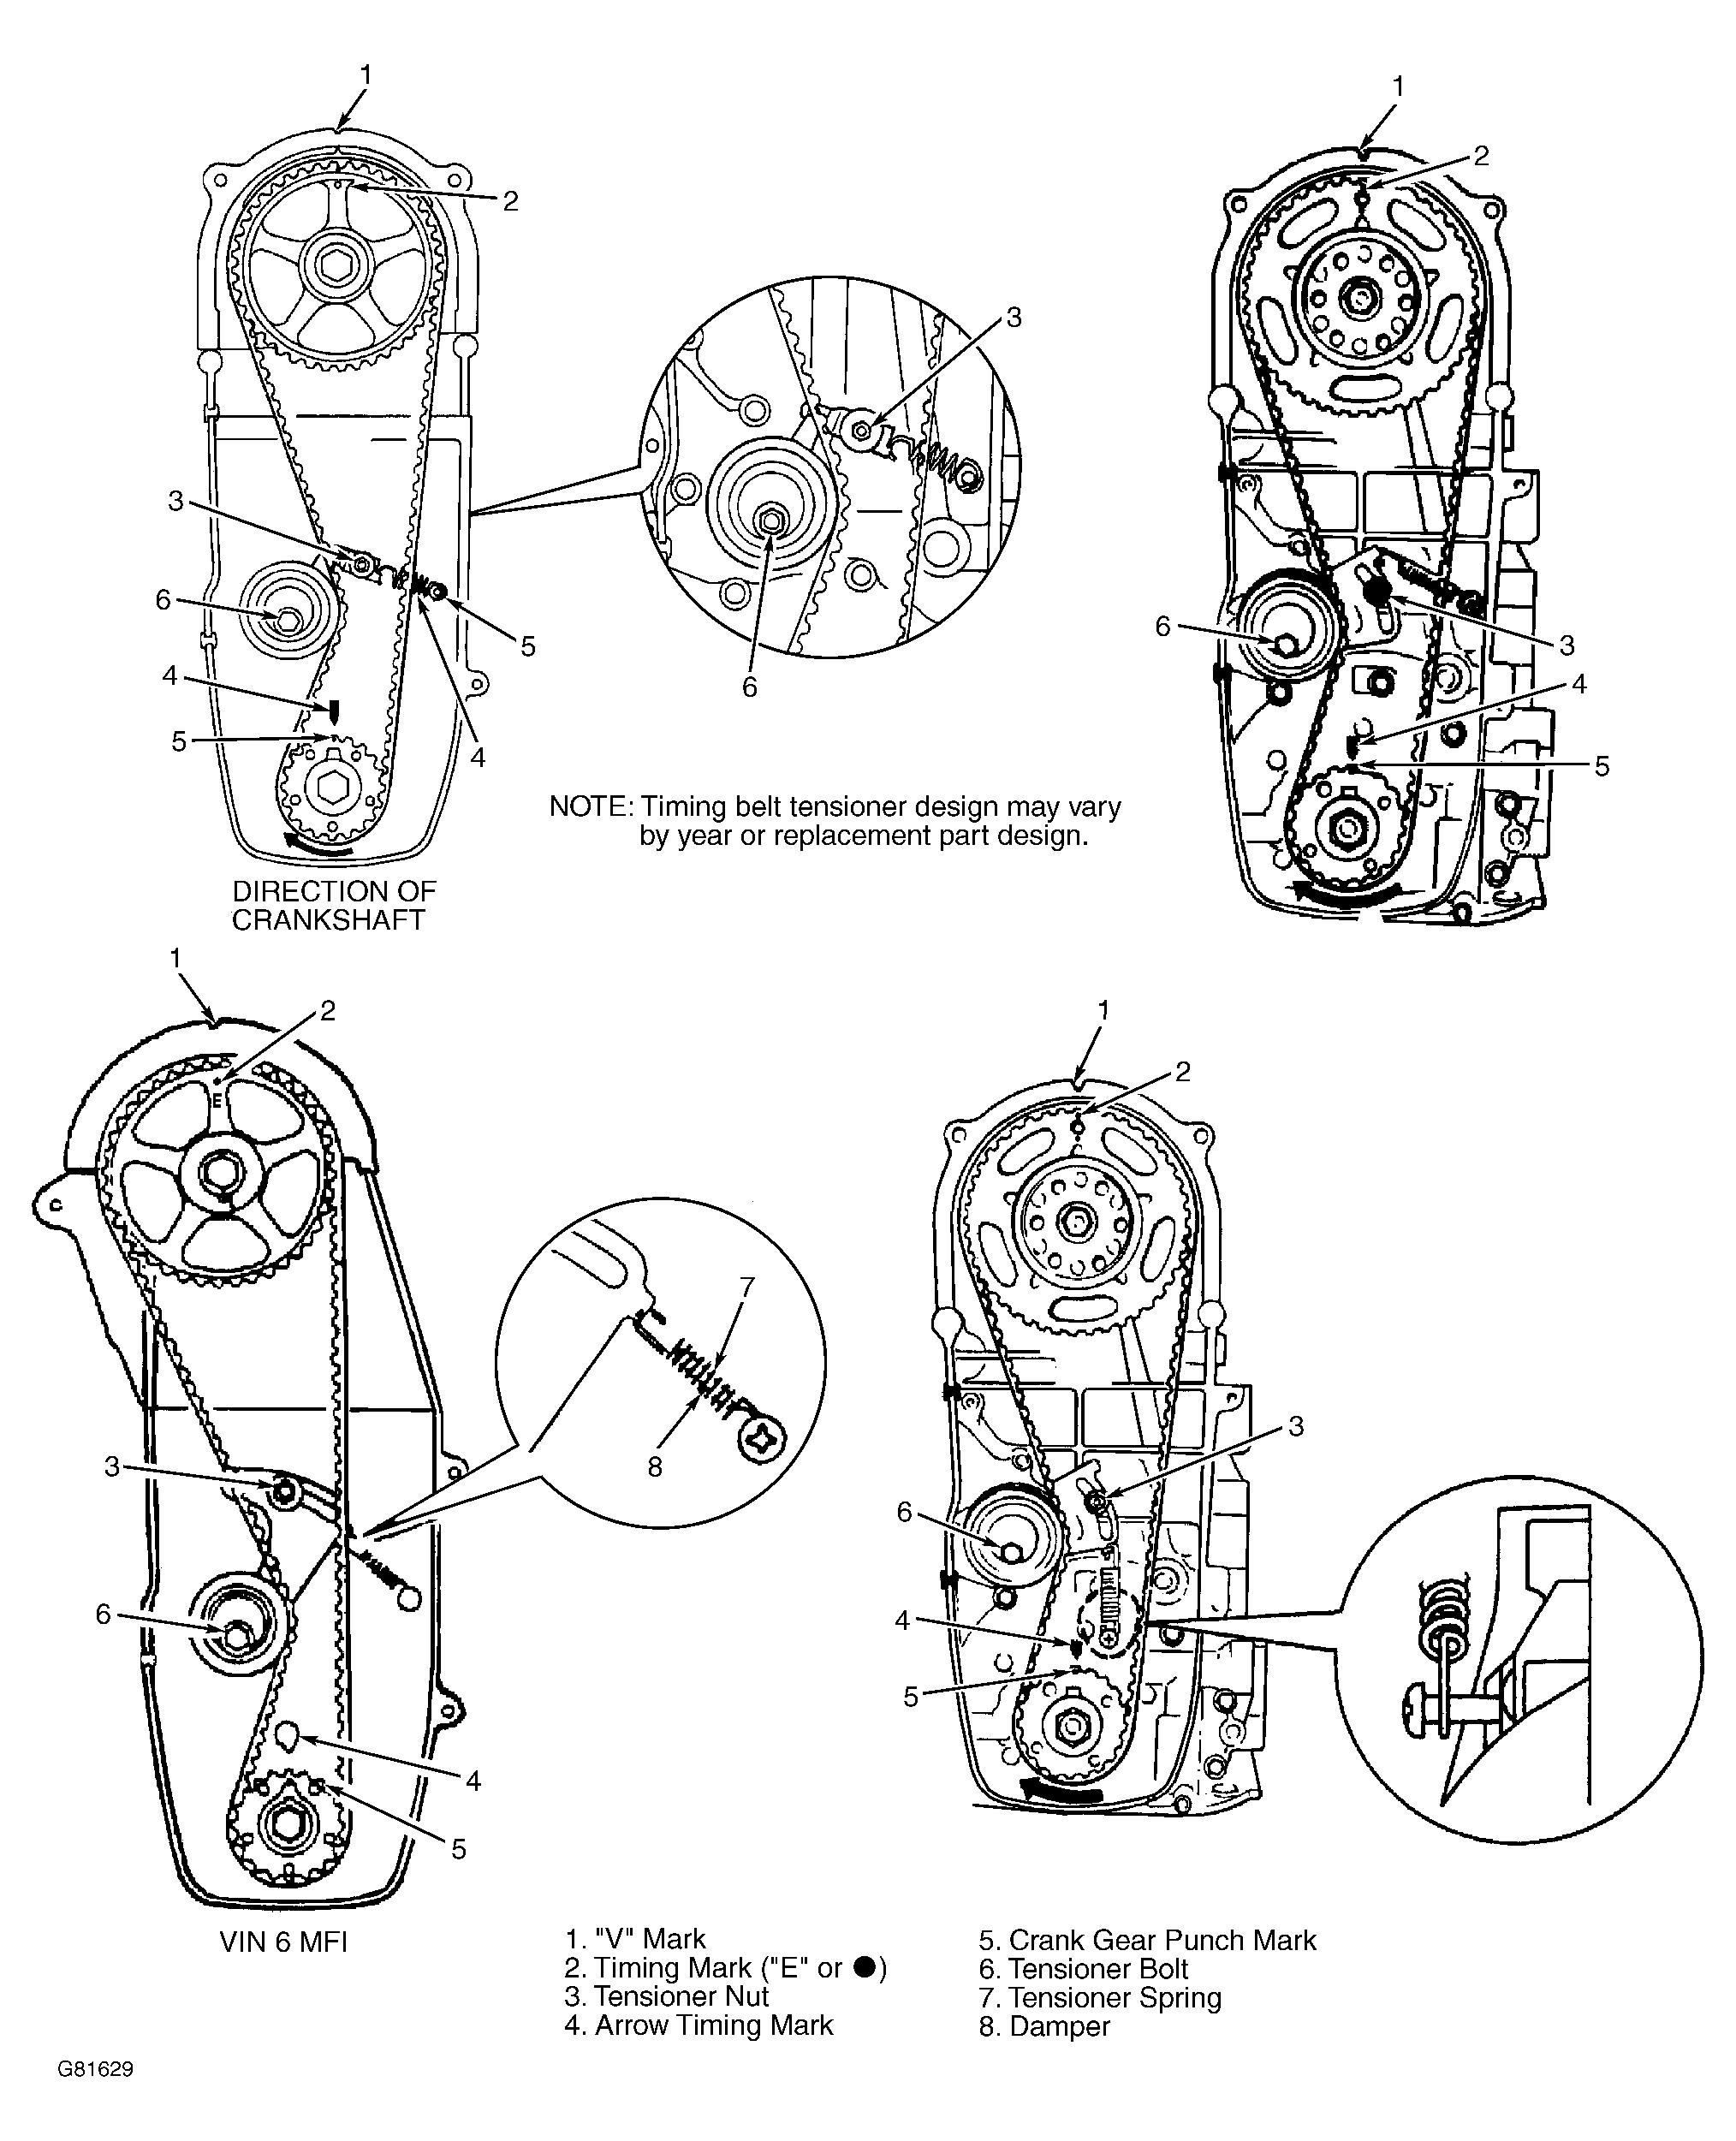 Courtesy of SUZUKI OF AMERICA CORP.