- Remove the engine from the vehicle. Ref. to MECHANICAL (H4DOTC)>Engine Assembly>REMOVAL .
- Remove the chain cover. Ref. to MECHANICAL (H4DOTC)>Chain Cover>REMOVAL .
- Remove the timing chain LH. Ref. to MECHANICAL (H4DOTC)>Timing Chain Assembly>REMOVAL>TIMING CHAIN LH .
- Remove the intake manifold. Ref. to FUEL INJECTION (FUEL SYSTEMS) (H4DOTC)>Intake Manifold>REMOVAL .
- Remove the rocker cover LH. Ref. to MECHANICAL (H4DOTC)>Rocker Cover>REMOVAL>ROCKER COVER LH .
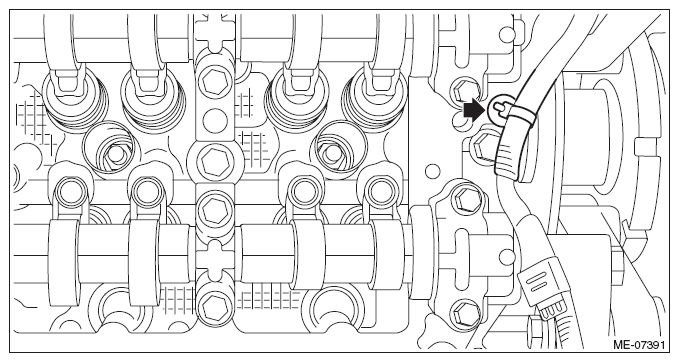
- Remove the clip holding the engine harness from cam carrier LH.
 Courtesy of SUBARU OF AMERICA, INC.
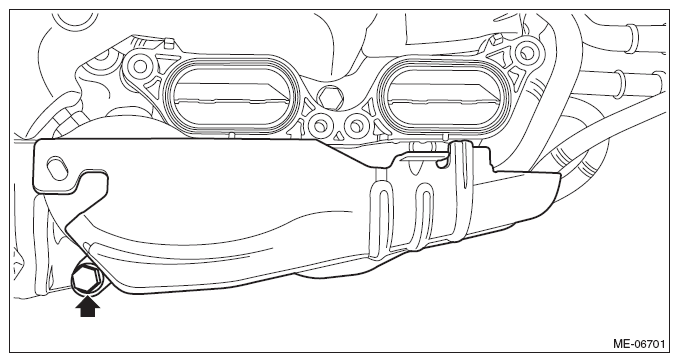
- Remove the fuel pipe protector from the high-pressure fuel pump case.
 Courtesy of SUBARU OF AMERICA, INC.
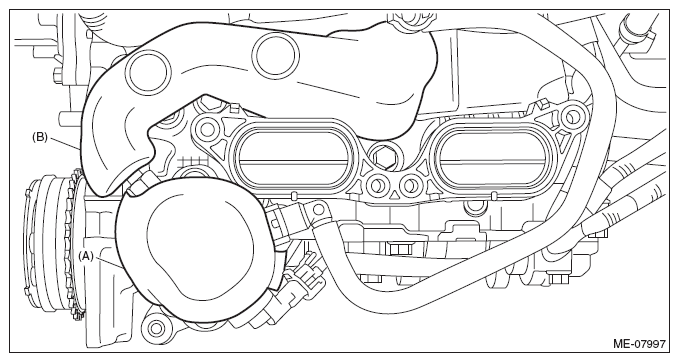
- Remove the fuel pump insulator (A) from the high-pressure fuel pump, and then remove the fuel pipe insulator No. 1 (B) from the high-pressure fuel delivery pipe.
 Courtesy of SUBARU OF AMERICA, INC.
- Disconnect the connector (A) from the high-pressure fuel pump, and remove the fuel delivery pipe from the high-pressure fuel pump.
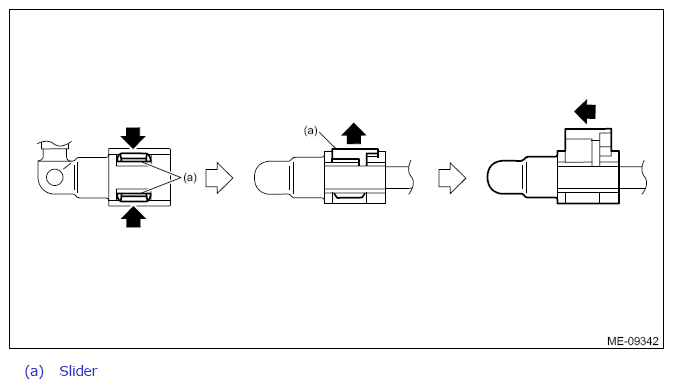
NOTE:
Disconnect the quick connector as shown in the figure.
 Courtesy of SUBARU OF AMERICA, INC.
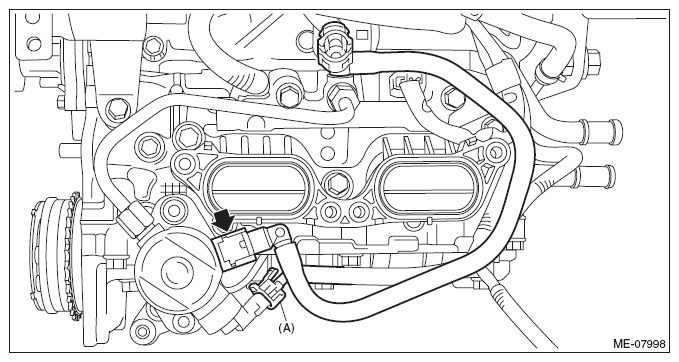 Courtesy of SUBARU OF AMERICA, INC.
- Remove the high-pressure fuel delivery pipe from the high-pressure fuel pump and fuel injector pipe.
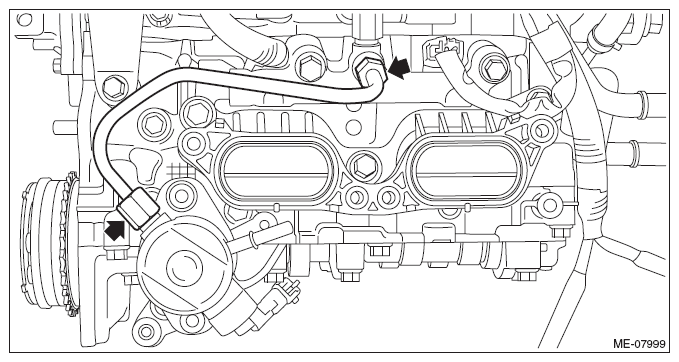 Courtesy of SUBARU OF AMERICA, INC.
- Disconnect the water pipe hose from oil pan upper, and remove the water pipe assembly.
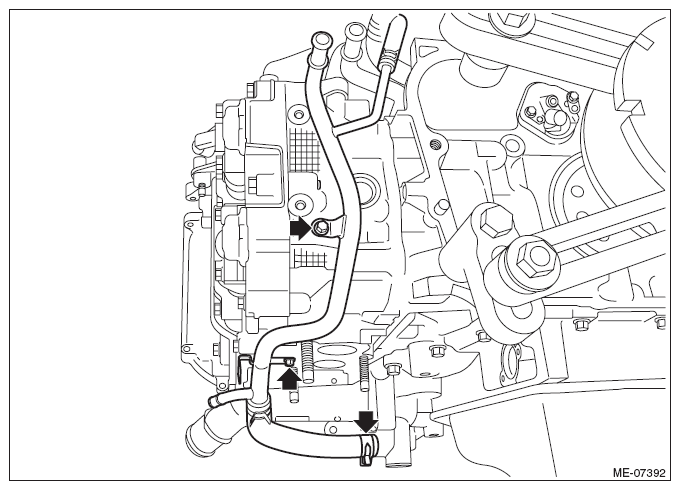 Courtesy of SUBARU OF AMERICA, INC.
- When disassembling the cam carrier LH
NOTE:
When disassembling the cam carrier LH, perform the following steps also.
- Remove the high-pressure fuel pump. Ref. to FUEL INJECTION (FUEL SYSTEMS) (H4DOTC)>High Pressure Fuel Pump>REMOVAL .
- Remove the cam sprocket LH. Ref. to MECHANICAL (H4DOTC)>Cam Sprocket>REMOVAL>CAM SPROCKET LH .
- Set the part so that the cam carrier LH is on the upper side.
- Loosen the bolts holding the cam carrier LH equally, a little at a time in numerical sequence as shown in the figure and remove the cam carrier LH.
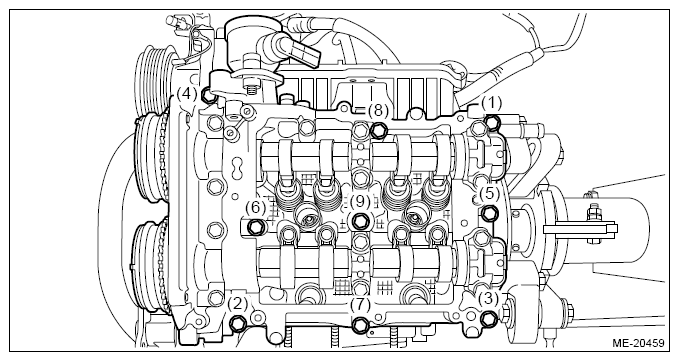 Courtesy of SUBARU OF AMERICA, INC.
- Remove the O-ring and the roller rocker arm from cylinder head LH.
NOTE:
Be careful not to confuse the roller rocker arms.
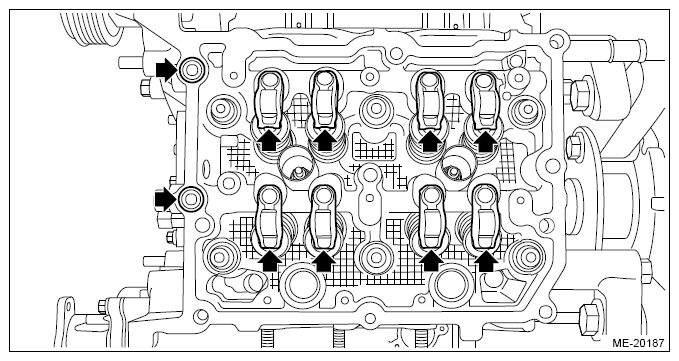 Courtesy of SUBARU OF AMERICA, INC.
- Remove the valve shim and the roller rocker arm pivot from cylinder head LH.
NOTE:
Be careful not to confuse the valve shim and the roller rocker arm pivot.
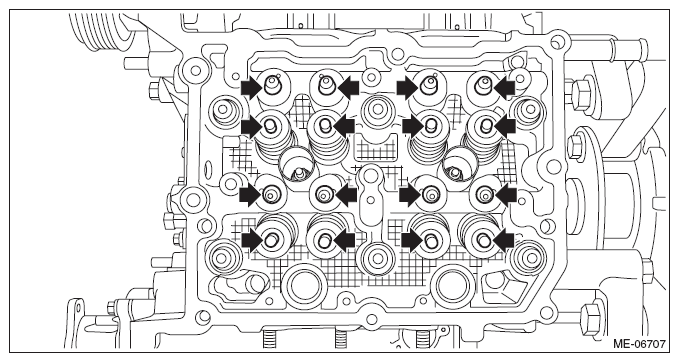 Courtesy of SUBARU OF AMERICA, INC.
- Remove the liquid gasket from cam carrier LH and cylinder head LH.