Control Valve Rear Body Assemble
 Courtesy of GENERAL MOTORS CORP.
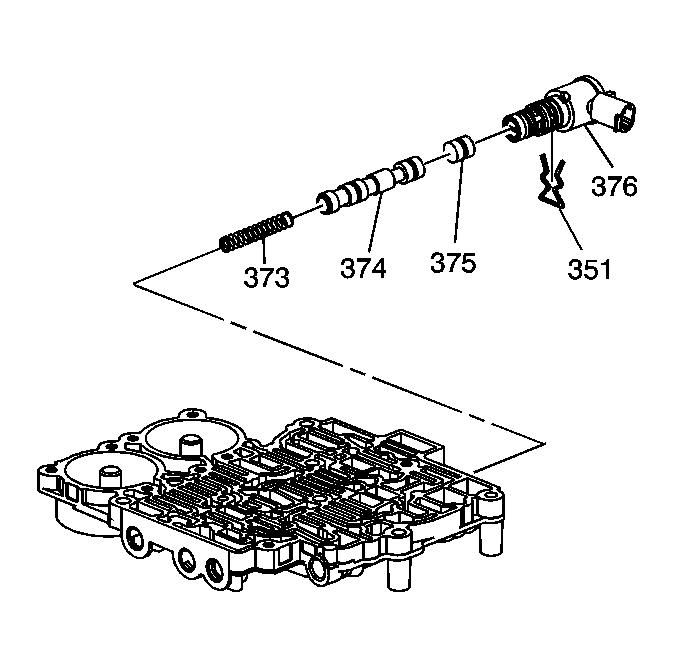
- Install the 4-5 shift valve spring (373).
- Install the 4-5 shift valve (374).
- Install the 4-5 shift control valve (375).
- Install the 4-5 shift solenoid (376).
- Install the 4-5 shift solenoid retainer (351).
 Courtesy of GENERAL MOTORS CORP.
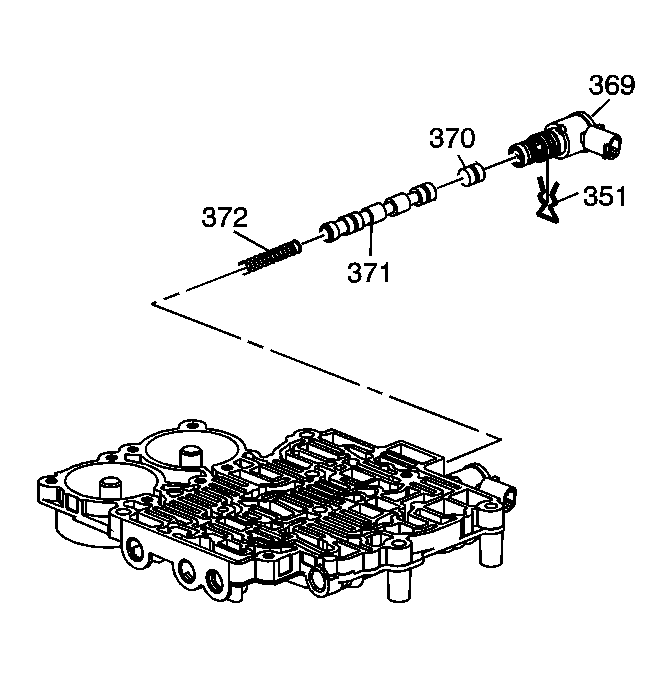
- Install the 2-3 shift valve spring (372).
- Install the 2-3 shift valve (371).
- Install the 2-3 shift control valve (370).
- Install the 2-3 shift solenoid (369).
- Install the 2-3 shift solenoid retainer (351).
 Courtesy of GENERAL MOTORS CORP.
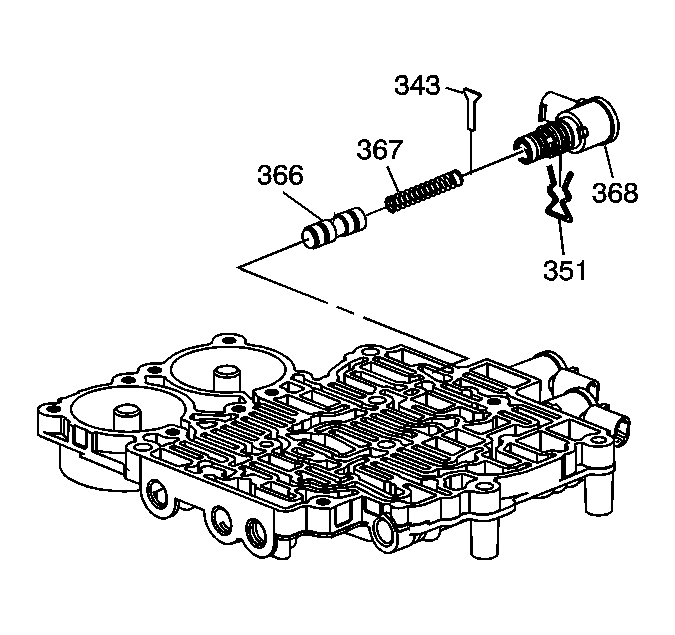
- Install the 1-2 shift control valve (366).
- Install the 1-2 shift control valve spring (367).
- Install the 1-2 shift control valve retainer (343).
- Install the 1-2 shift solenoid (368).
- Install the 1-2 shift solenoid retainer (351).
 Courtesy of GENERAL MOTORS CORP.
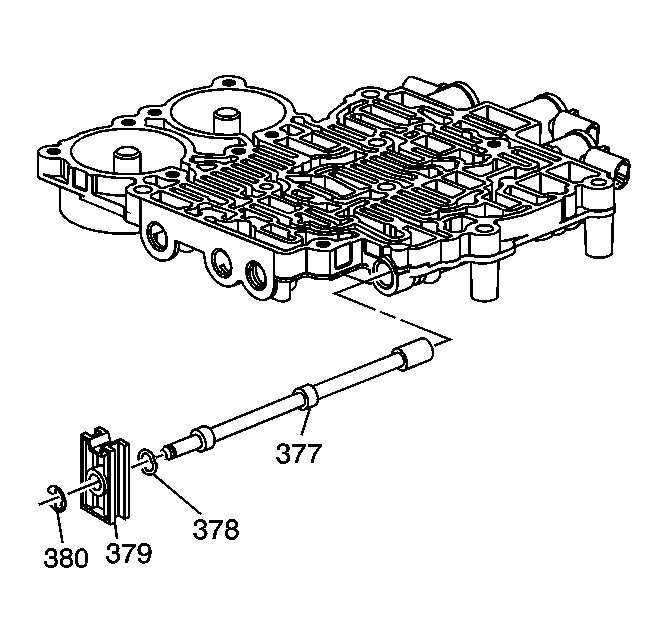
- Install the manual valve link retainer (380).
- Install the manual valve link (379).
- Install the manual valve link retainer (378).
- Install the manual valve (377).
 Courtesy of GENERAL MOTORS CORP.
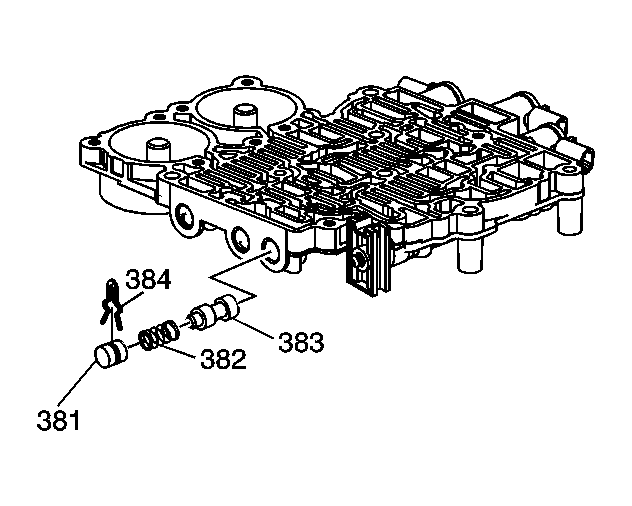
- Install the low pressure control valve (383).
- Install the low pressure control valve spring (382).
- Install the bore plug (381).
- Install the low pressure control valve bore retainer (384).
 Courtesy of GENERAL MOTORS CORP.
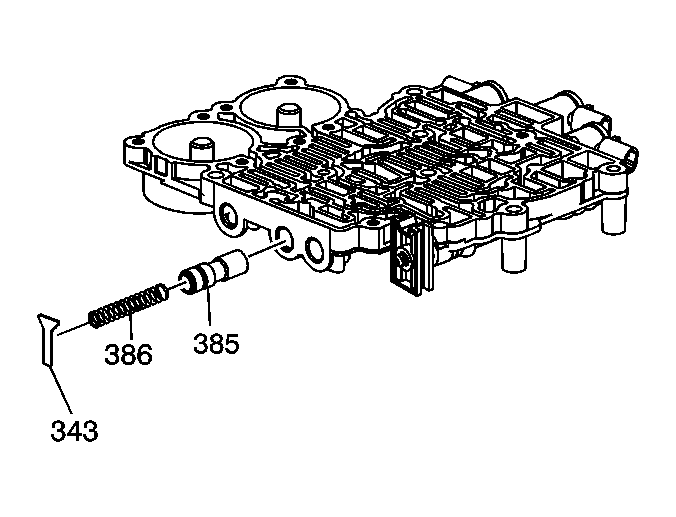
- Install the reverse lock out valve (385).
- Install the reverse lock out spring (386).
- Install the reverse lock out valve retainer (343).
 Courtesy of GENERAL MOTORS CORP.
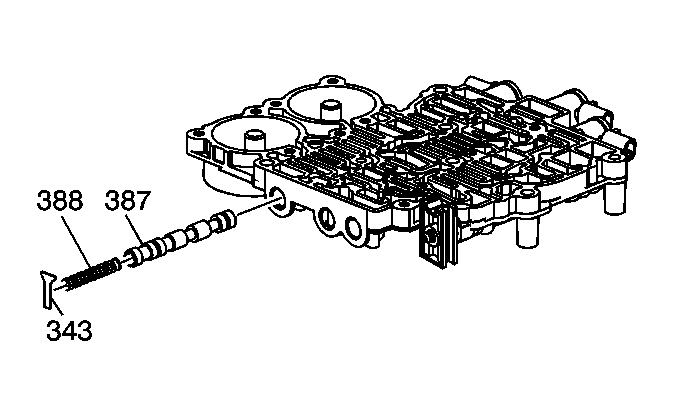
- Install the 1-2 shift valve (387).
- Install the 1-2 shift valve spring (388).
- Install the 1-2 shift valve retainer (343).