Brake Rotor Replacement - Rear
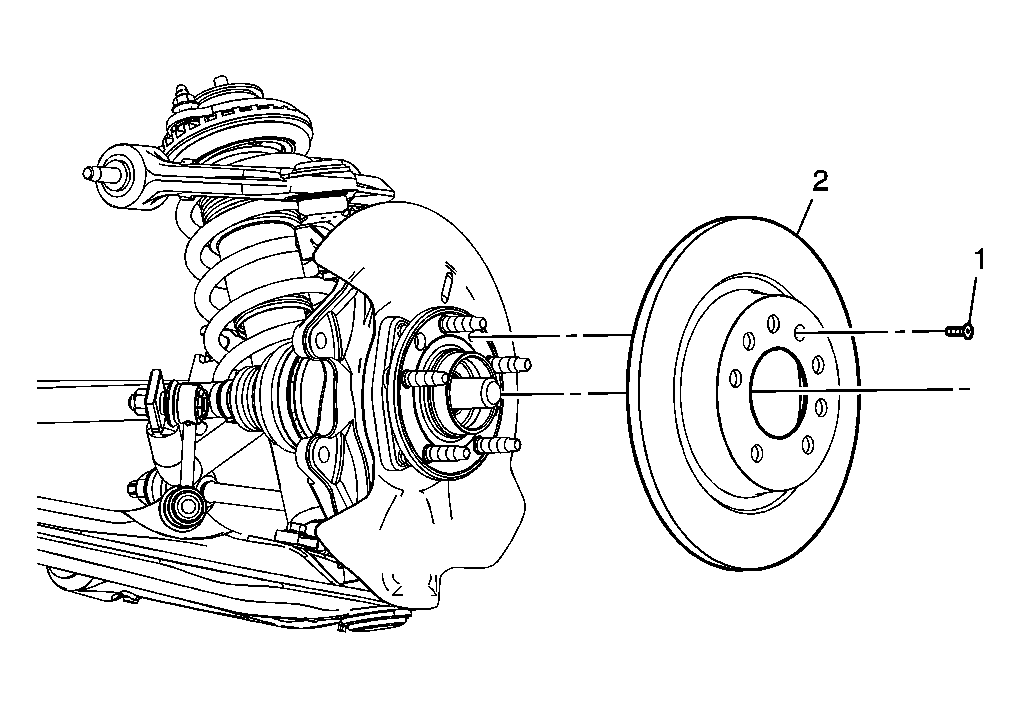 Courtesy of GENERAL MOTORS CORP.
 Brake Rotor Replacement - Rear
| Callout |
Component Name |
|
CAUTION:
Refer to Brake Dust Caution.
Fastener Tightening Specifications:
Refer to Fastener Tightening Specifications.Preliminary Procedure
- Raise and support the vehicle. Refer to Lifting and Jacking the Vehicle
Lifting and Jacking the Vehicle.
- Remove the tire and wheel. Refer to Tire and Wheel Removal and Installation
Tire and Wheel Removal and Installation.
- Remove and relocate the brake caliper. Refer to Brake Caliper Replacement - Rear
|
| 1 |
Bolt, Rear Brake Rotor Tighten:
10 N.m (89 lb in)
|
| 2 |
Rotor, Rear Brake
Tip:
- If the rotor is to be reused, mark the position of the rotor to the wheel stud.
- Using the J 41013
, thoroughly clean any rust or corrosion from the hub/axle flange. See Special Tools .
- Using the J 42450-A
, clean the rust and corrosion from the mating surface of the rotor to the hub/axle flange, if the brake rotor is to be reused. See Special Tools .
- If the brake rotor was removed and installed as part of a brake system repair, check the lateral runout (LRO). Refer to Brake Rotor Assembled Lateral Runout (LRO) Measurement .
- If the brake rotor assembled lateral runout (LRO) measurement exceeds the specification, refer to Brake Rotor Assembled Lateral Runout (LRO) Correction .
- If the brake rotor was refinished or replaced, or new brake pads were installed, burnish the pads and rotors. Refer to Burnishing Pads and Rotors .
|