Rear Door Opening Weatherstrip Replacement
Rear Door Opening Weatherstrip Replacement
Removal Procedure
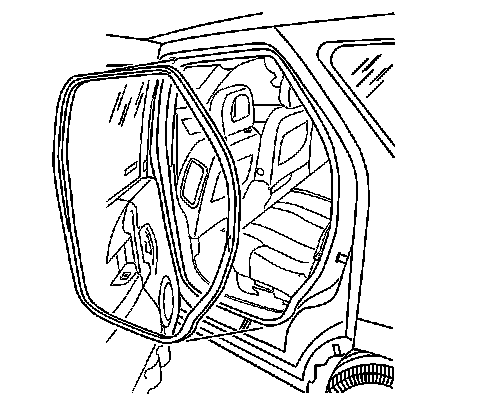
1. Open the rear door.
2. Remove the rear door sill plates. Refer to Front Side Door Sill Trim Plate Replacement (Front Side Door Sill Trim Plate Replacement).
3. Remove the rear quarter upper trim panel. Refer to Quarter Upper Trim Panel Replacement (Quarter Upper Trim Panel Replacement).
4. Remove the rear quarter lower trim panel. Refer to Quarter Lower Rear Trim Panel Replacement (Quarter Lower Rear Trim Panel Replacement).
5. Remove the upper center pillar trim panel. Refer to Center Pillar Upper Trim Panel Replacement (Center Pillar Upper Trim Panel Replacement).
6. Remove the center lower trim panel. Refer to Center Pillar Lower Trim Panel Replacement (Center Pillar Lower Trim Panel Replacement).
7. Remove the rear door opening weatherstrip by pulling it off the pinchweld flange.
Installation Procedure
1. Position the rear door opening weatherstrip to the pinchweld flange.
Starting at the center of the rocker panel area and moving in a clockwise direction press the rear door opening weatherstrip to the pinchweld flange until fully seated.
Important: The joint butt ends must have no gap and be located in the center of the rocker panel area.
2. Install joint butt ends together.
3. Install the rear quarter upper trim panel. Refer to Quarter Upper Trim Panel Replacement (Quarter Upper Trim Panel Replacement).
4. Install the rear quarter lower trim panel. Refer to Quarter Lower Rear Trim Panel Replacement (Quarter Lower Rear Trim Panel Replacement).
5. Install the upper center pillar trim panel. Refer to Center Pillar Upper Trim Panel Replacement (Center Pillar Upper Trim Panel Replacement).
6. Install the center lower trim panel. Refer to Center Pillar Lower Trim Panel Replacement (Center Pillar Lower Trim Panel Replacement).
7. Install the rear door sill plates. Refer to Front Side Door Sill Trim Plate Replacement (Front Side Door Sill Trim Plate Replacement).
8. Close the rear door.