Removal and Installation: Installation
WARNING: This page is about a different car, the 2018 Nissan Maxima. However, it is still accessible from the selected car via links, so may be relevant.
Installation is in the reverse order of removal.
CAUTION:
- Do not allow oil to get on mounting insulators.
- Be careful not to damage mounting insulators.
NOTE:
- Tighten transmission bolts to specification. Refer to Exploded View
.
- Install engine mounting insulator (LH) as follows:
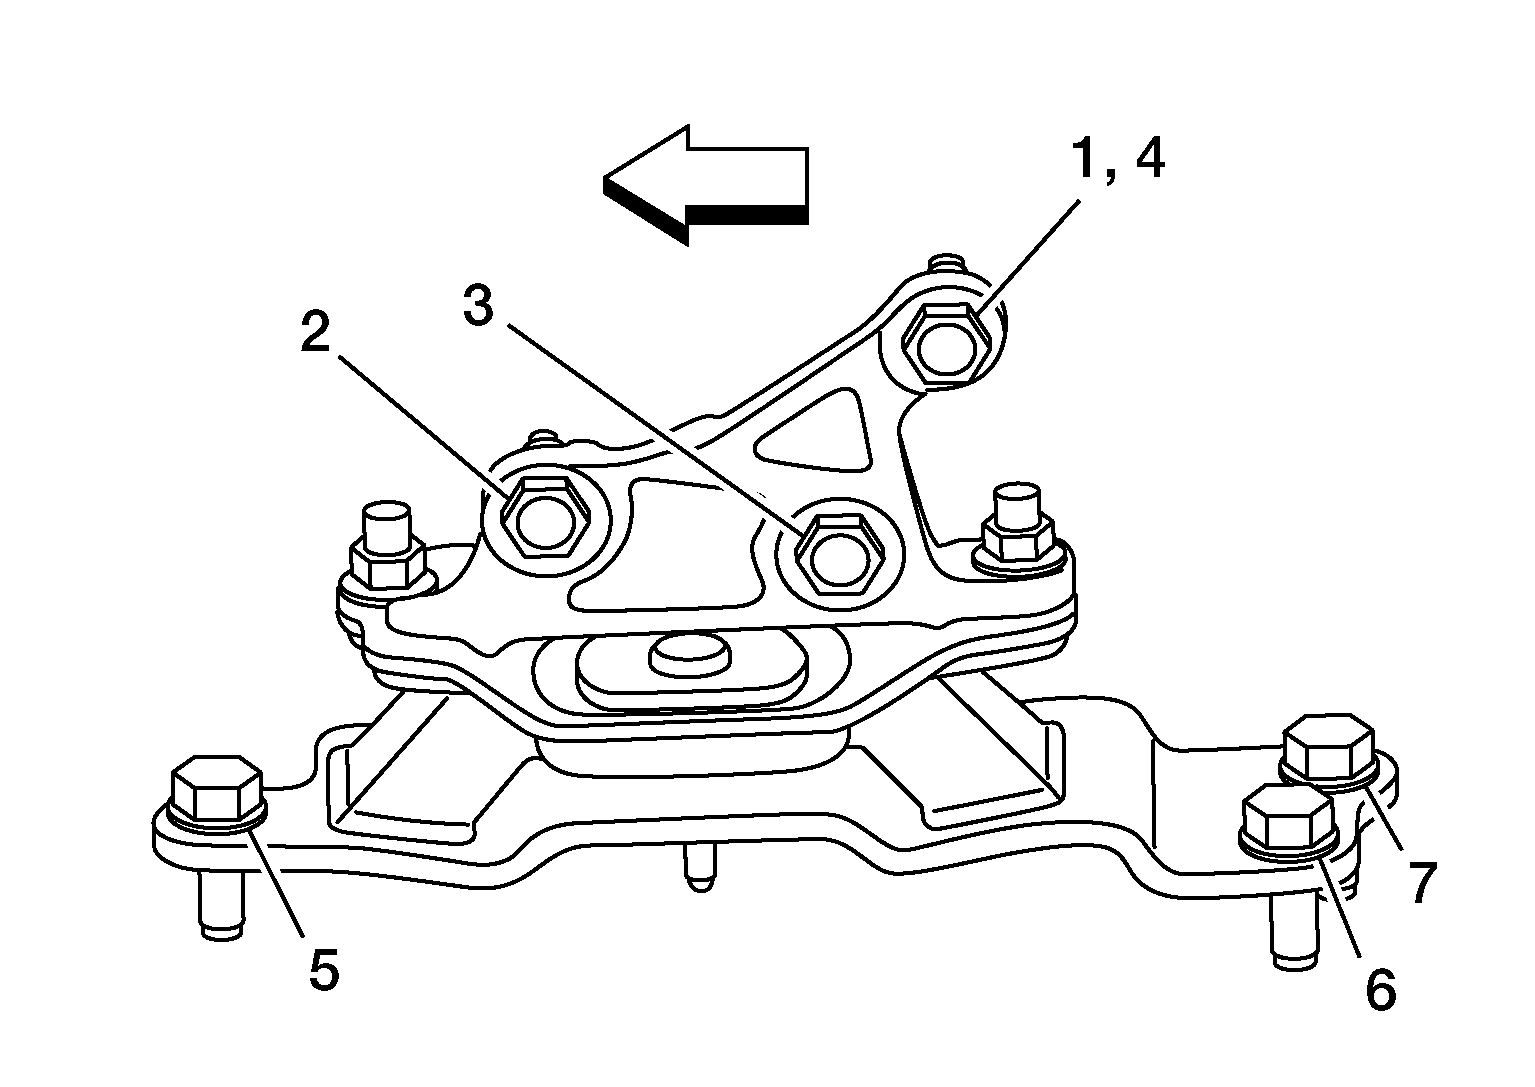 Courtesy of NISSAN NORTH AMERICA, INC.
- Temporarily tighten bolt located at position 1.
- Tighten the remaining bolts in sequence as shown above, to the specified torque.
|

|
: Front
|
|
Bolts
|
: 80 N.m (8.2 kg-m, 59 ft-lb)
|
- Install engine mounting bracket (rear) as follows:
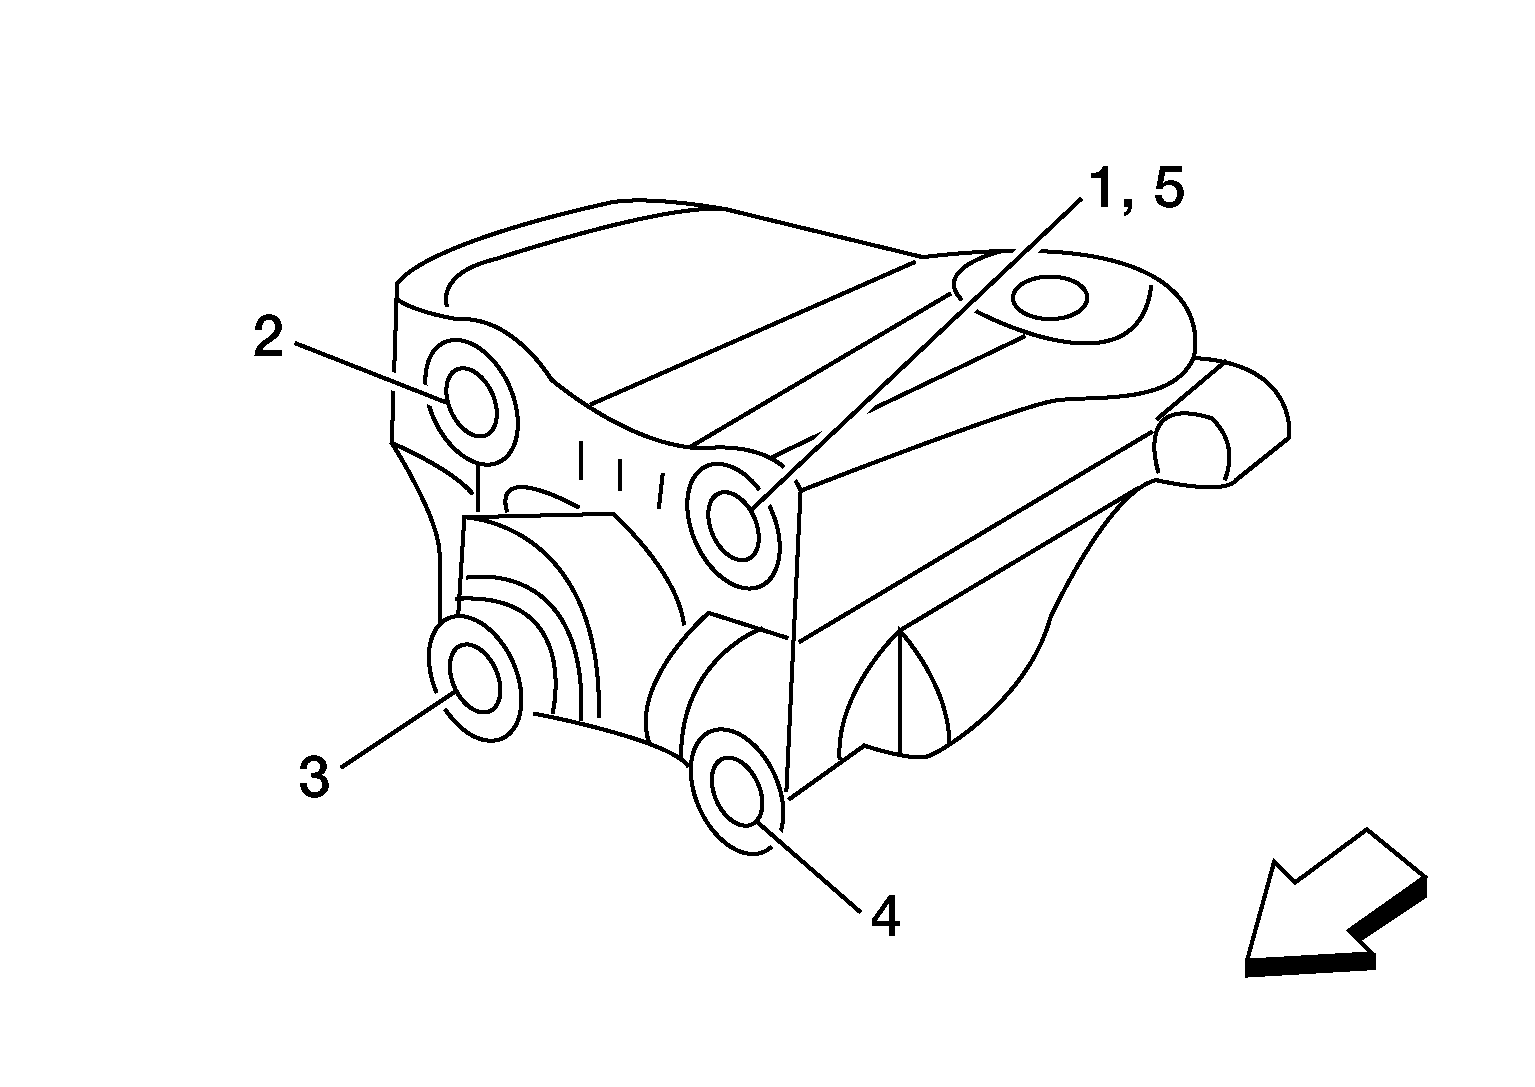 Courtesy of NISSAN NORTH AMERICA, INC.
- Temporarily tighten bolt located at position 1.
- Tighten the remaining bolts in sequence as shown above, to the specified torque.
|
|
: Front
|
|
Bolts
|
: 40 N.m (4.1 kg-m, 30 ft-lb)
|
- Install engine mounting bracket (front) as follows:
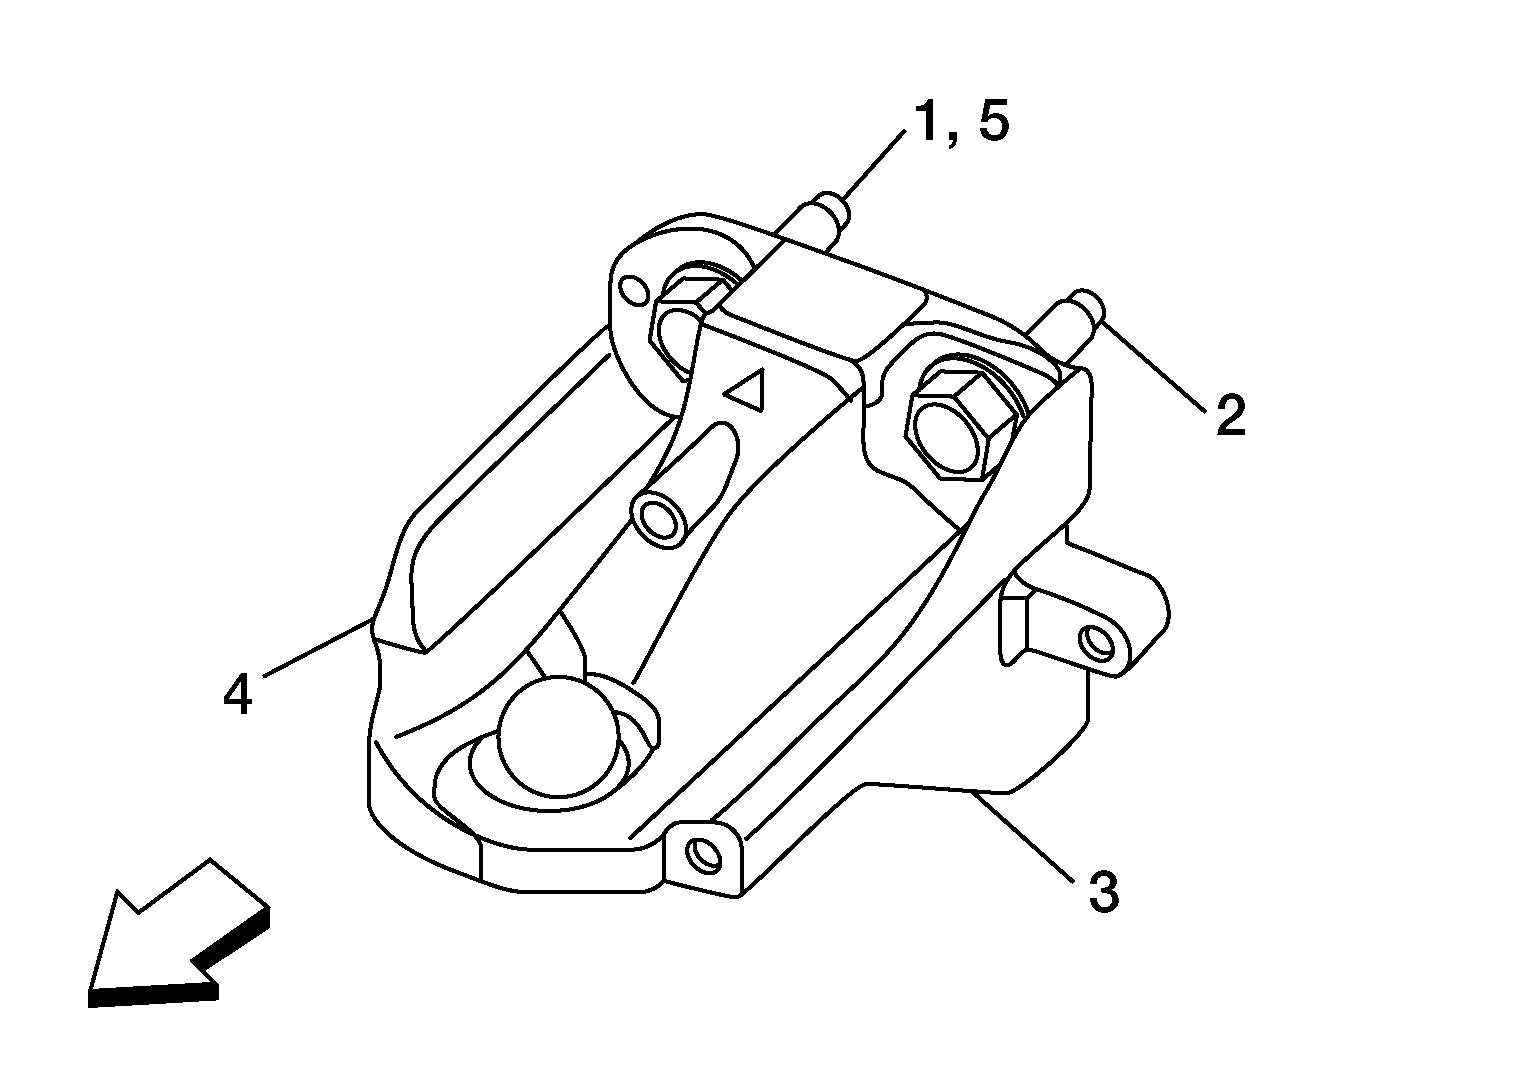 Courtesy of NISSAN NORTH AMERICA, INC.
- Temporarily tighten bolt located at position 1.
- Tighten the remaining bolts in sequence as shown above, to the specified torque.
|
|
: Front
|
|
Bolts
|
: 40 N.m (4.1 kg-m, 30 ft-lb)
|
- Install rear torque rod bracket as follows:
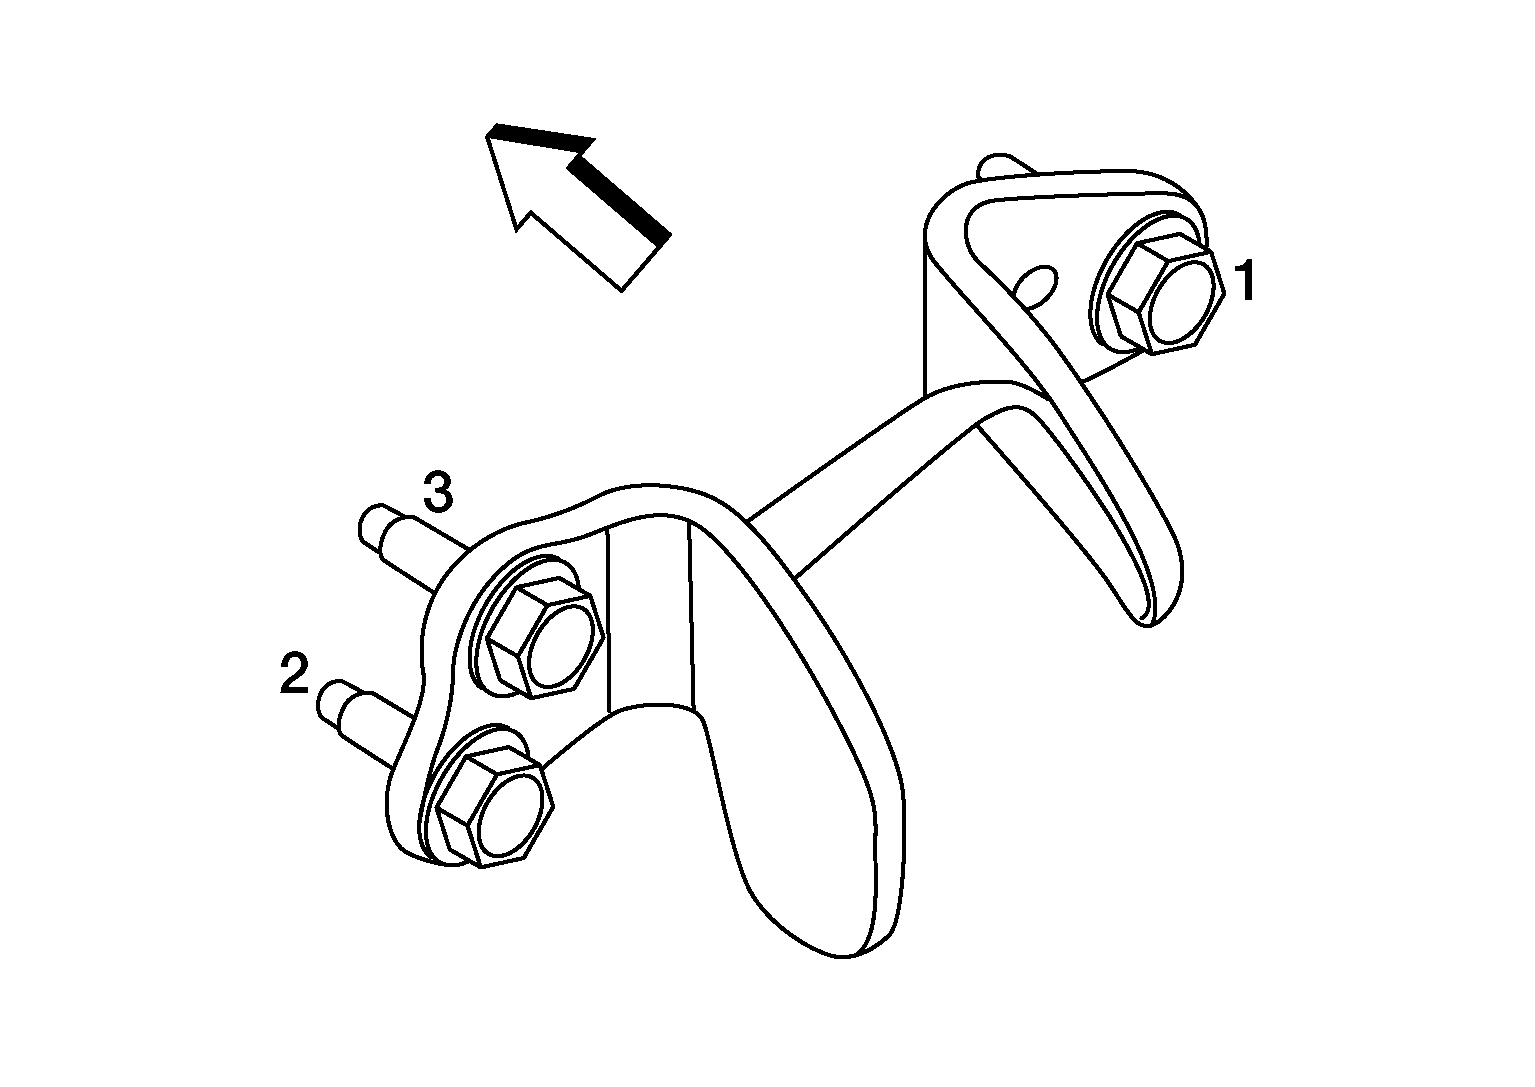 Courtesy of NISSAN NORTH AMERICA, INC.
- Tighten the bolts in sequence as shown above, to the specified torque.
|
|
: Front
|
|
Bolts
|
: 40 N.m (4.1 kg-m, 30 ft-lb)
|
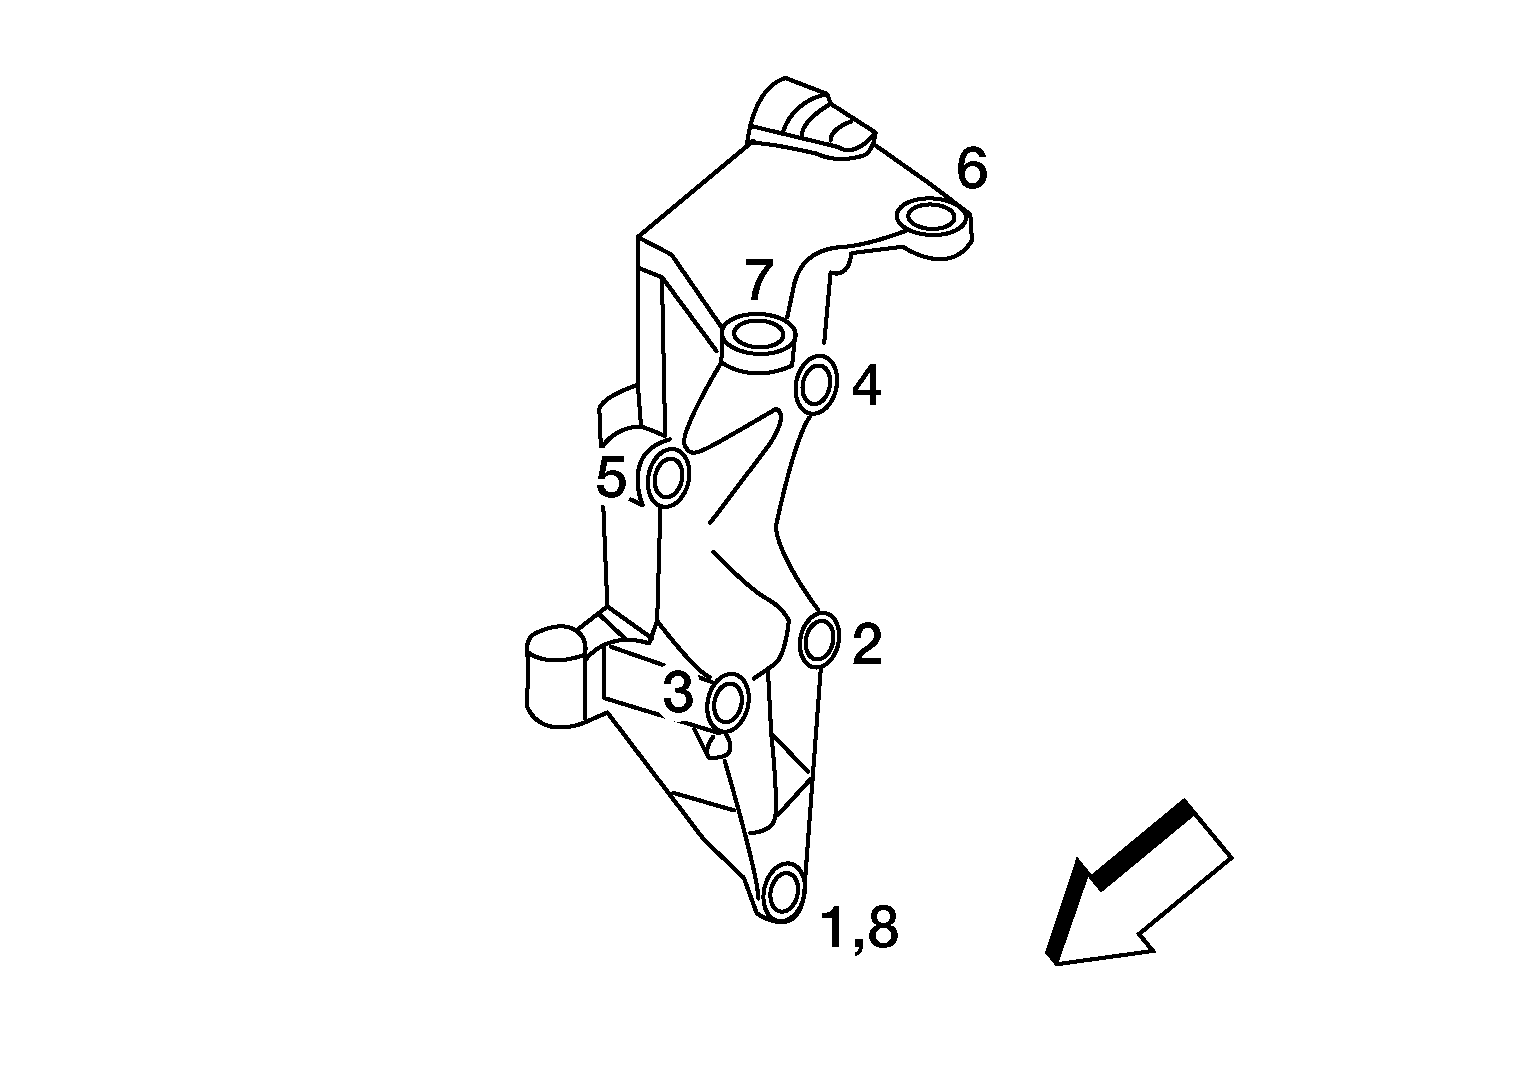
- Install engine mounting bracket (RH) as follows:
 Courtesy of NISSAN NORTH AMERICA, INC.
- Temporarily tighten bolt located at position 1.
- Tighten the remaining bolts in sequence as shown above, to the specified torque.
|
|
: Front
|
|
Bolts
|
: 90 N.m (9.2 kg-m, 66 ft-lb)
|
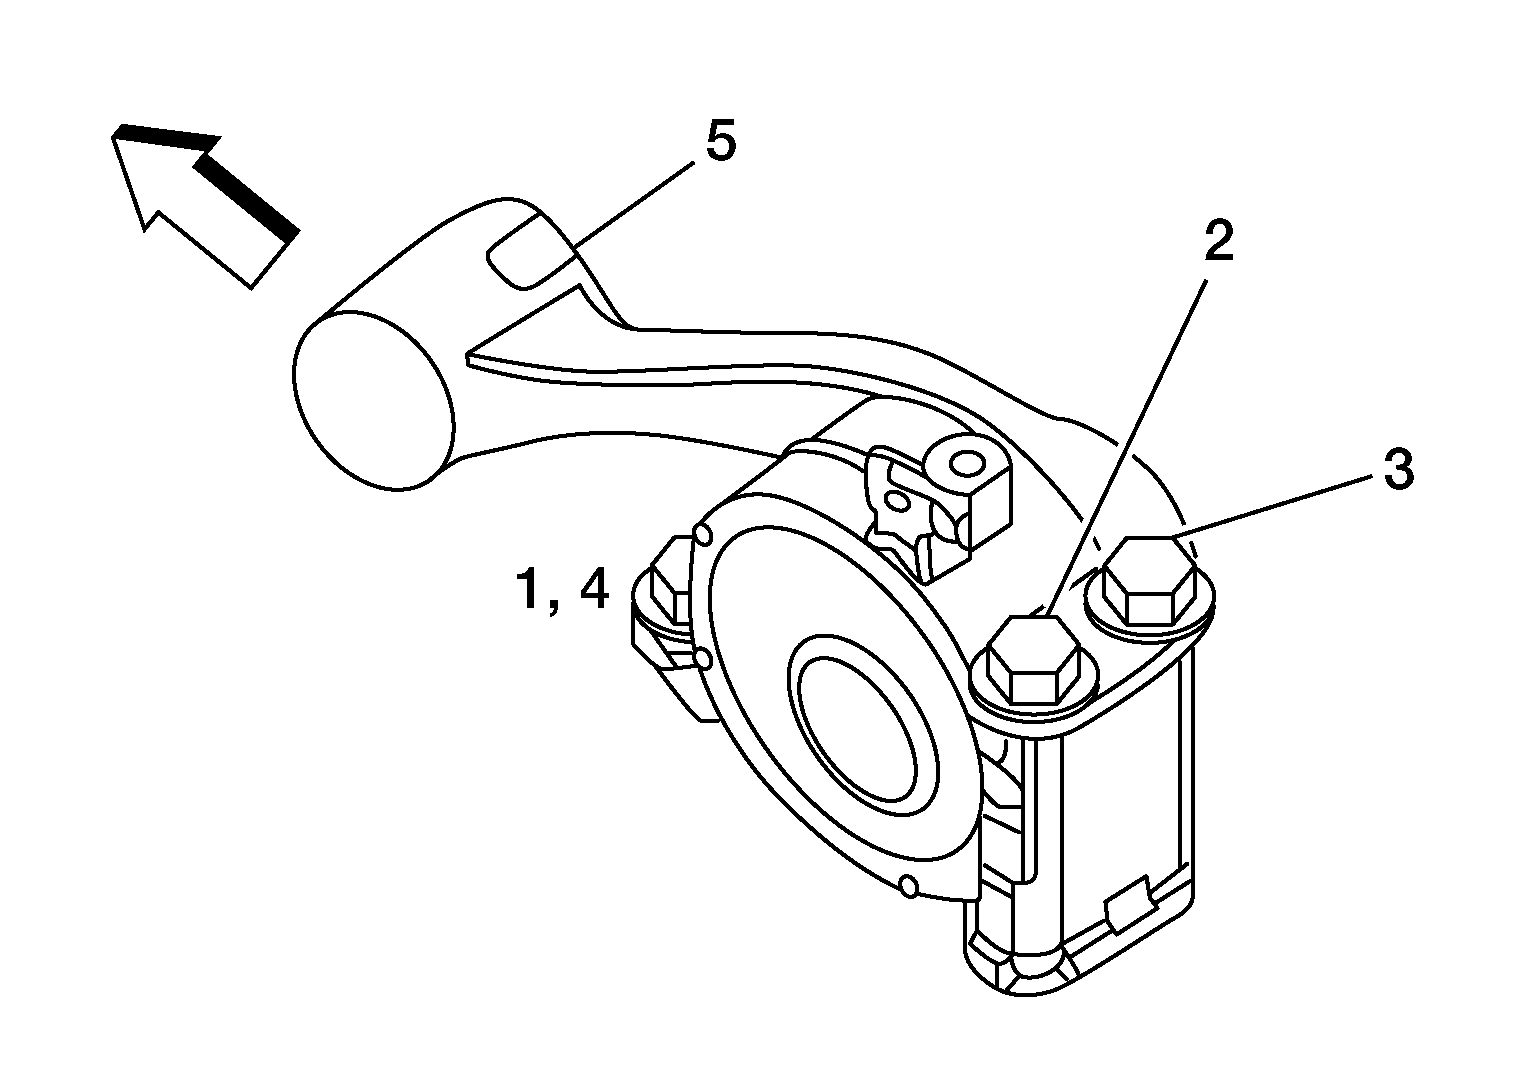
- Install rear torque rod as follows:
 Courtesy of NISSAN NORTH AMERICA, INC.
- Temporarily tighten bolt located at position 1.
- Tighten the remaining bolts in sequence as shown above, to the specified torque.
|
|
: Front
|
|
Bolts
|
Positions 2, 3
|
: 35 N.m (3.6 kg-m, 26 ft-lb)
|
|
Bolt
|
: Position 4
|
: 50 N.m (5.1 kg-m, 37 ft-lb)
|
|
Bolt
|
: Position 5
|
: 103 N.m (11 kg-m, 76 ft-lb)
|
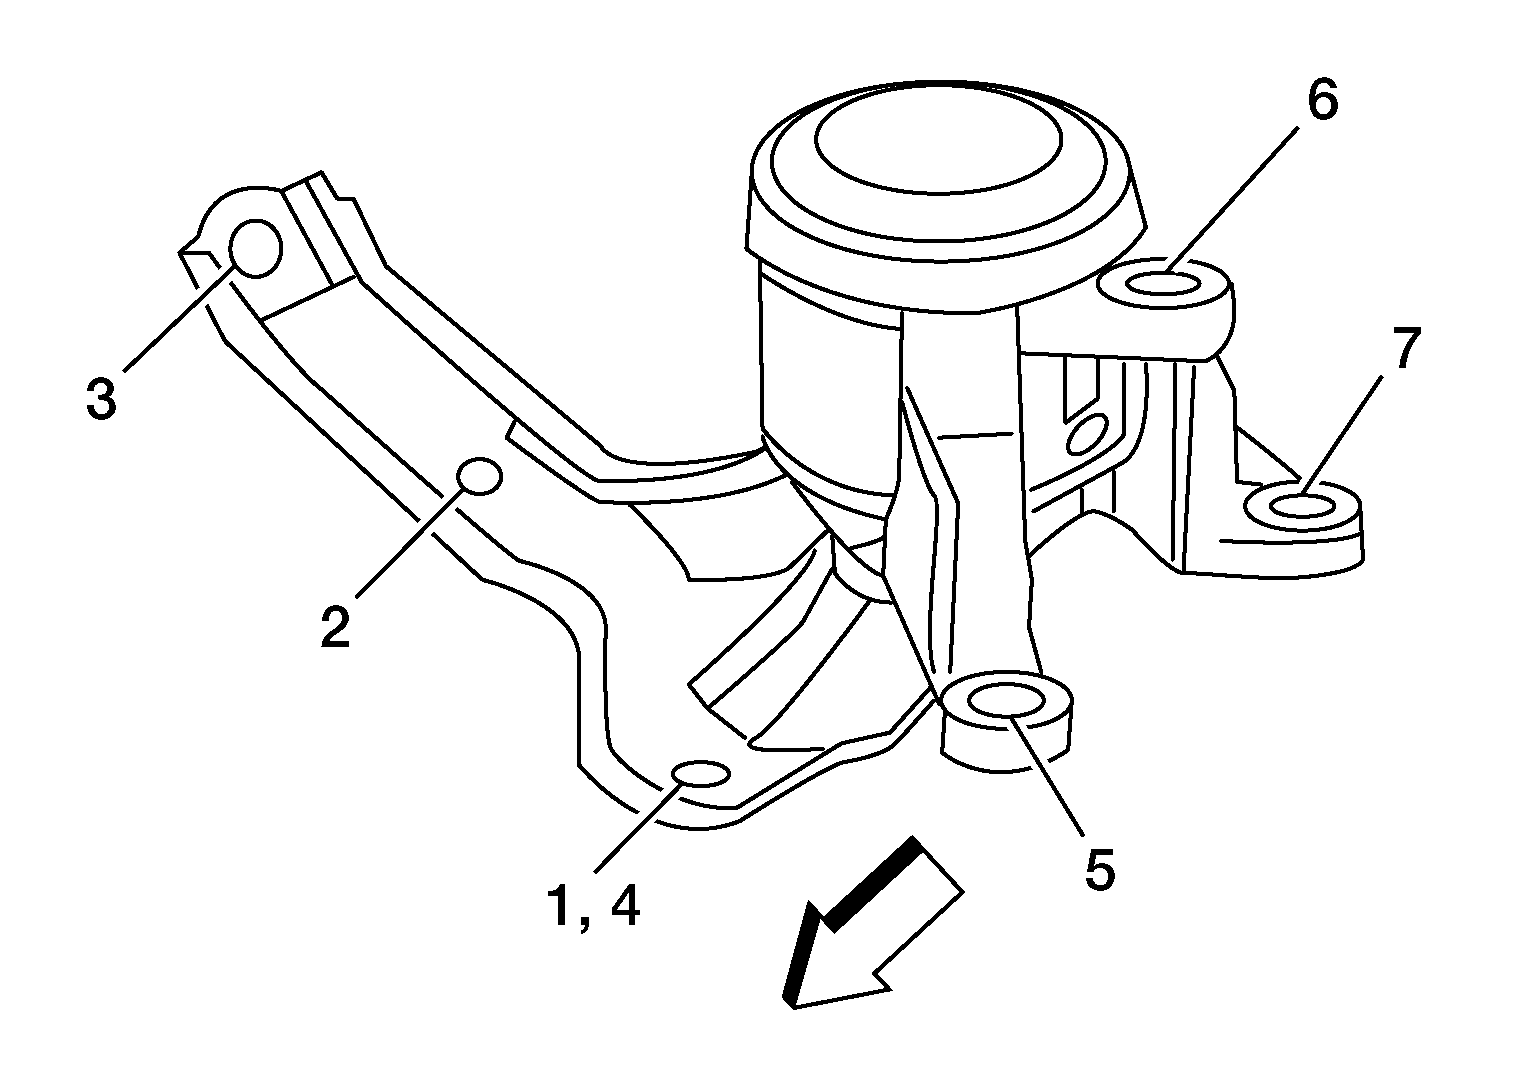
- Install engine mounting insulator (RH) as follows:
 Courtesy of NISSAN NORTH AMERICA, INC.
- Temporarily tighten bolt located at position 1.
- Tighten the remaining bolts in sequence as shown above, to the specified torque.
|
|
: Front
|
|
Nut and Bolts
|
: 50 N.m (5.1 kg-m, 37 ft-lb)
|
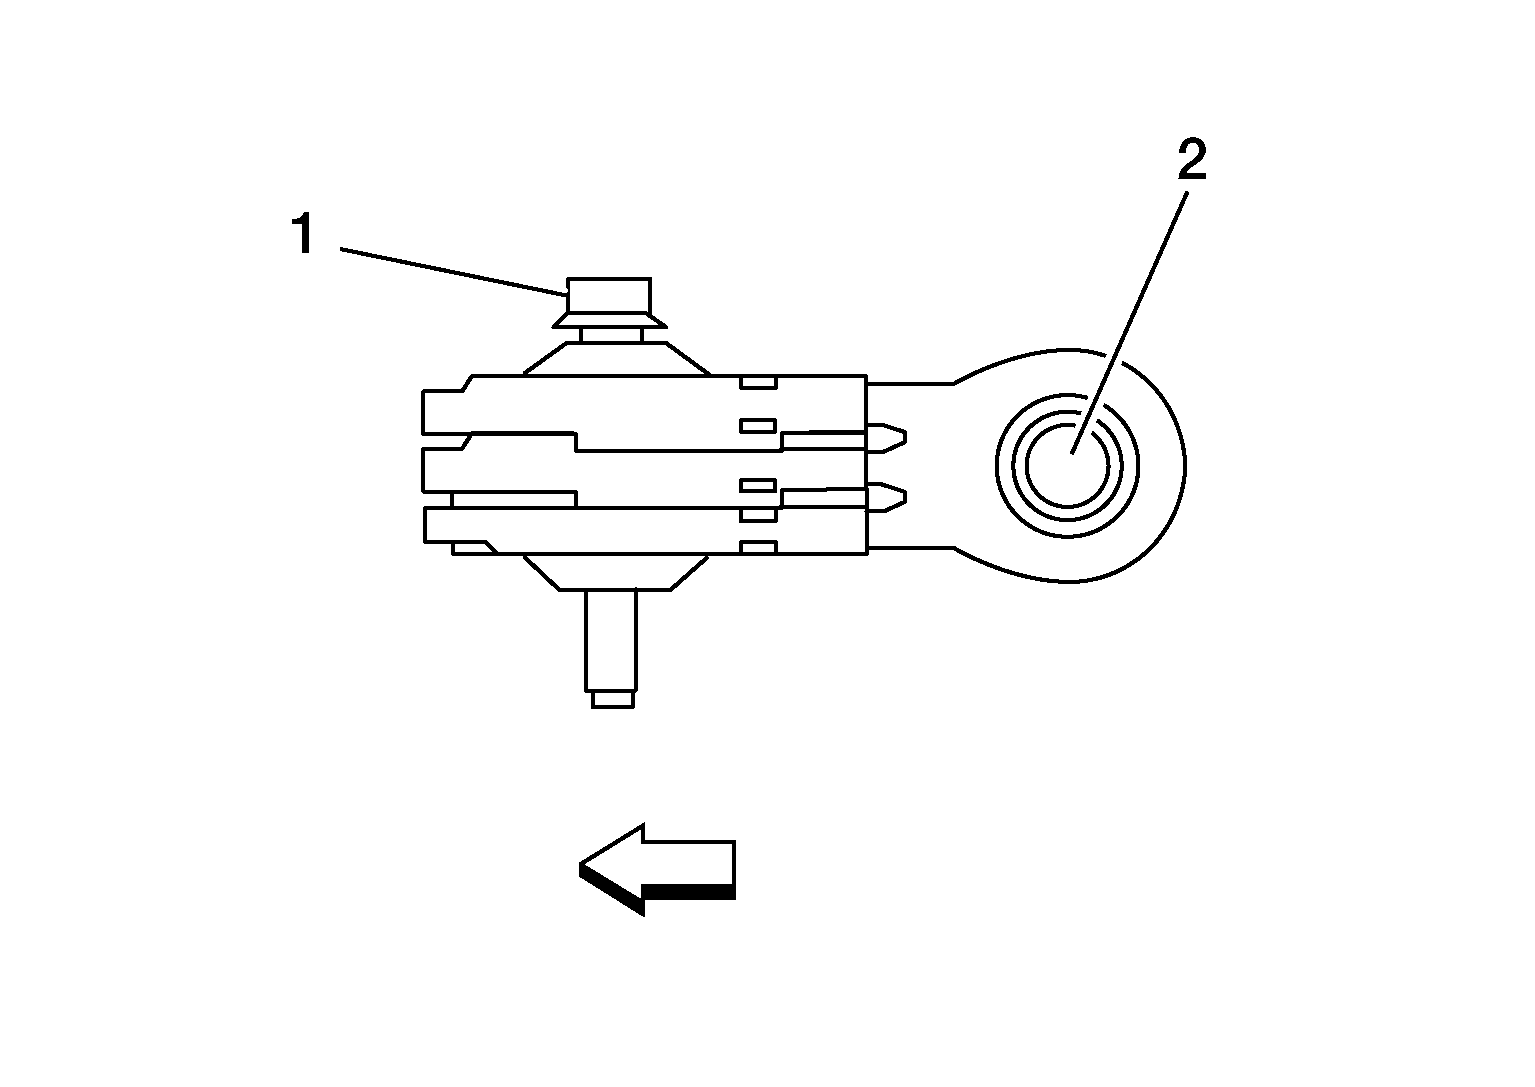
- Install upper torque rod as follows:
 Courtesy of NISSAN NORTH AMERICA, INC.
- Tighten the bolts in sequence as shown above, to the specified torque.
|
|
: Front
|
|
Bolts
|
: 85 N.m (8.7 kg-m, 63 ft-lb)
|