Removal and Installation: Removal
- Remove shift knob (6MT models). Refer to
"EXPLODED VIEW
".
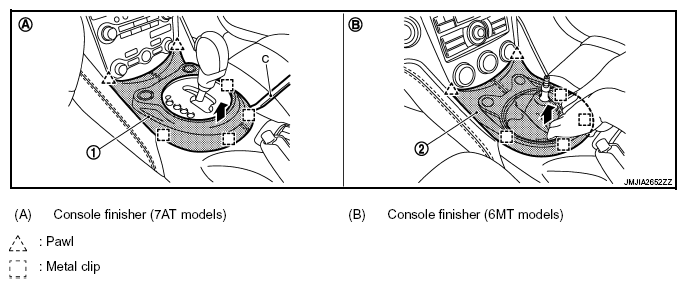
- Remove console finisher assembly.
 Courtesy of NISSAN MOTOR CO., U.S.A.
- 7AT models
- Insert remover tool (A) between console finisher (1) and center console, lift up console finisher, and then disengage metal clips and pawls.
- Disconnect harness connectors.
- 6MT models
- Pull up console finisher (2), and then disengage metal clips and pawls.
- Disconnect harness connector.
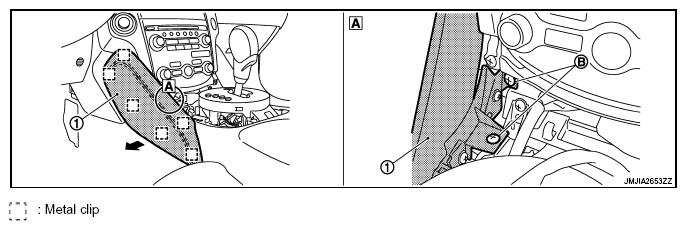
- Remove console panel LH.
 Courtesy of NISSAN MOTOR CO., U.S.A.
- Remove console panel LH (1) fixing screws (B).
- Pull the console panel LH crosswise.
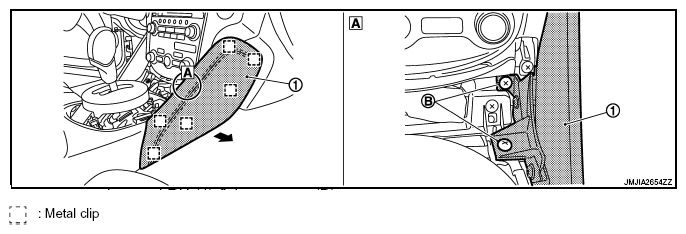
- Remove console panel RH.
 Courtesy of NISSAN MOTOR CO., U.S.A.
- Remove console panel RH (1) fixing screws (B).
- Pull the console panel RH crosswise.
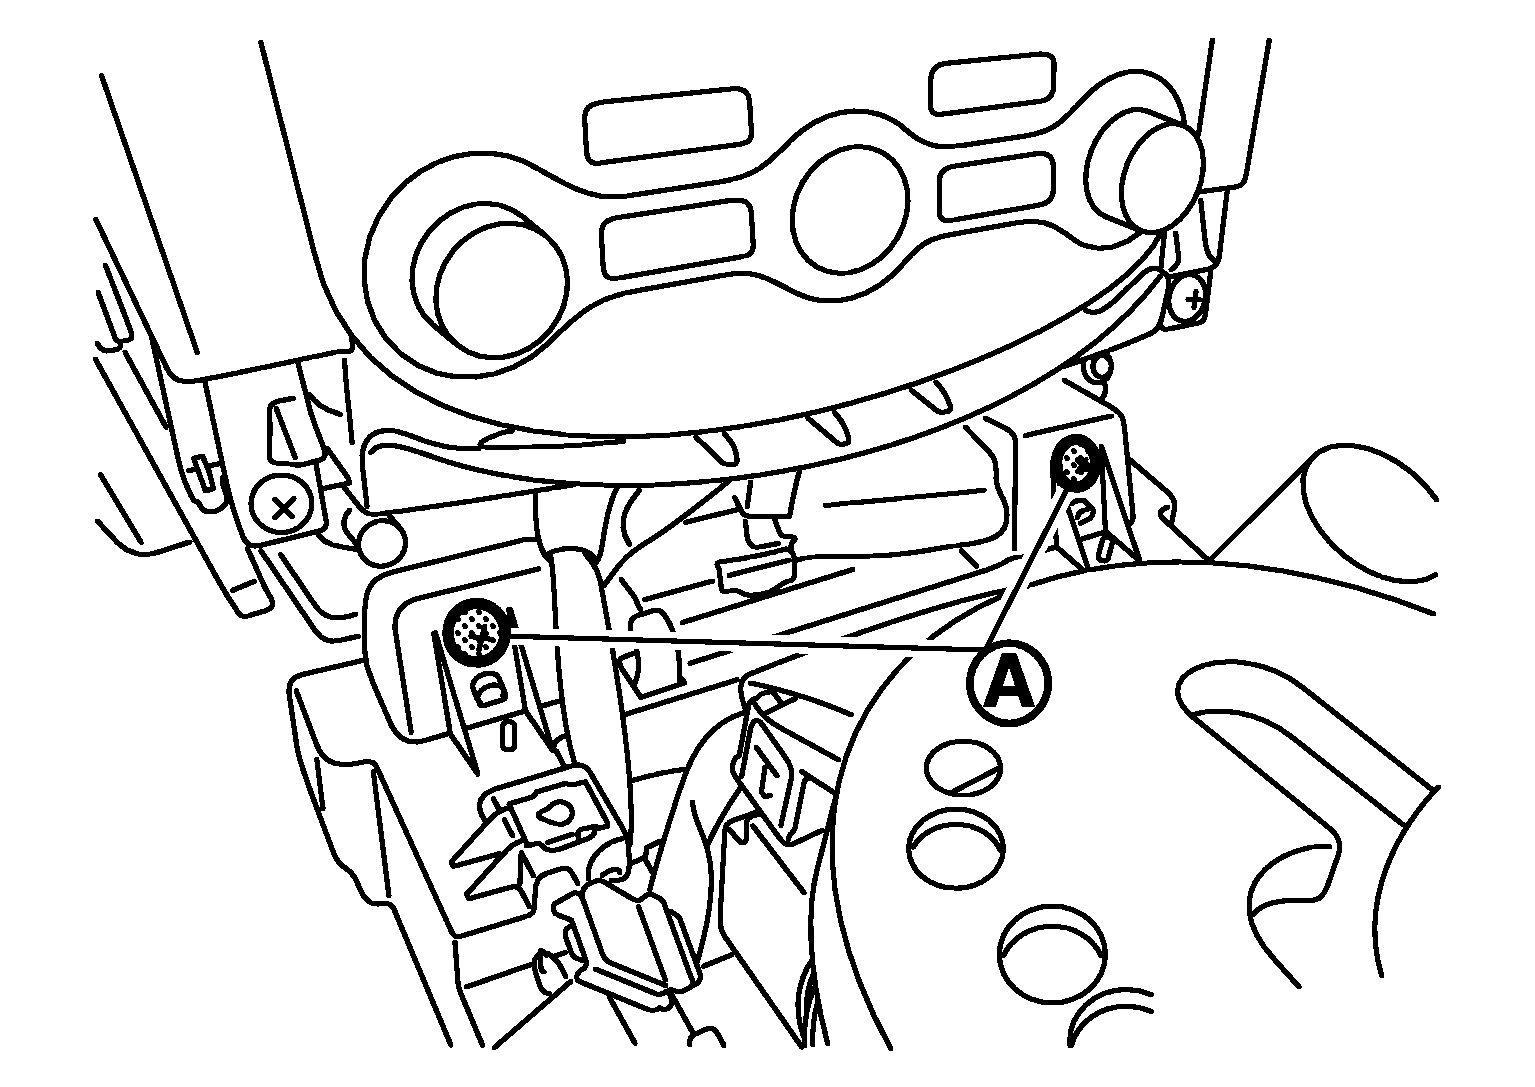
- Remove center console fixing screws (A).
 Courtesy of NISSAN MOTOR CO., U.S.A.
- Disconnect console sub-harness connectors (A) and (B).
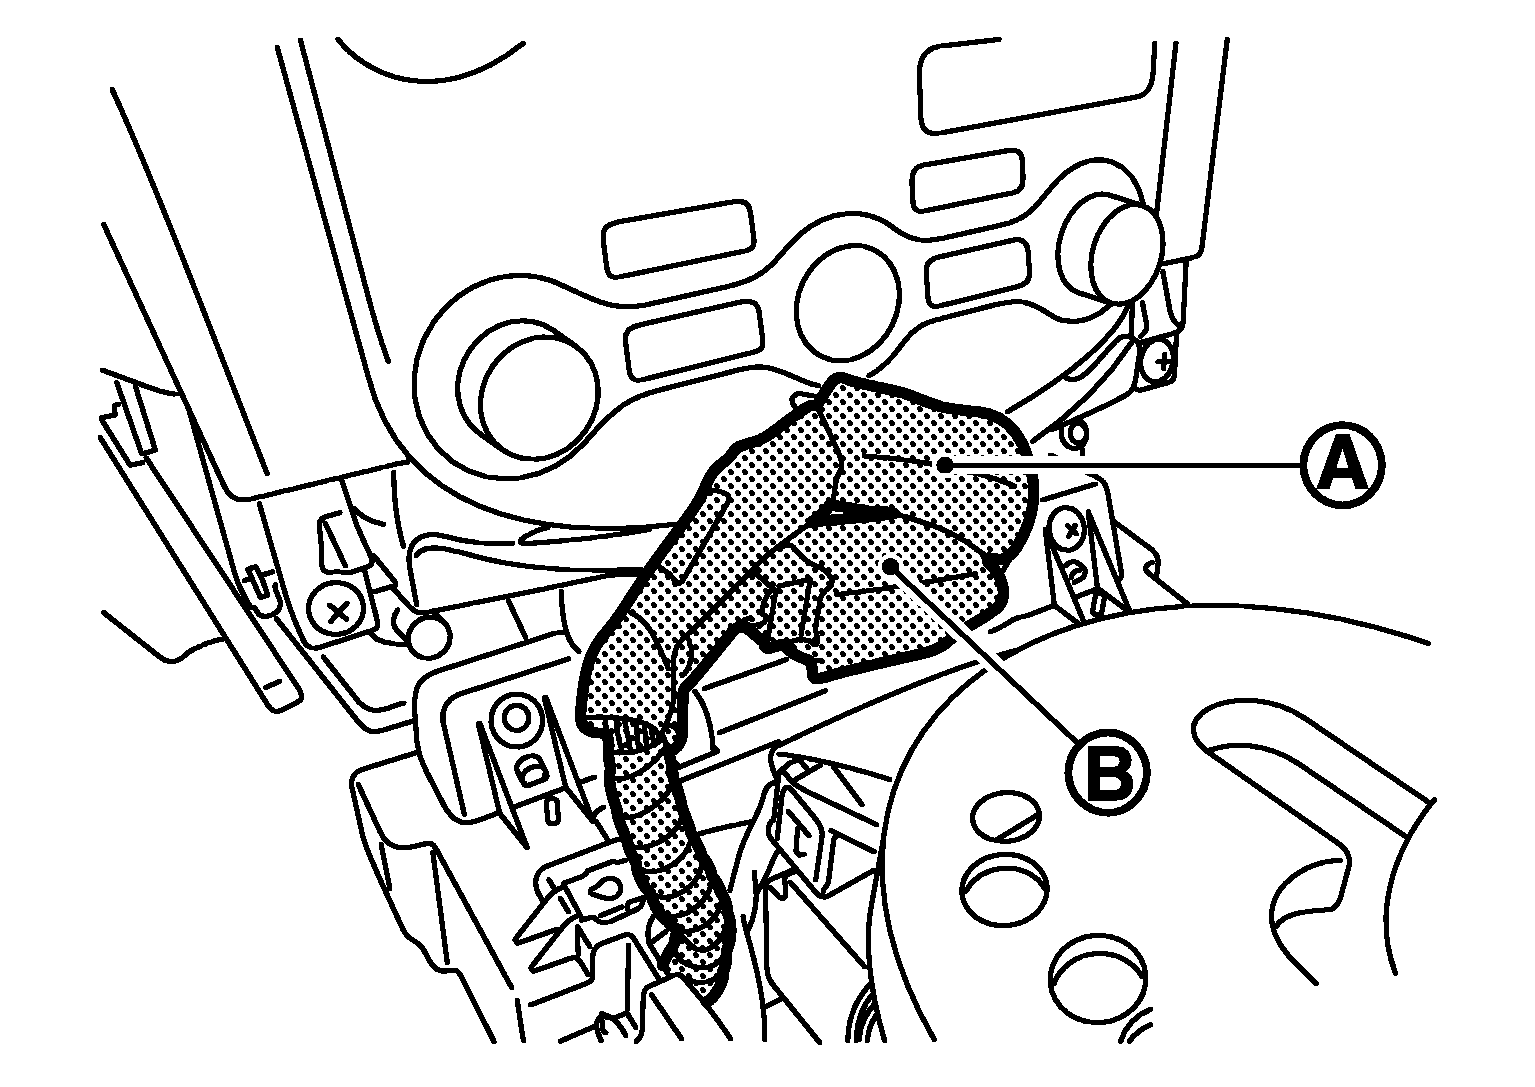 Courtesy of NISSAN MOTOR CO., U.S.A.
- Remove cup holder assembly.
- Pull up cup holder assembly (1).
- Disconnect harness connectors.
- Remove harness clip.
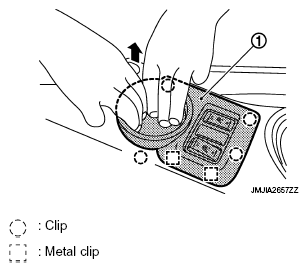 Courtesy of NISSAN MOTOR CO., U.S.A.
- Disconnect iPod adapter harness connector (A). (with iPod adapter)
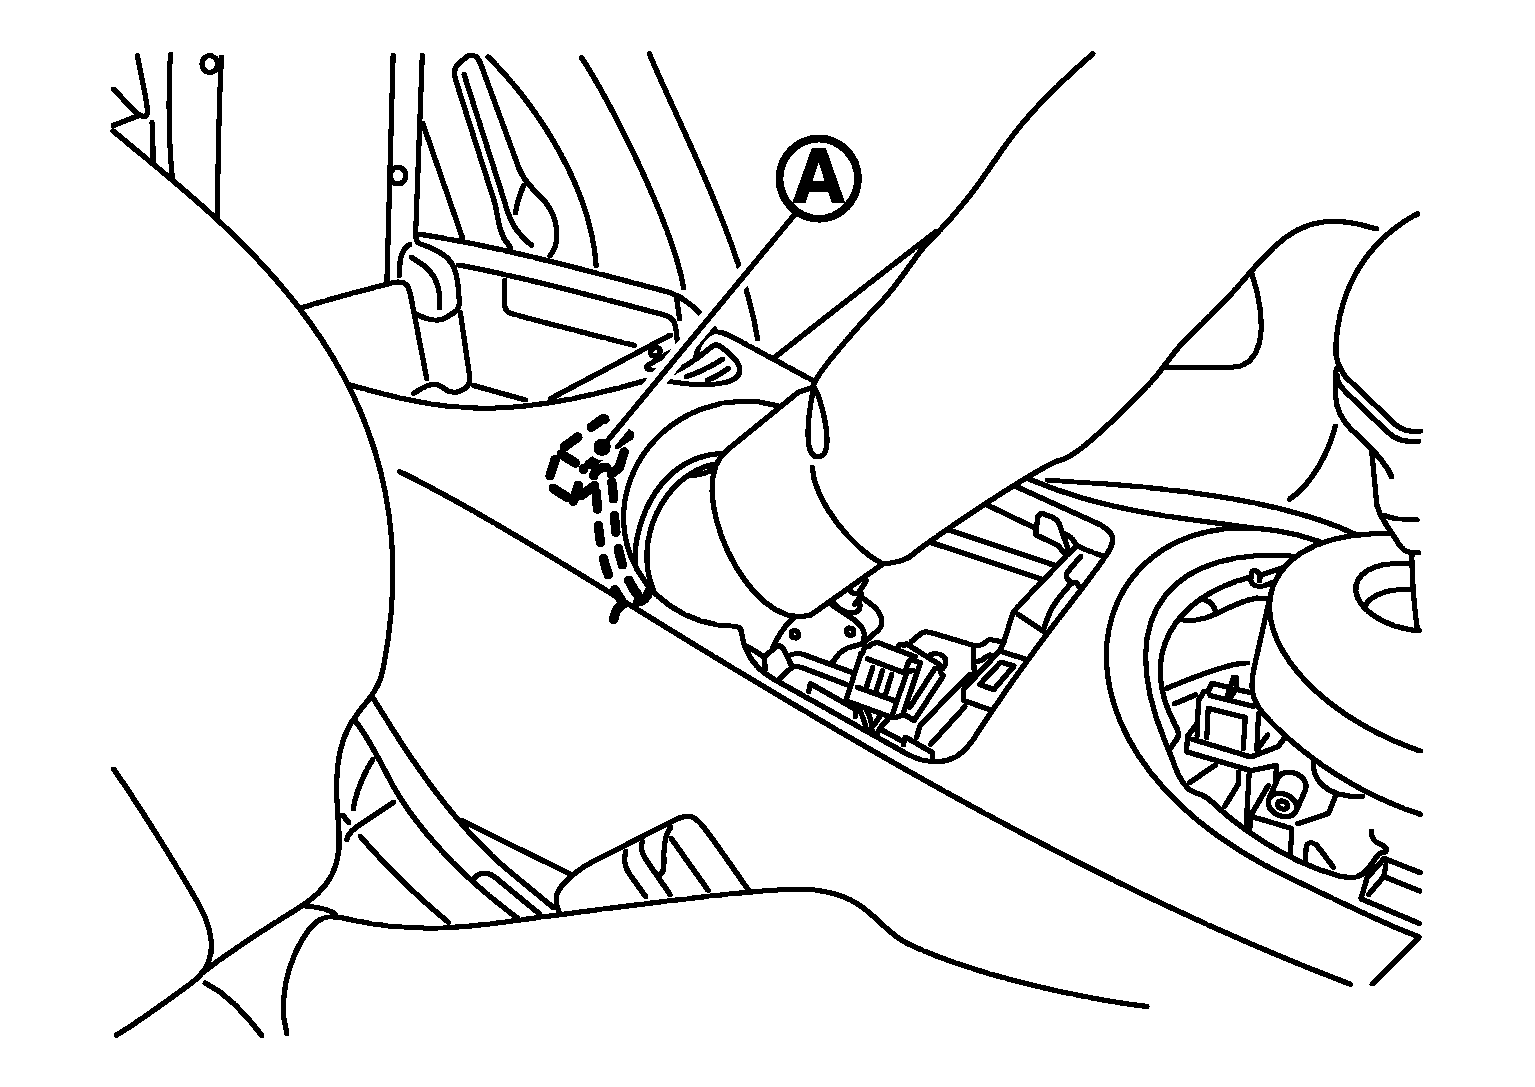 Courtesy of NISSAN MOTOR CO., U.S.A.
- Insert a deep-well socket wrench (A) to rotate adjusting nut to loosen cable sufficiently.
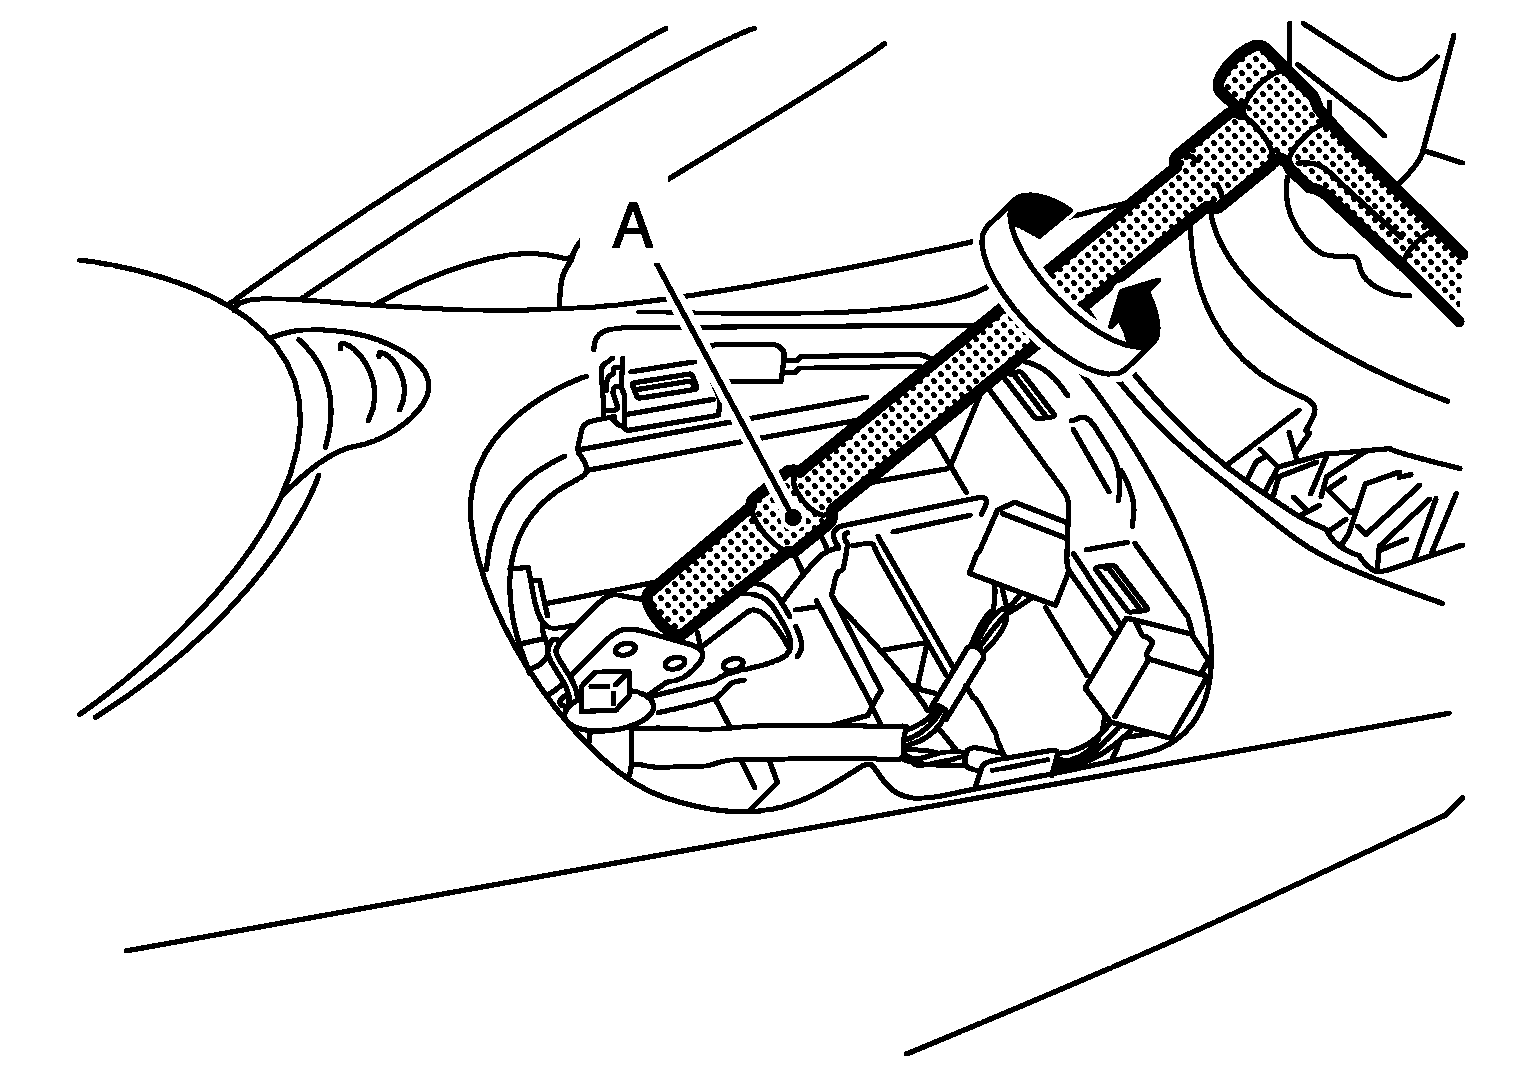 Courtesy of NISSAN MOTOR CO., U.S.A.
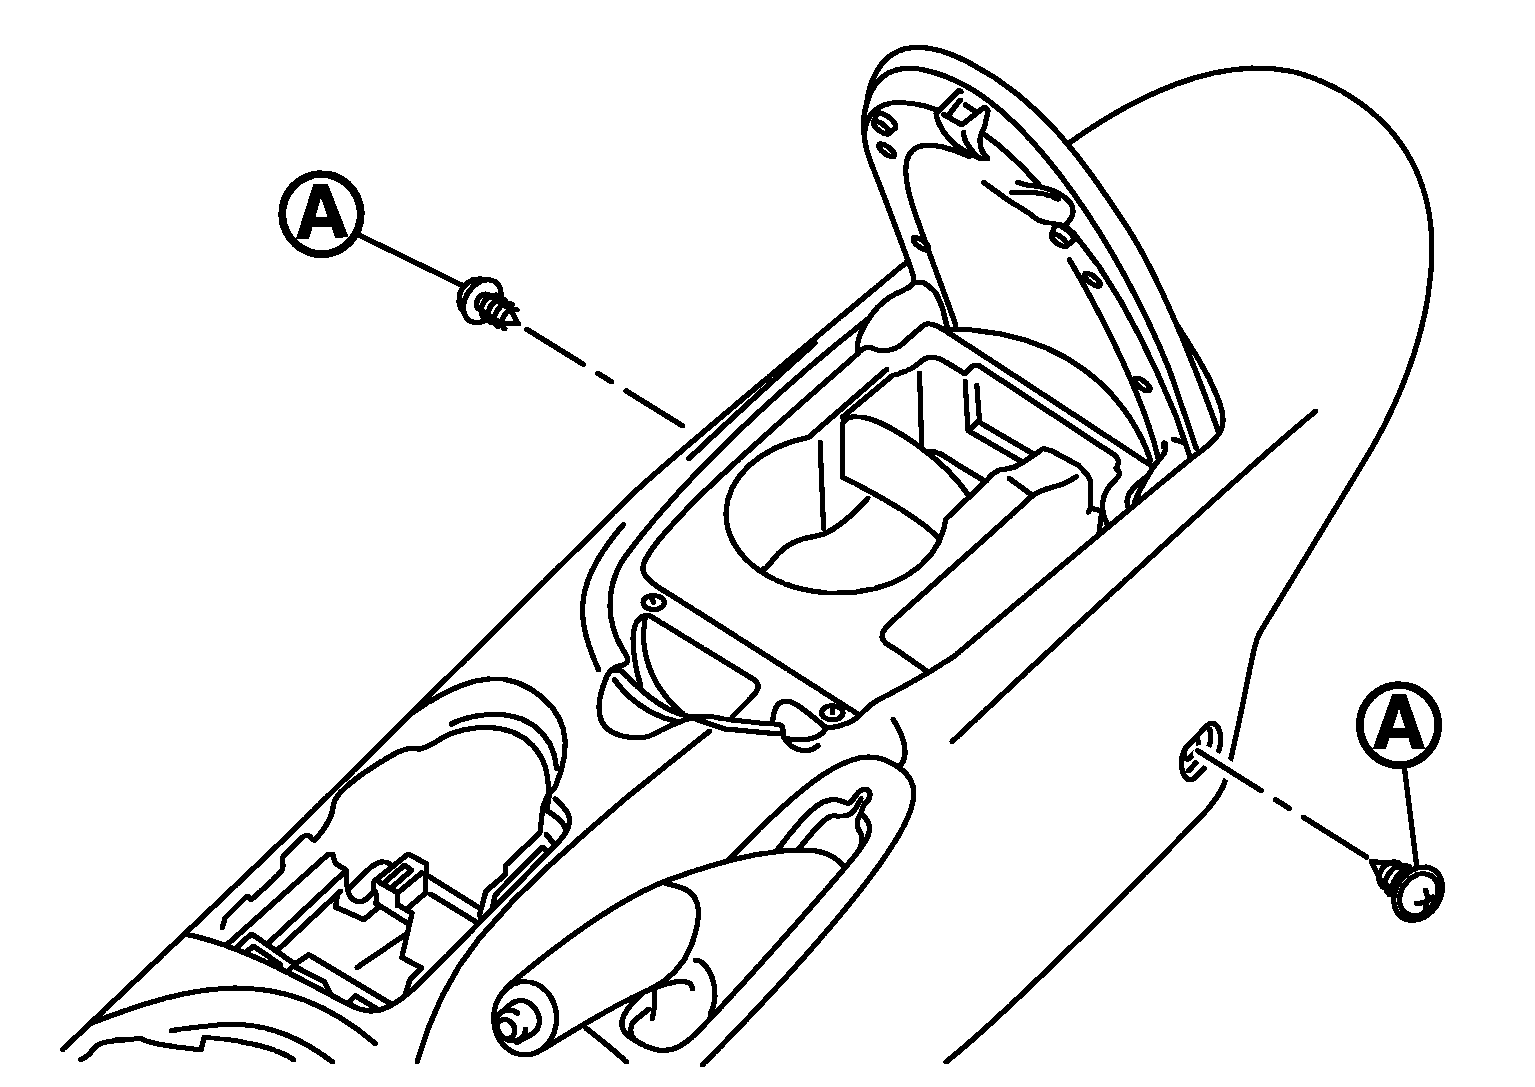
- Remove center console assembly.
- Put seat assembly (LH/RH) to the front-most position.
- Remove center console fixing screws (A).
- Put seat assembly (LH/RH) to the rear-most position.
- Lift up center console assembly back side, and then remove center console assembly.
 Courtesy of NISSAN MOTOR CO., U.S.A.