B-Pillar Upper Trim Removal/Installation
- Remove the following parts:
- Front scuff plate (See FRONT SCUFF PLATE REMOVAL/INSTALLATION .)
- Rear scuff plate (See REAR SCUFF PLATE REMOVAL/INSTALLATION .)
- B-pillar lower trim (See B-PILLAR LOWER TRIM REMOVAL/INSTALLATION .)
- Adjust anchor cover on the front seat belt (See FRONT SEAT BELT REMOVAL/INSTALLATION
.)
- Upper anchor installation bolt on the front seat belt (See FRONT SEAT BELT REMOVAL/INSTALLATION
.)
- Partially peel back the seaming welts.
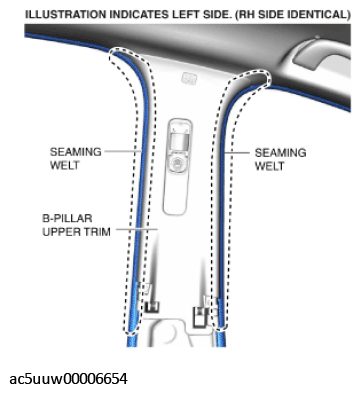 Courtesy of MAZDA MOTORS CORP.
- Hold the shaded areas shown in the figure and while pulling the B-pillar upper trim in the direction of arrow (1), remove the clips, pin A, and pin B.
CAUTION:
- If the B-pillar upper trim is pulled forcibly when removing the clips, pin A, and pin B, the guide could be damaged. When pulling the B-pillar upper trim in the direction of arrow (1), be careful not to damage the guide.
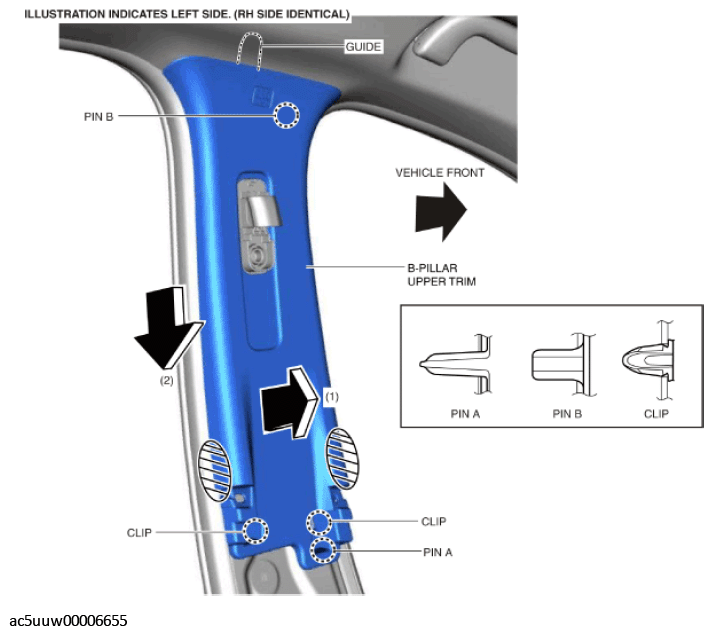 Courtesy of MAZDA MOTORS CORP.
- Pull the B-pillar upper trim in the direction of arrow (2) shown in the figure, and remove it while pulling out the guide.
- Install in the reverse order of removal.