Rear Door Module Panel Removal/Installation
- Fully lower the rear door glass.
- Disconnect the negative battery terminal. (See NEGATIVE BATTERY TERMINAL DISCONNECTION/CONNECTION
.)
- Remove the following parts:
- Rear door trim (See REAR DOOR TRIM REMOVAL/INSTALLATION
.)
- Rear door speaker (See REAR DOOR SPEAKER REMOVAL/INSTALLATION
.)
- Rear door glass (See REAR DOOR GLASS REMOVAL/INSTALLATION
.)
NOTE:
- After removing the rear door trim, secure the inner handle using screws so that the procedure is performed smoothly.
- Remove the fastener.
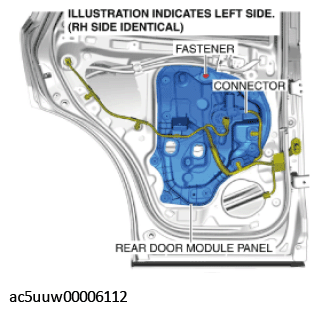 Courtesy of MAZDA MOTORS CORP.
- Disconnect the connector.
- Remove the screws.
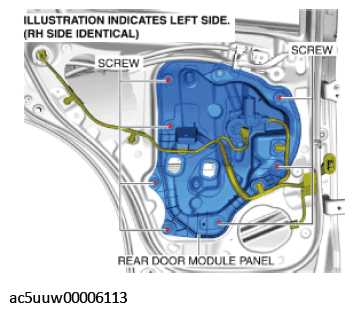 Courtesy of MAZDA MOTORS CORP.
- Move the rear door module panel in the direction of the arrow shown in the figure and remove the pin from the rear door inner panel.
CAUTION:
- If the protector does not come out easily from the rear door inner panel, pulling the rear door module panel forcibly may cause the rear door module panel to deform. If the protector does not come out easily, remove the rear door module panel while gradually removing the adhered protector.
- If the rear power window regulator contacts the rear door inner panel during the rear door module panel removal, the coating film on the rear door inner panel may get scratched, or the rear door module panel and rear power window regulator could be damaged. Remove the rear door module panel while verifying that the rear power window regulator and the rear door inner panel do not contact each other.
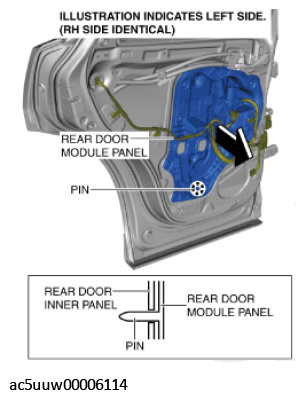 Courtesy of MAZDA MOTORS CORP.
- Remove the wiring harness clips.
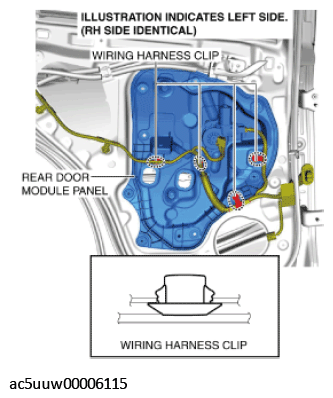 Courtesy of MAZDA MOTORS CORP.
- Move the rear door module panel in the direction of the arrow shown in the figure so that the upper part of the rear power window regulator does not contact the rear door inner panel, and remove the rear door module panel and the rear power window regulator as a single unit.
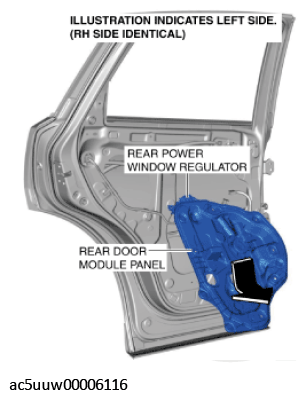 Courtesy of MAZDA MOTORS CORP.
- Remove the rear power window motor. (See REAR POWER WINDOW MOTOR REMOVAL/INSTALLATION
.)
- Remove the rear power window regulator. (See REAR POWER WINDOW REGULATOR REMOVAL/INSTALLATION
.)
- Install in the reverse order of removal.