Front Door Removal/Installation
- Disconnect the negative battery terminal. (See NEGATIVE BATTERY TERMINAL DISCONNECTION/CONNECTION
.)
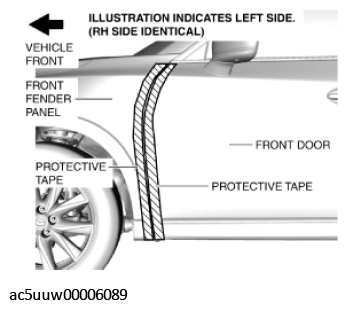
- To prevent scratches or damage, apply protective tape to the positions shown in the figure.
 Courtesy of MAZDA MOTORS CORP.
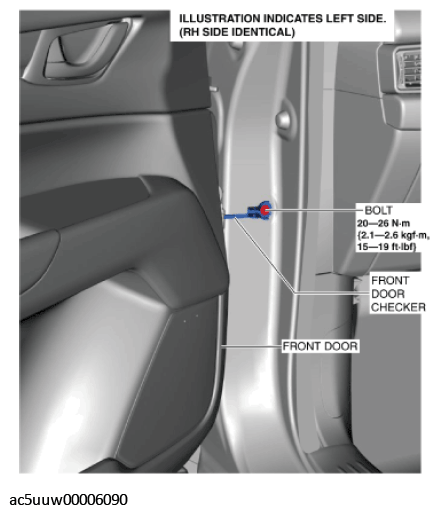
- Remove the bolt.
 Courtesy of MAZDA MOTORS CORP.
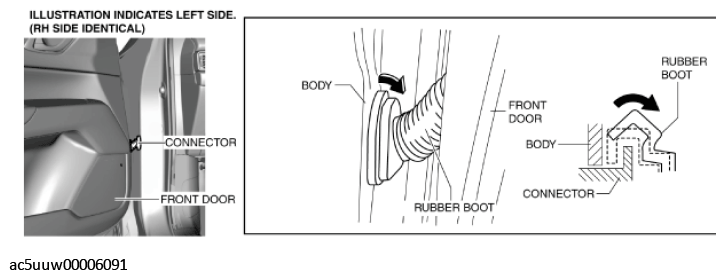
- Partially peel back the rubber boot in the direction of the arrow shown in the figure and remove it from the connector.
 Courtesy of MAZDA MOTORS CORP.
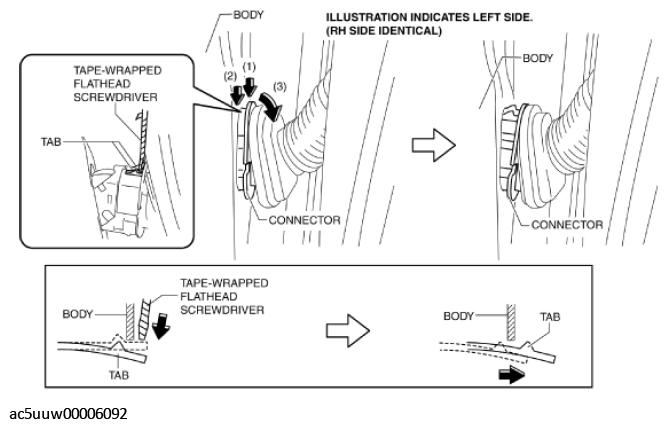
- Using a tape-wrapped flathead screwdriver, remove the upper part of the connector from the body in the direction of arrow (3) shown in the figure while pressing the tabs in the direction of arrows (1) and (2).
 Courtesy of MAZDA MOTORS CORP.
- Using a tape-wrapped flathead screwdriver, move the connector in the direction of arrow (2) shown in the figure and detach the tab from the body while pressing the tab in the direction of arrow (1).
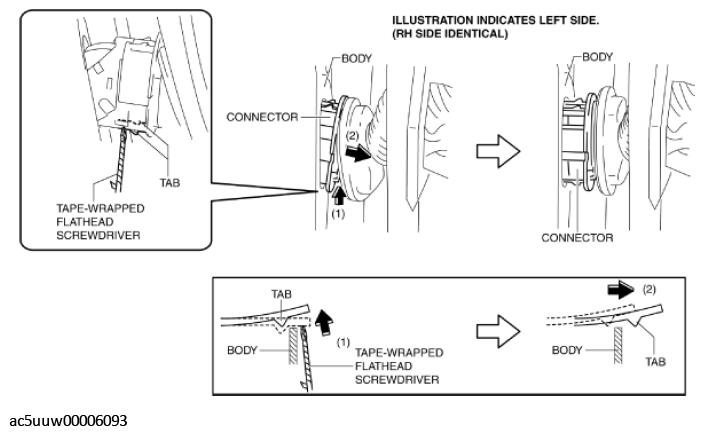 Courtesy of MAZDA MOTORS CORP.
- Lower the lever in the direction of arrow (1), and disconnect the connector in the direction of arrow (2).
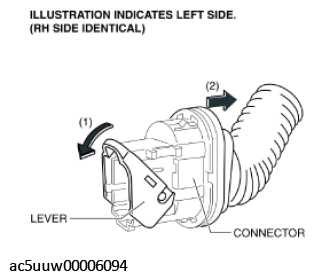 Courtesy of MAZDA MOTORS CORP.
- Remove the bolt.
WARNING:
- Removing the front door without supporting it could cause the front door to fall and cause serious injury. Always perform the procedure with at least one other person to prevent the front door from falling.
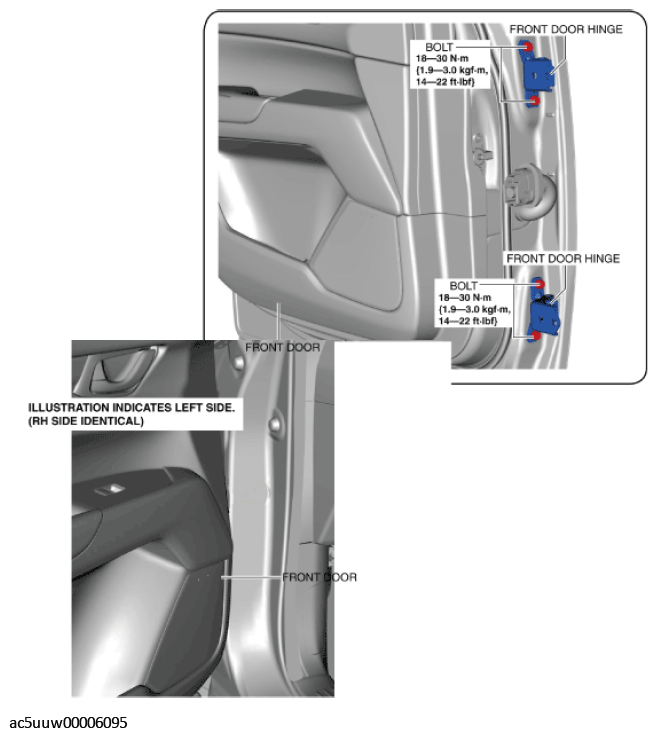 Courtesy of MAZDA MOTORS CORP.
- Remove the front door.
- Install in the reverse order of removal.
- Adjust the front door. (See DOOR ADJUSTMENT .)