Rear Door Latch And Lock Actuator Removal/Installation
- Fully close the rear door glass.
- Disconnect the negative battery terminal. (See NEGATIVE BATTERY TERMINAL DISCONNECTION/CONNECTION
.)
- Remove the following parts:
- Rear door trim (See REAR DOOR TRIM REMOVAL/INSTALLATION
.)
- Rear inner handle (See INNER HANDLE REMOVAL/INSTALLATION .)
- Rear outer handle bracket (See REAR OUTER HANDLE REMOVAL/INSTALLATION .)
- Disconnect the connector.
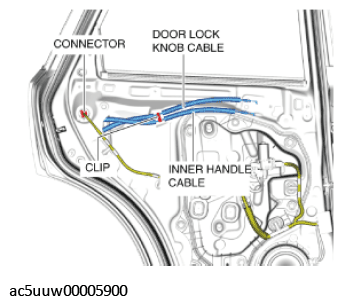 Courtesy of MAZDA MOTORS CORP.
- Remove the door lock knob cable and the inner handle cable from the clip.
- Remove the screws.
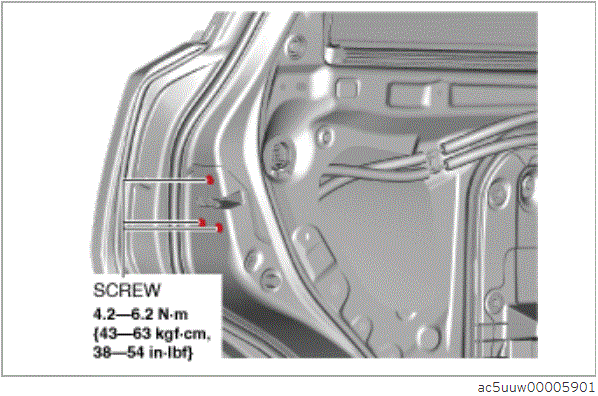 Courtesy of MAZDA MOTORS CORP.
- Tilt the rear door latch and lock actuator in the direction of arrow (1) shown in the figure and lift it in the direction of arrow (2) to detach the hook of the rear door latch and lock actuator.
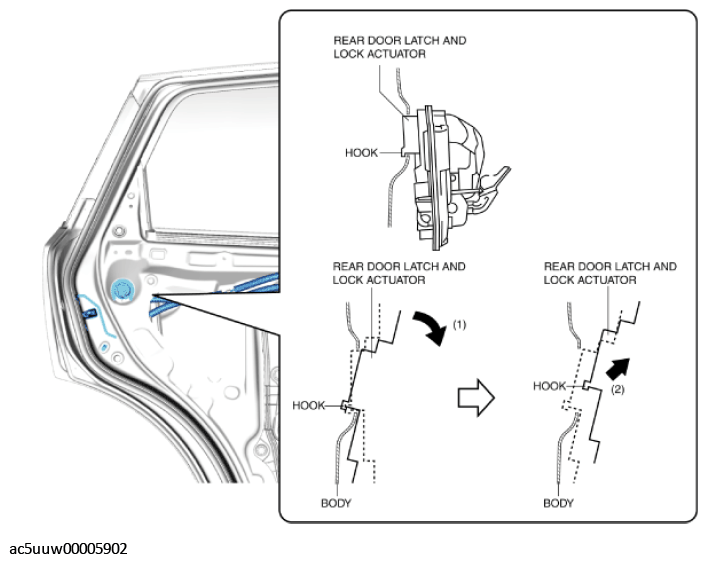 Courtesy of MAZDA MOTORS CORP.
- Remove the rear door latch and lock actuator.
- Install in the reverse order of removal.