Switch Panel Removal/Installation
- Disconnect the negative battery cable. (See NEGATIVE BATTERY CABLE DISCONNECTION/CONNECTION
.)
- Open the glove compartment.
- Remove the center panel. (See CENTER PANEL REMOVAL/INSTALLATION .)
- Remove the screw.
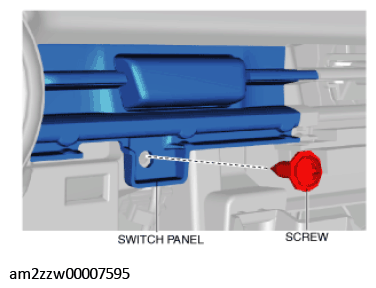 Courtesy of MAZDA MOTORS CORP.
- Move the remover tool in the order of arrows (1) and (2) shown in the figure and detach the clips from the dashboard.
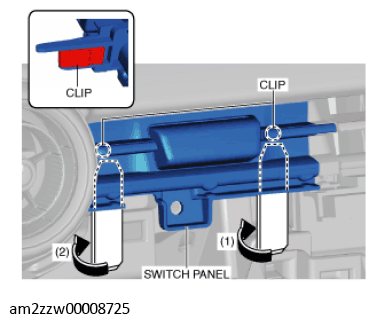 Courtesy of MAZDA MOTORS CORP.
- Disconnect the hazard warning switch connector and remove the switch panel.
- When replacing the switch panel, remove the hazard warning switch. (See HAZARD WARNING SWITCH REMOVAL/INSTALLATION
.)
- Install in the reverse order of removal.