Center Panel Removal/Installation
- Open the glove compartment.
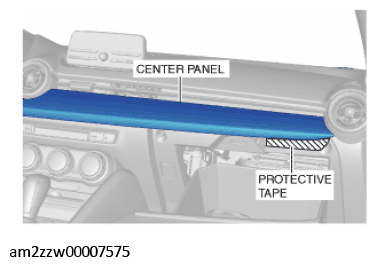
- Affix protective tape to the shaded position shown in the figure.
CAUTION:
- If the remover tool is inserted without affixing protective tape, the passenger-side lower panel may be damaged. Always affix protective tape before inserting the remover tool to prevent damage.
 Courtesy of MAZDA MOTORS CORP.
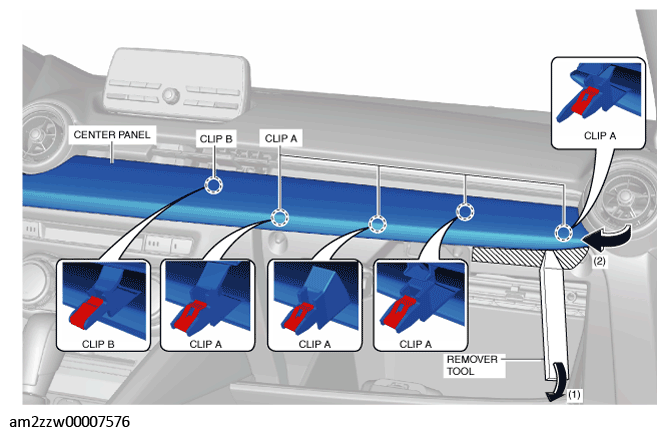
- Insert the remover tool into the position shown in the figure and move it in the direction of arrow (1) shown in the figure.
 Courtesy of MAZDA MOTORS CORP.
- Move the center panel in the direction of arrow (2) shown in the figure and detach clips A and B.
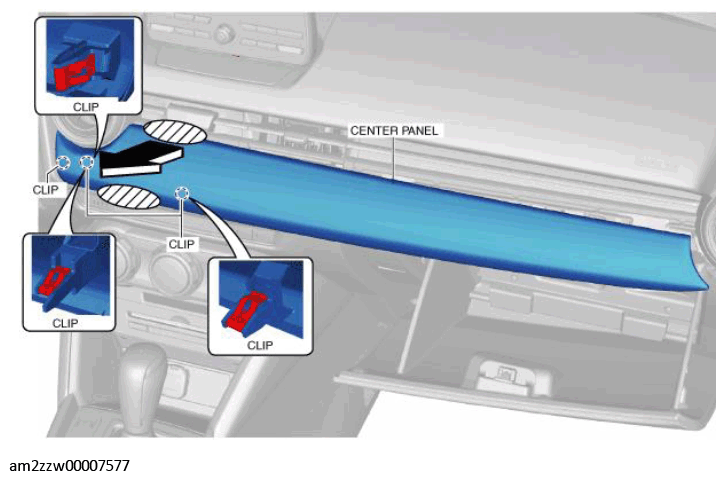
- Hold the shaded areas shown in the figure with your hands, pull the center panel in the direction of the arrow and detach the clips.
 Courtesy of MAZDA MOTORS CORP.
- Remove the center panel.
- Install in the reverse order of removal.