Front Side
- Remove the rear beltline molding. (See REAR BELTLINE MOLDING REMOVAL/INSTALLATION .)
WARNING:
- Using a utility knife with bare hands can cause injury. Always wear gloves when using a utility knife.
- Remove the double-sided adhesive tape in the position shown in the figure using the utility knife.
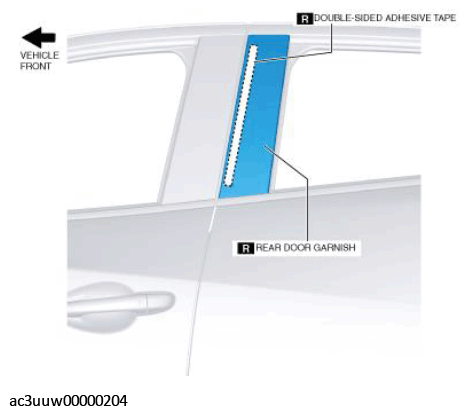 Courtesy of MAZDA MOTORS CORP.
- Move the remover tool in the direction of the arrow shown in the figure and while peeling off the double-sided adhesive tape, detach the rear door garnish clips (1), (2) and (3) from the rear door starting from the top of the vehicle.
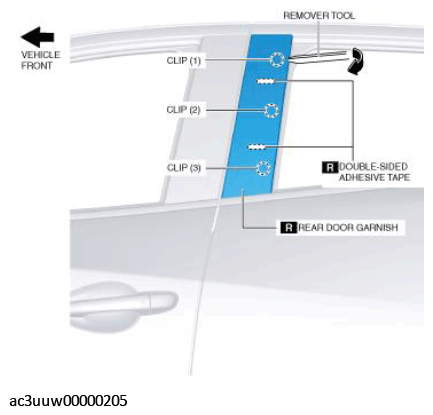 Courtesy of MAZDA MOTORS CORP.
- Remove the rear door garnish.