Rear BELTLINE Molding Removal/Installation
- Fully open the rear door glass.
- Affix the protective tape to the position shown in the figure to prevent scratches and damage.
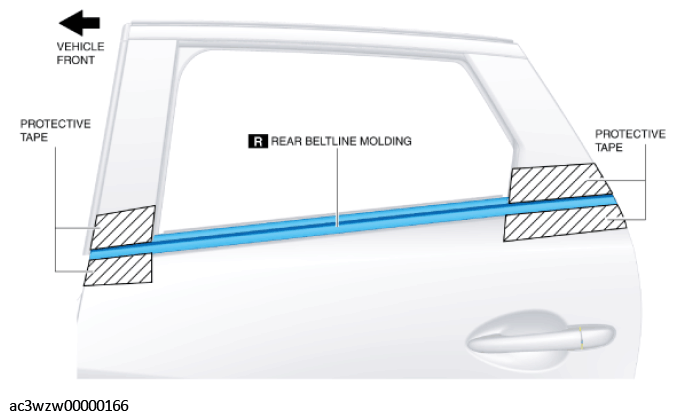 Courtesy of MAZDA MOTORS CORP.
- Insert the remover tool in the position shown in the figure.
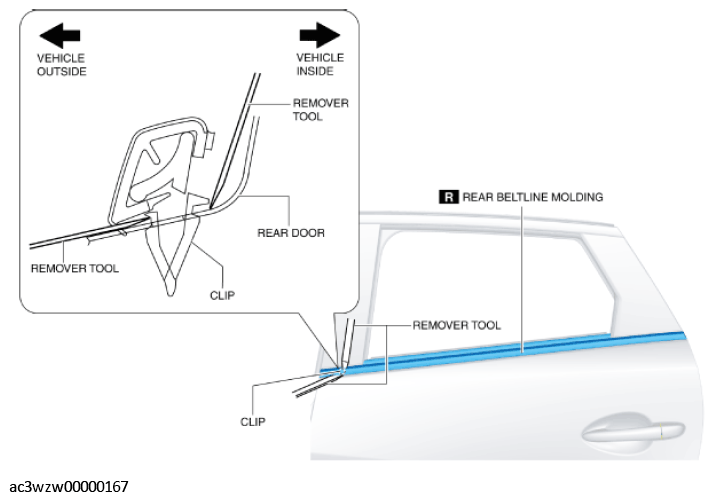 Courtesy of MAZDA MOTORS CORP.
- Move the remover tool in the direction of the arrow shown in the figure and detach the clip of the rear beltline molding from the rear door.
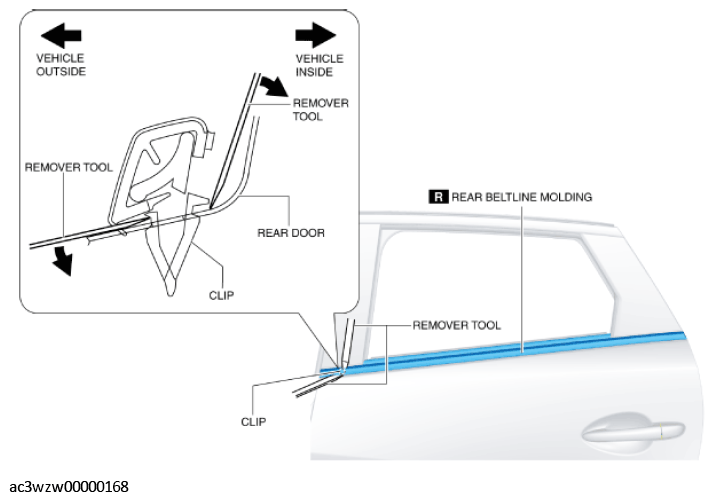 Courtesy of MAZDA MOTORS CORP.
- Pull the rear beltline molding up in the direction of the arrow shown in the figure.
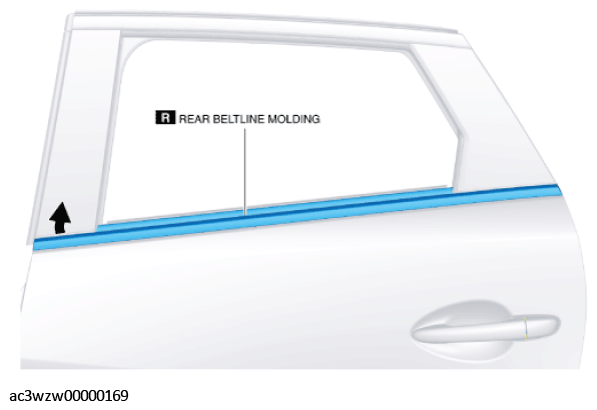 Courtesy of MAZDA MOTORS CORP.
- Insert the remover tool in the position shown in the figure.
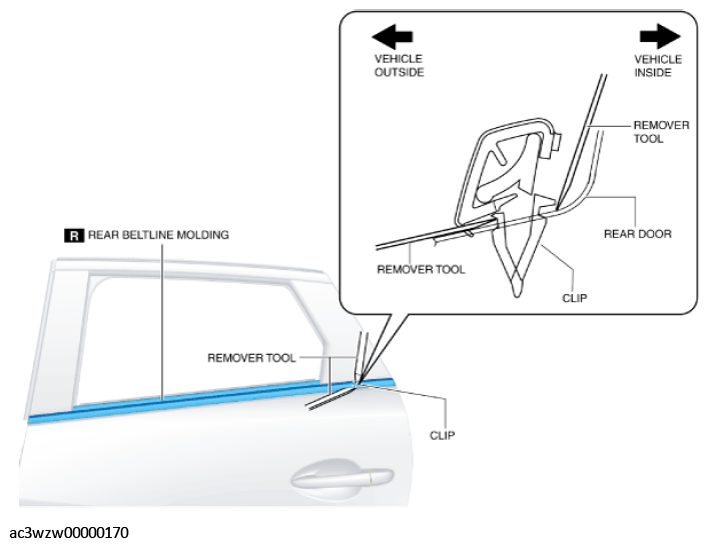 Courtesy of MAZDA MOTORS CORP.
- Move the remover tool in the direction of the arrow shown in the figure and detach the clip of the rear beltline molding from the rear door.
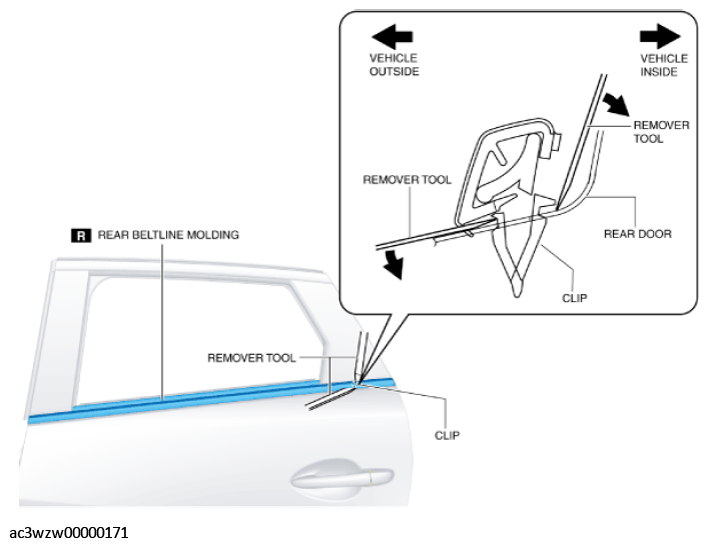 Courtesy of MAZDA MOTORS CORP.
- Pull the rear beltline molding up in the direction of the arrow shown in the figure.
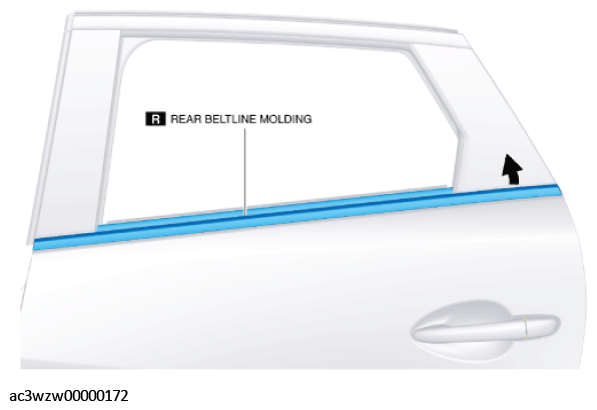 Courtesy of MAZDA MOTORS CORP.
- Rotate the rear beltline molding in the direction of the arrows shown in the figure and detach the rear beltline molding tabs from the rear door.
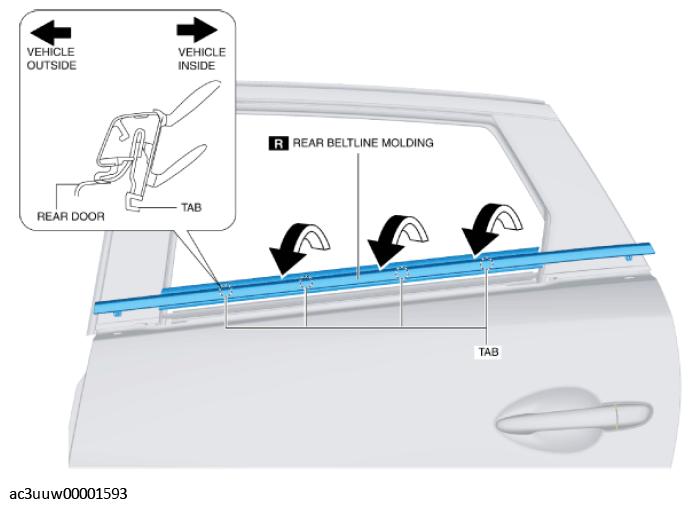 Courtesy of MAZDA MOTORS CORP.
- Remove the rear beltline molding.
- Install in the reverse order of removal.