Trunk Side Trim Removal/Installation
- Disconnect the negative battery terminal. (Refer to NEGATIVE BATTERY TERMINAL DISCONNECTION/CONNECTION
.)
- Remove the following parts:
- Trunk covering (Refer to TRUNK COVERING REMOVAL/INSTALLATION .)
- Trunk board (Refer to TRUNK BOARD REMOVAL/INSTALLATION .)
- Trunk side pocket (Refer to TRUNK SIDE POCKET REMOVAL/INSTALLATION .)
- Trunk end trim (Refer to TRUNK END TRIM REMOVAL/INSTALLATION .)
- Rear scuff plate (Refer to REAR SCUFF PLATE REMOVAL/INSTALLATION .)
- Third-row seat cushion (Refer to THIRD-ROW SEAT CUSHION REMOVAL/INSTALLATION
.)
- Third-row seat back component (Refer to THIRD-ROW SEAT BACK COMPONENT REMOVAL/INSTALLATION
.)
- Partially peel back the seaming welt.
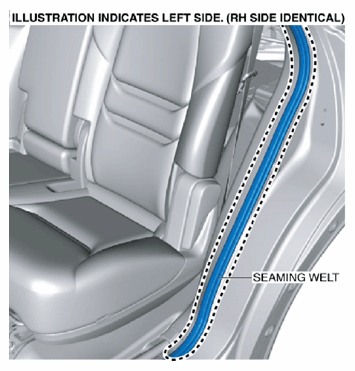 Courtesy of MAZDA MOTORS CORP.
- Slide the second-row seat forward.
- Partially peel back the weather strip.
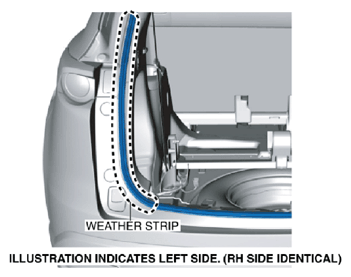 Courtesy of MAZDA MOTORS CORP.
- Remove the fastener.
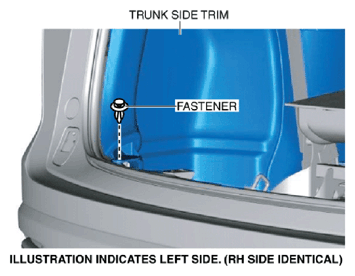 Courtesy of MAZDA MOTORS CORP.
- Remove the service hole covers.
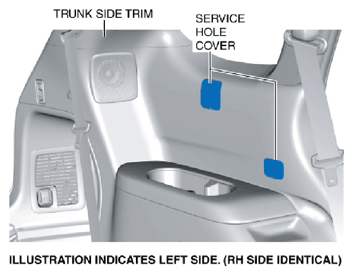 Courtesy of MAZDA MOTORS CORP.
- Remove the screws.
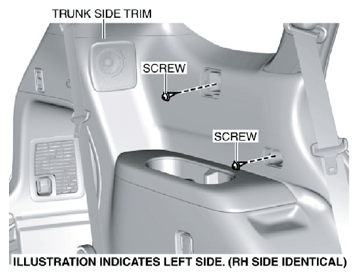 Courtesy of MAZDA MOTORS CORP.
- Affix protective tape to the position shown in the figure.
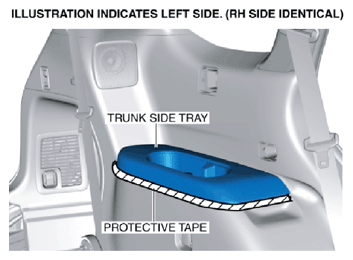 Courtesy of MAZDA MOTORS CORP.
- Using the remover tool, remove the trunk side tray in the direction of arrow shown in the figure while detaching the clip A, clips B.
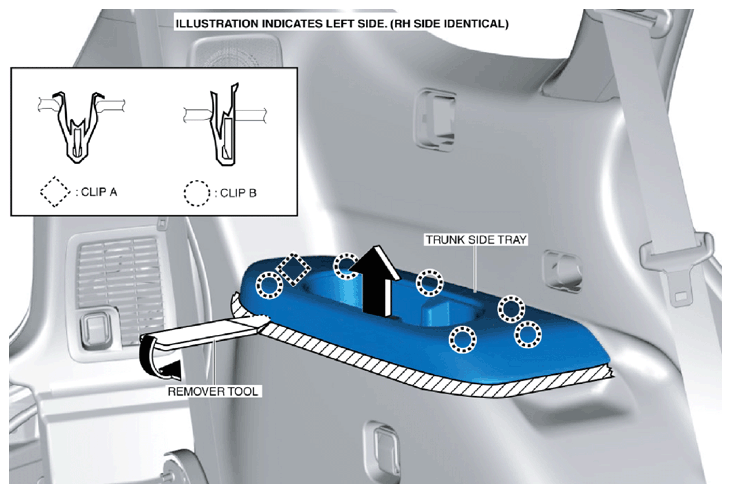 Courtesy of MAZDA MOTORS CORP.
- Pull the cover in the direction the of arrow shown in the figure.
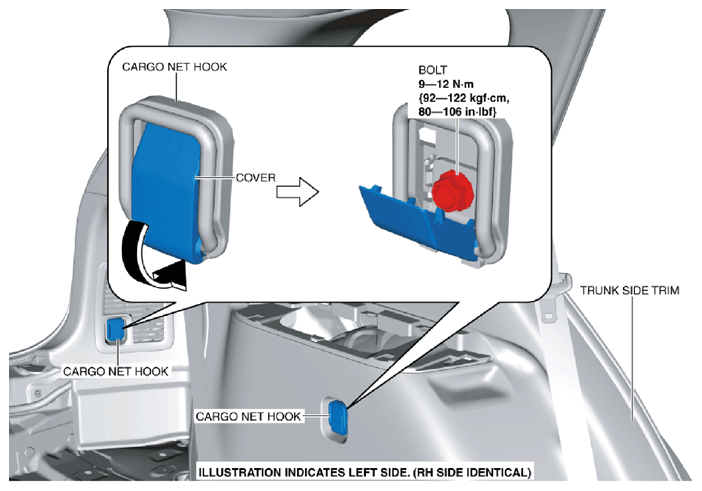 Courtesy of MAZDA MOTORS CORP.
- Remove the bolts, then remove the cargo net hooks.
- Remove the bolt, then remove the cargo net hook.
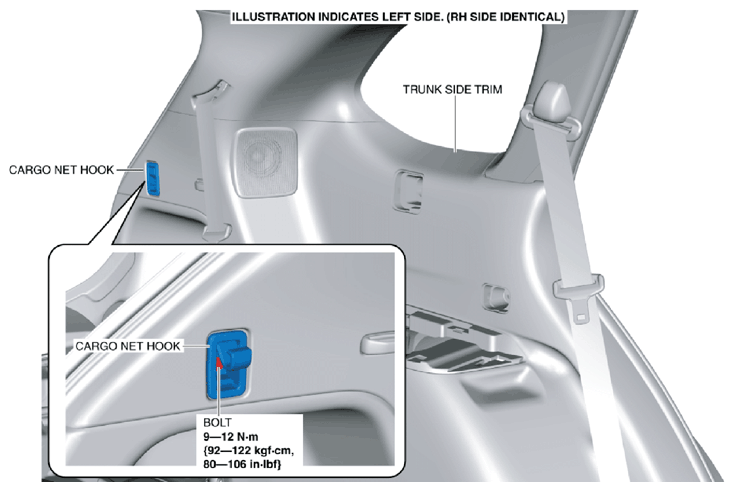 Courtesy of MAZDA MOTORS CORP.
- Pull the trunk side trim in the direction of the arrow in the order of (1), (2), (3), (4), (5) and remove it while detaching clips, hooks.
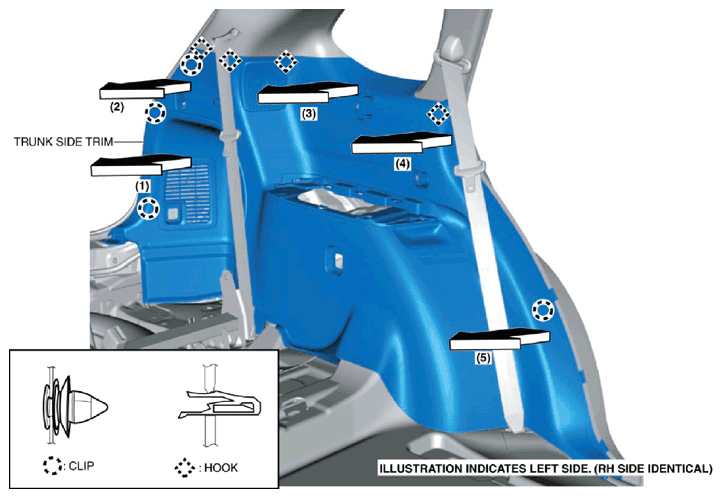 Courtesy of MAZDA MOTORS CORP.
- Disconnect the accessory socket connector. (RH only)
- Disconnect the rear side speaker connector. (with rear side speaker)
- Remove the trunk side trim.
- Install in the reverse order of removal.