Rear Console Removal/Installation
- Disconnect the negative battery cable. (See
NEGATIVE BATTERY CABLE DISCONNECTION/CONNECTION [SKYACTIV-G 2.0, SKYACTIV-G 2.5]
.)
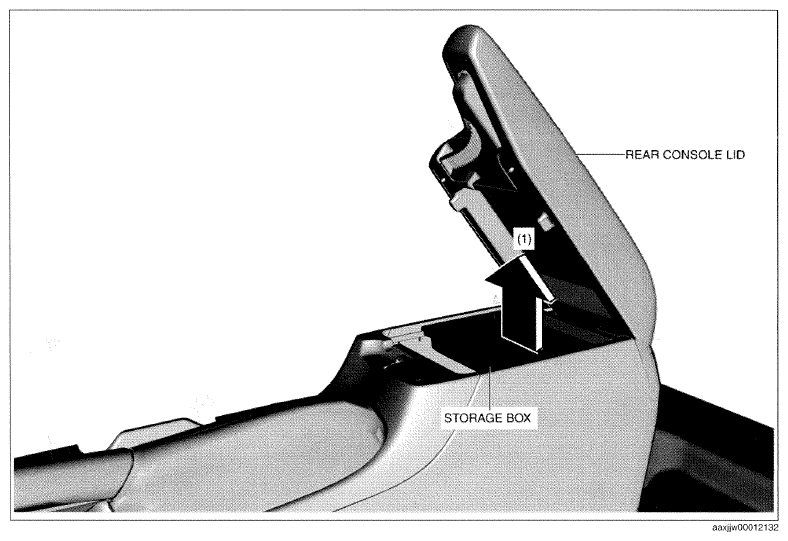
- Open the rear console lid.
 Courtesy of MAZDA MOTORS CORP.
- Remove the storage box in the direction of the arrow (1) shown in the figure.
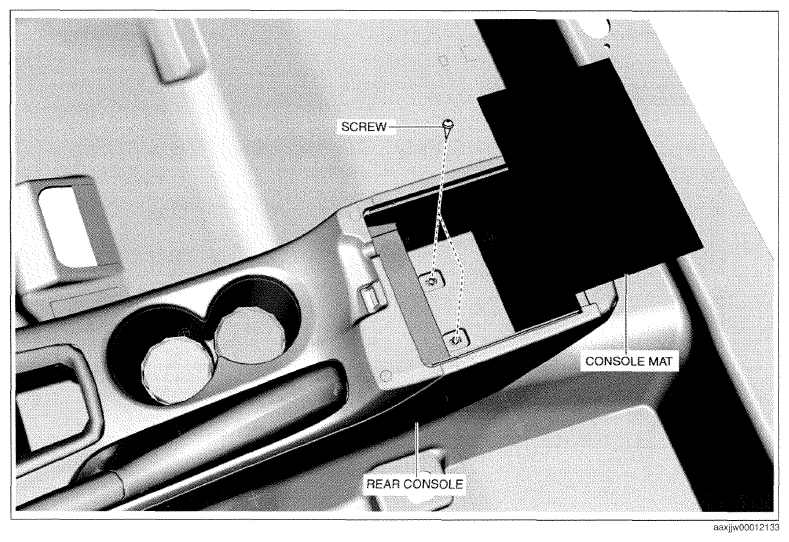
- Remove the console mat.
 Courtesy of MAZDA MOTORS CORP.
- Remove screws.
- Remove the upper panel. (See
UPPER PANEL REMOVAL ) (See
UPPER PANEL INSTALLATION .)
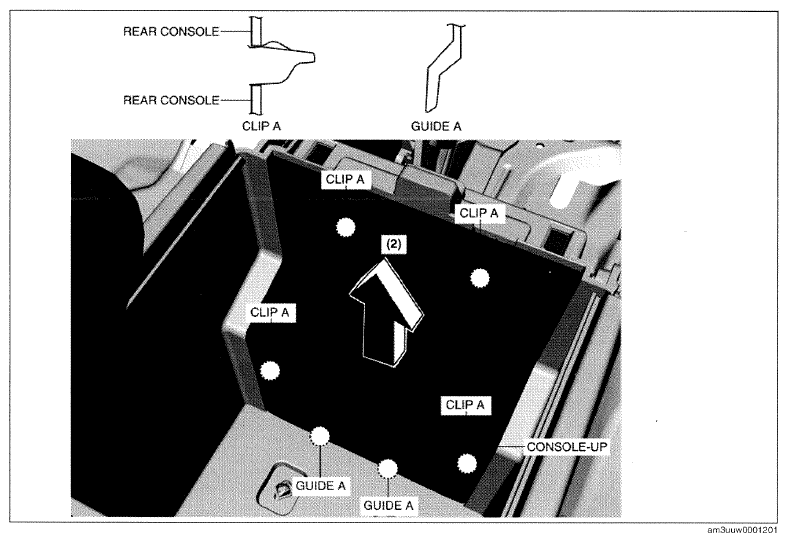
- Pull the console-up in the direction of the arrow (2) and remove it while detaching clips A, guides A.
 Courtesy of MAZDA MOTORS CORP.
- Disconnect the auxiliary jack/USB port/SD card slot hub connector, (with center display and with CD player)
- Disconnect the auxiliary jack/USB port connector, (without center display and with CD player)
- Disconnect the center accessory socket connector.
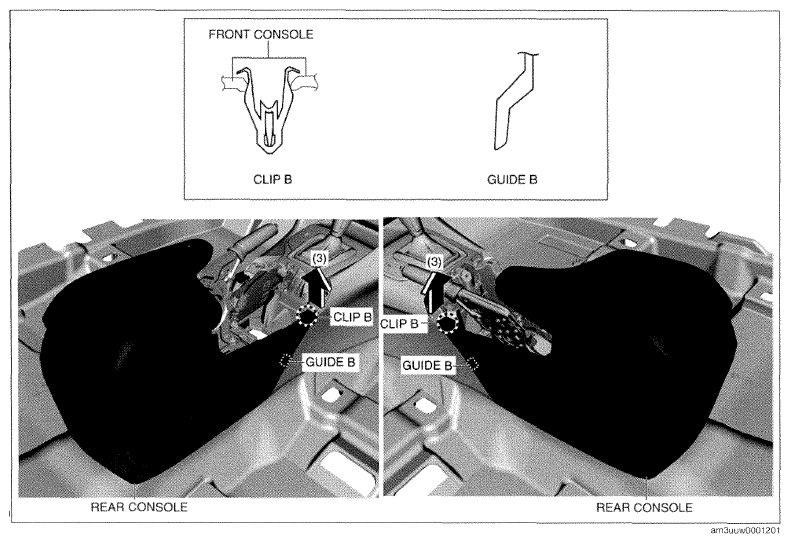
- Pull the rear console in the direction of the arrow (3) and remove it from the front console while detaching clips B, guides B.
 Courtesy of MAZDA MOTORS CORP.
- Remove the rear console in the direction of the arrow (4) shown in the figure.
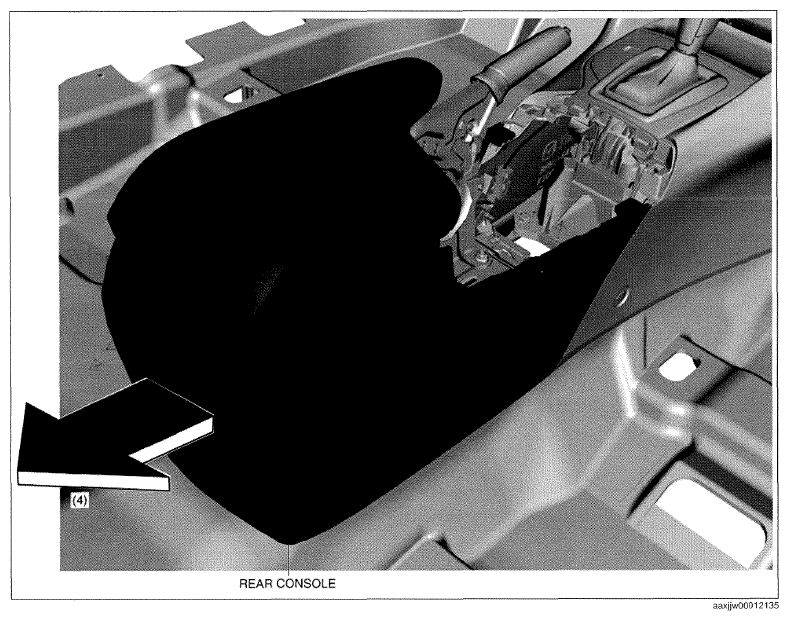 Courtesy of MAZDA MOTORS CORP.
- Install in the reverse order of removal.