Front Door Trim Removal/Installation
- Disconnect the negative battery cable.
- Remove the inner garnish. (See
INNER GARNISH REMOVAL/INSTALLATION .)
- Pull the cover of inner handle and remove it while detaching tabs.
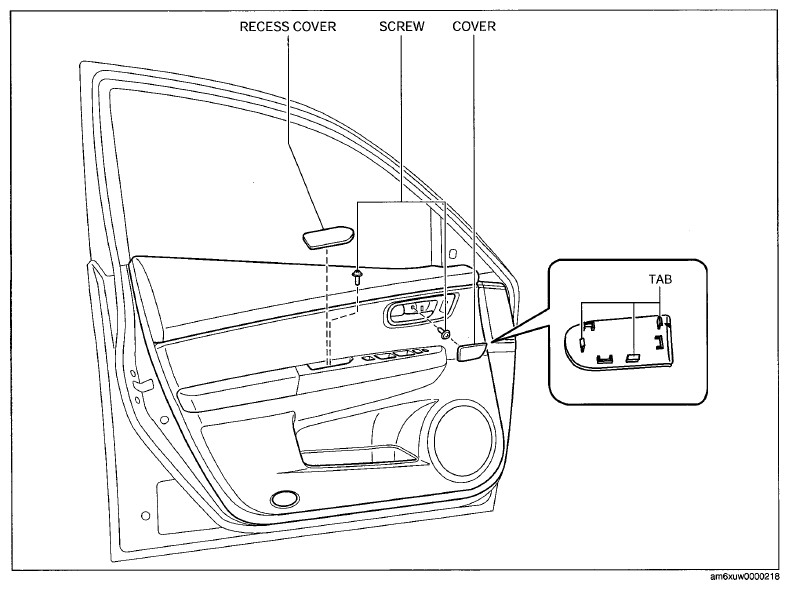 Courtesy of MAZDA MOTORS CORP.
- Remove the recess cover.
- Remove the screws.
- Pull in the direction of the arrow shown in the illustration and remove clips from the door inner panel using a fastener remover.
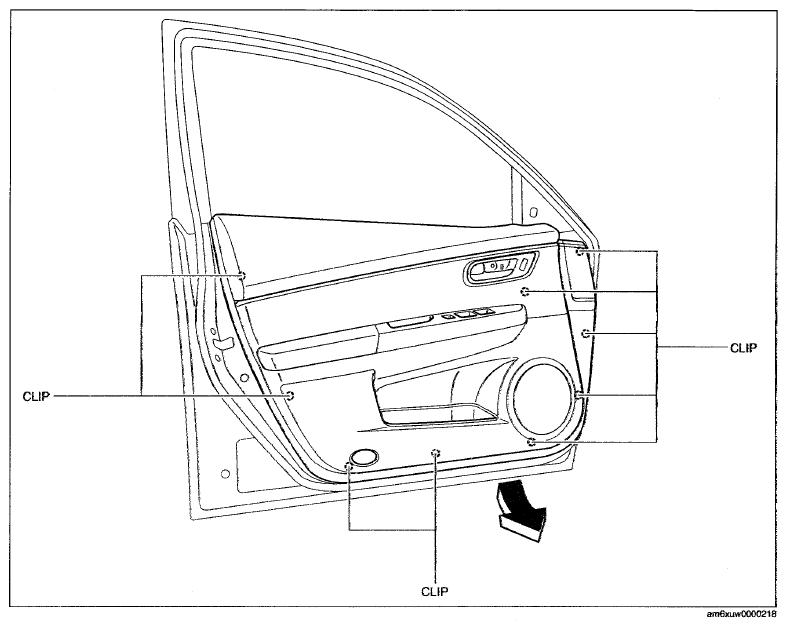 Courtesy of MAZDA MOTORS CORP.
- Remove the front door trim in the direction of the arrow shown in the illustration.
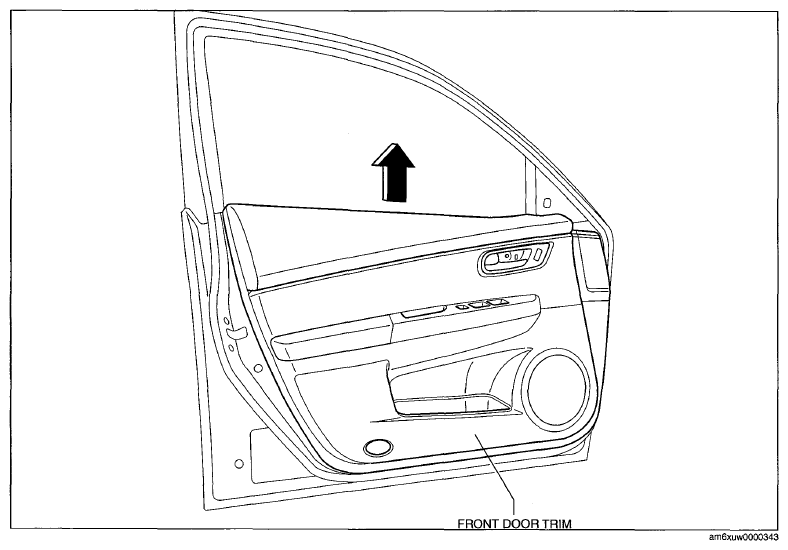 Courtesy of MAZDA MOTORS CORP.
- Remove the inner handle and move the front door trim in the direction of the arrow shown in the illustration.
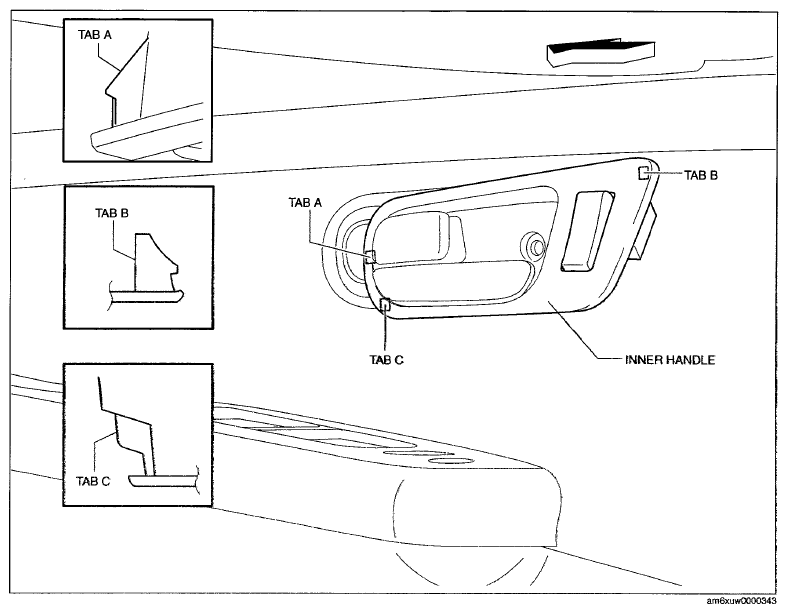 Courtesy of MAZDA MOTORS CORP.
- Turn the inner handle 90° in the direction of the arrow and remove it from the front door trim.
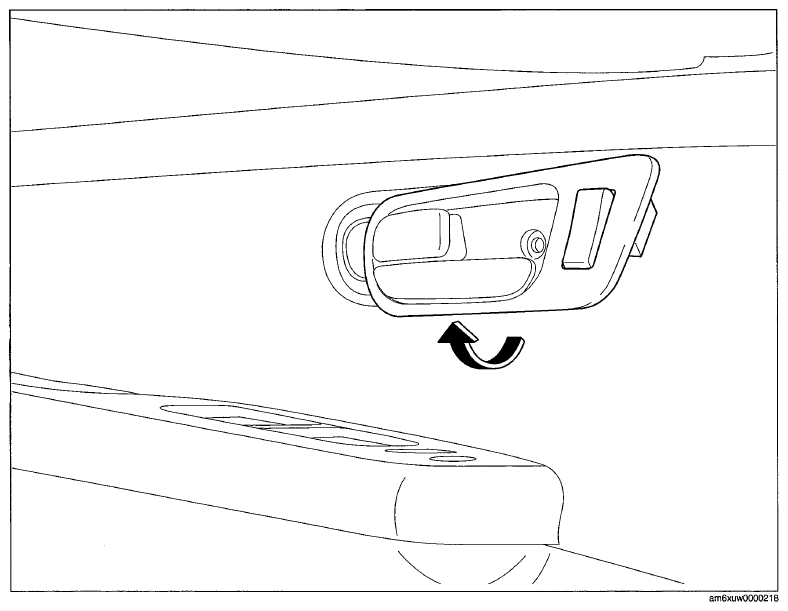 Courtesy of MAZDA MOTORS CORP.
- Disconnect the power outer mirror switch connector and power window main switch connector. (driver-side)
- Disconnect the power window subswitch connector. (passenger-side)
- Remove the door courtesy illumination bulb socket. (See
COURTESY LIGHT BULB REMOVAL/INSTALLATION
.)
- Install in the reverse order of removal.