- REMOVE ENGINE AND TRANSMISSION
(Refer to REMOVAL [09/2015 - ]
)
- REMOVE FRONT FRAME ASSEMBLY
Refer to PROCEDURE - Step 53
- REMOVE ENGINE OIL LEVEL DIPSTICK GUIDE
Refer to PROCEDURE - Step 54
- REMOVE NO. 1 EXHAUST MANIFOLD HEAT INSULATOR
- Remove the 3 bolts and No. 1 exhaust manifold heat insulator.
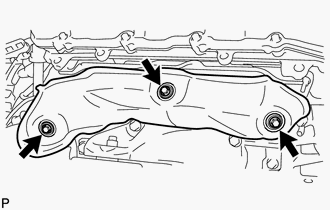 Courtesy of © TOYOTA, LICENSE AGREEMENT TMS1002 Courtesy of © TOYOTA, LICENSE AGREEMENT TMS1002
|
- REMOVE NO. 2 EXHAUST MANIFOLD HEAT INSULATOR
- Remove the 3 bolts and No. 2 exhaust manifold heat insulator.
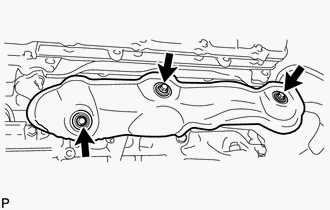 Courtesy of © TOYOTA, LICENSE AGREEMENT TMS1002 Courtesy of © TOYOTA, LICENSE AGREEMENT TMS1002
|
- REMOVE FRONT ENGINE MOUNTING INSULATOR
Refer to PROCEDURE - Step 58
- REMOVE FRONT NO. 1 ENGINE MOUNTING BRACKET RH
Refer to PROCEDURE - Step 59
- REMOVE FRONT NO. 1 ENGINE MOUNTING BRACKET LH
Refer to PROCEDURE - Step 60
- REMOVE EXHAUST MANIFOLD SUB-ASSEMBLY RH
- Disconnect the air fuel ratio sensor connector.
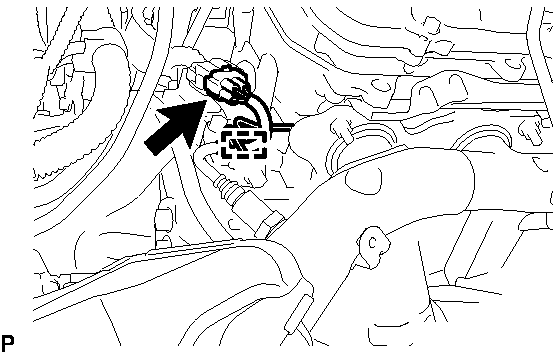 Courtesy of © TOYOTA, LICENSE AGREEMENT TMS1002 Courtesy of © TOYOTA, LICENSE AGREEMENT TMS1002
|
- Detach the wire harness from the bracket.
- Remove the 8 nuts and exhaust manifold sub-assembly RH.
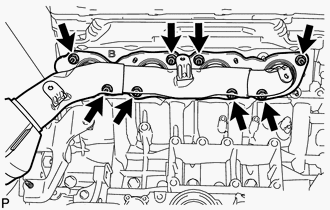 Courtesy of © TOYOTA, LICENSE AGREEMENT TMS1002 Courtesy of © TOYOTA, LICENSE AGREEMENT TMS1002
|
- Remove the gasket.
- REMOVE EXHAUST MANIFOLD SUB-ASSEMBLY LH
- Disconnect the air fuel ratio sensor connector.
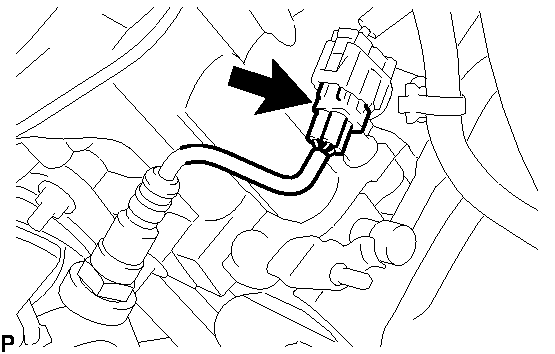 Courtesy of © TOYOTA, LICENSE AGREEMENT TMS1002 Courtesy of © TOYOTA, LICENSE AGREEMENT TMS1002
|
- Remove the 8 nuts and exhaust manifold sub-assembly LH.
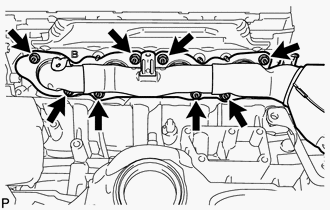 Courtesy of © TOYOTA, LICENSE AGREEMENT TMS1002 Courtesy of © TOYOTA, LICENSE AGREEMENT TMS1002
|
- Remove the gasket.
- REMOVE AIR FUEL RATIO SENSOR (for Bank 1 Sensor 1)
- Using SST, remove the air fuel ratio sensor from the exhaust manifold sub-assembly LH.
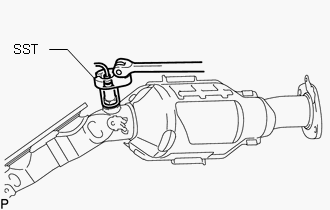 Courtesy of © TOYOTA, LICENSE AGREEMENT TMS1002 Courtesy of © TOYOTA, LICENSE AGREEMENT TMS1002
|
- REMOVE AIR FUEL RATIO SENSOR (for Bank 2 Sensor 1)
- Using SST, remove the air fuel ratio sensor from the exhaust manifold sub-assembly RH.
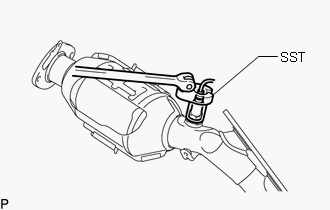 Courtesy of © TOYOTA, LICENSE AGREEMENT TMS1002 Courtesy of © TOYOTA, LICENSE AGREEMENT TMS1002
|