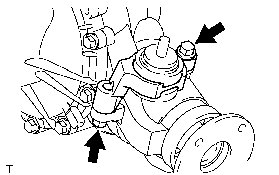
Removal
AXLE AND DIFFERENTIAL: FRONT DIFFERENTIAL CARRIER ASSEMBLY: REMOVAL
1. DISCONNECT CABLE FROM NEGATIVE BATTERY TERMINAL
NOTICE:
* w/ Navigation System:
After the engine switch is turned off, the display and navigation module display (navigation system) records various types of memory and settings. As a result, after turning the engine switch off, be sure to wait for the time specified in the following table before disconnecting the cable from the negative (-) battery terminal.
Waiting Time before Disconnecting Cable from Negative (-) Battery Terminal:

* When disconnecting the cable, some systems need to be initialized after the cable is reconnected Repair Instruction - Initialization.
2. REMOVE NO. 1 ENGINE UNDER COVER SUB-ASSEMBLY
(a) Remove the No. 1 engine under cover Removal.
3. REMOVE REAR ENGINE UNDER COVER ASSEMBLY
(a) Remove the rear engine under cover Removal.
4. DRAIN DIFFERENTIAL OIL Service and Repair
5. REMOVE FRONT WHEELS
6. REMOVE FRONT DRIVE SHAFT ASSEMBLY
(a) Remove the front drive shaft Removal.
7. REMOVE FRONT PROPELLER SHAFT ASSEMBLY
(a) Remove the front propeller shaft Removal.
8. REMOVE FRONT STABILIZER LINK ASSEMBLY
(a) Remove the stabilizer link Removal.
9. REMOVE FRONT SPEED SENSOR
(a) Remove the front speed sensor Removal.
10. DISCONNECT TIE ROD END SUB-ASSEMBLY LH
(a) Disconnect the tie rod end sub-assembly Removal.
11. DISCONNECT TIE ROD END SUB-ASSEMBLY RH
(a) Disconnect the tie rod end sub-assembly Removal.
12. REMOVE FRONT LOWER NO. 1 SUSPENSION ARM SUB-ASSEMBLY LH
(a) Remove the front lower No. 1 suspension arm sub-assembly Removal.
13. REMOVE FRONT LOWER NO. 1 SUSPENSION ARM SUB-ASSEMBLY RH
HINT
Use the same procedure described for the LH side.
14. REMOVE FRONT DIFFERENTIAL CARRIER ASSEMBLY
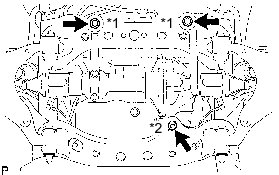
(a) Remove the bolt and disconnect the front differential breather tube bracket.
(b) Support the front differential with a jack.
(c) Remove the front No. 1 differential mount nut.
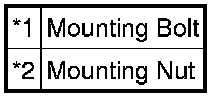
(d) Remove the 2 front mounting bolts and nut.
Text in Illustration
(e) Disconnect the actuator hose and connector.
(f) Lower the jack and remove the front differential.
(g) Remove the 3 bolts and front No. 1 differential support.
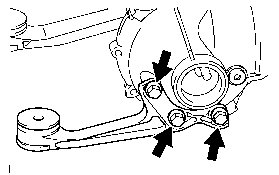
(h) Remove the 2 bolts and front No. 2 differential support.
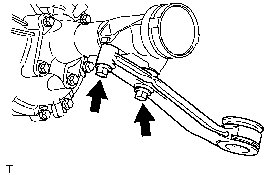
(i) Remove the 2 bolts and front No. 3 differential support.