Installation
REAR SUSPENSION: REAR UPPER ARM: INSTALLATION
HINT:
- Use the same procedures for the RH side and LH side.
- The procedures listed below are for the LH side.
- A bolt without a torque specification is shown in the standard bolt chart Standard Bolt - Specified Torque For Standard Bolts.
1. TEMPORARILY INSTALL REAR UPPER CONTROL ARM ASSEMBLY LH
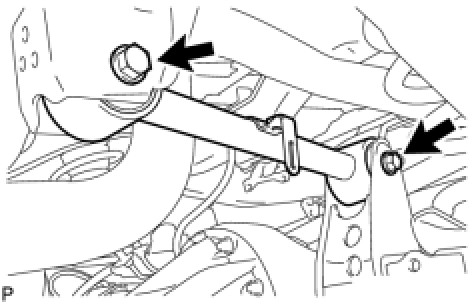
(a) Temporarily install the rear upper control arm with the 2 bolts, 2 washers and 2 nuts.
2. STABILIZE SUSPENSION Installation
3. TIGHTEN REAR UPPER CONTROL ARM ASSEMBLY LH
(a) Tighten the 2 nuts.
Torque: 150 Nm (1530 kgf-cm, 111 ft-lbf)
NOTICE:
Perform this procedure with all 4 wheels on the ground.
4. INSTALL UPPER ARM BUSH HEAT INSULATOR
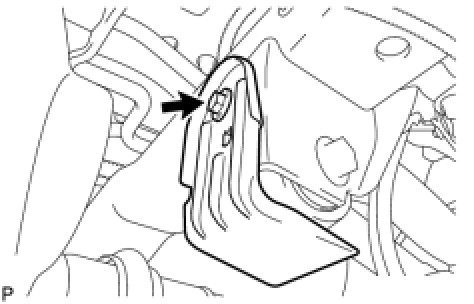
(a) Install the upper arm bush heat insulator with the bolt.
Torque: 18 Nm (184 kgf-cm, 13 ft-lbf)
5. CONNECT SPEED SENSOR WIRE HARNESS
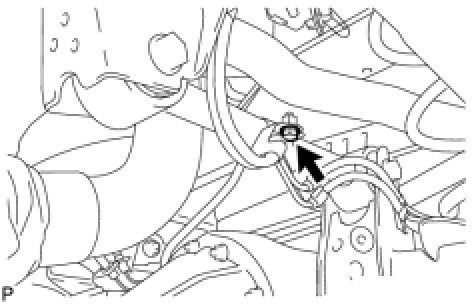
(a) Connect the speed sensor wire harness with the bolt.
Torque: 13 Nm (127 kgf-cm, 9 ft-lbf)
6. INSTALL REAR HEIGHT CONTROL SENSOR SUB-ASSEMBLY LH Installation
7. CONNECT CABLE TO NEGATIVE BATTERY TERMINAL
NOTICE:
When disconnecting the cable, some systems need to be initialized after the cable is reconnected Repair Instruction - Initialization.
8. PERFORM VEHICLE OFF SET CALIBRATION
(a) Perform the vehicle off set calibration Installation.
9. ADJUST REAR HEIGHT CONTROL SENSOR SUB-ASSEMBLY LH Height Control Sensor (for Rear Side)
10. ADJUST HEADLIGHT ASSEMBLY
(a) Adjust the headlight assembly Adjustments.