Rear Power Point Socket: Removal
- REMOVE REAR DOOR SCUFF PLATE LH (See step 17 in REMOVAL
)
- REMOVE REAR DOOR OPENING TRIM WEATHERSTRIP LH
- REMOVE DECK BOARD SUB-ASSEMBLY (See step 3 in
REMOVAL
)
- REMOVE TONNEAU COVER ASSEMBLY
- REMOVE JACK CARRIER SUPPORT
- REMOVE JACK ASSEMBLY
- REMOVE JACK CARRIER ASSEMBLY
- REMOVE DECK FLOOR BOX FRONT (See step 4 in
REMOVAL
)
- REMOVE DECK FLOOR BOX REAR (See step 5 in
REMOVAL
)
- REMOVE NO. 2 DECK BOARD SUB-ASSEMBLY (See step 7 in REMOVAL
)
- REMOVE NO. 3 DECK BOARD SUB-ASSEMBLY (See step 6 in
REMOVAL
)
- REMOVE BACK DOOR WEATHERSTRIP
- REMOVE DECK SIDE TRIM BOX LH (See step 12 in REMOVAL
)
- REMOVE DECK SIDE TRIM BOX RH
- REMOVE REAR FLOOR FINISH PLATE (See step 9 in REMOVAL
)
- REMOVE REAR FLOOR FINISH SIDE PLATE LH (See step 40 in REMOVAL
)
- REMOVE DECK SIDE TRIM COVER LH (See step 34 in REMOVAL
)
- SEPARATE REAR NO. 1 SEAT OUTER BELT ASSEMBLY LH (See step 36 in REMOVAL
)
- REMOVE REAR SEAT SIDE COVER LH (See step 38 in REMOVAL
)
- REMOVE ROPE HOOK (See step 42 in REMOVAL
)
- REMOVE DECK TRIM SIDE PANEL ASSEMBLY LH (See step 43 in REMOVAL
)
- REMOVE NO. 2 ROOM LIGHT ASSEMBLY (See step 45 in REMOVAL
)
- REMOVE ROOF SIDE GARNISH ASSEMBLY INNER LH (See step 46 in REMOVAL
)
- REMOVE REAR POWER POINT SOCKET
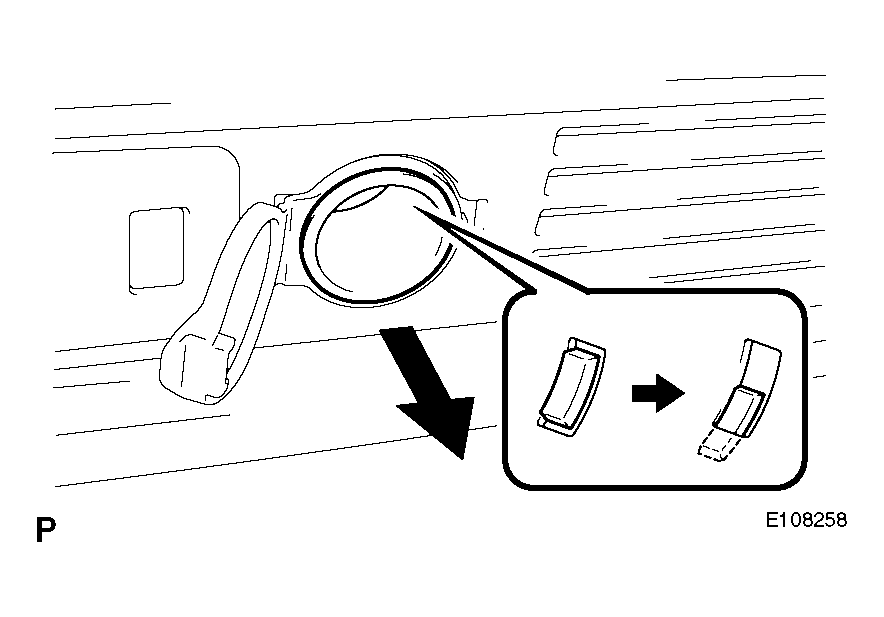
- Turn the rear power point socket in counterclockwise as shown in the illustration and disengage the claw between the rear power point socket and the power point socket cover.
- Push out the rear power point socket.
 Courtesy of © TOYOTA, LICENSE AGREEMENT TMS1002
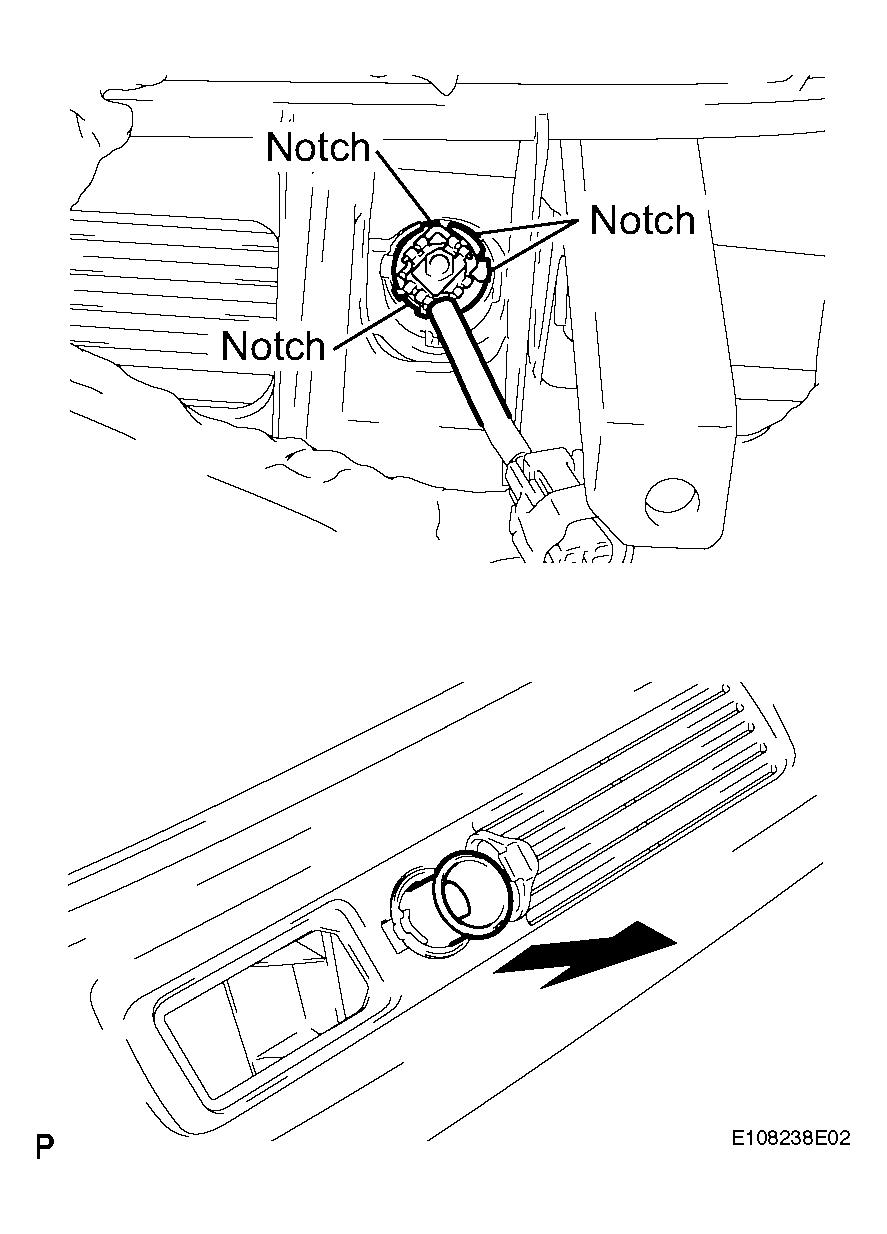
- Align the rear power point socket with the notch on the power point socket cover, and remove the rear power point socket.
 Courtesy of © TOYOTA, LICENSE AGREEMENT TMS1002
- REMOVE POWER OUTLET SOCKET COVER REAR
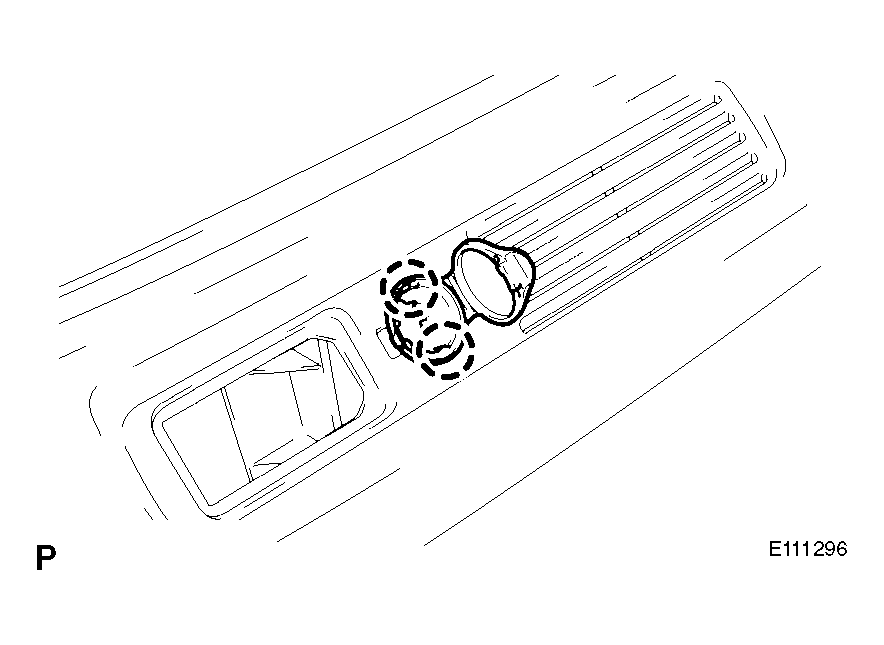
- Disengage the 2 claws, and remove the power outlet socket cover rear.
 Courtesy of © TOYOTA, LICENSE AGREEMENT TMS1002