Rear Differential Front Oil Seal (4WD): Replacement
- DRAIN HYPOID GEAR OIL
- Torque: 49 N.m (500 kgf.cm, 36 ft.lbf)
- REMOVE PROPELLER SHAFT (See REMOVAL
)
- REMOVE COMPANION FLANGE
- Using a chisel and hammer, unstake the staked part of the nut.
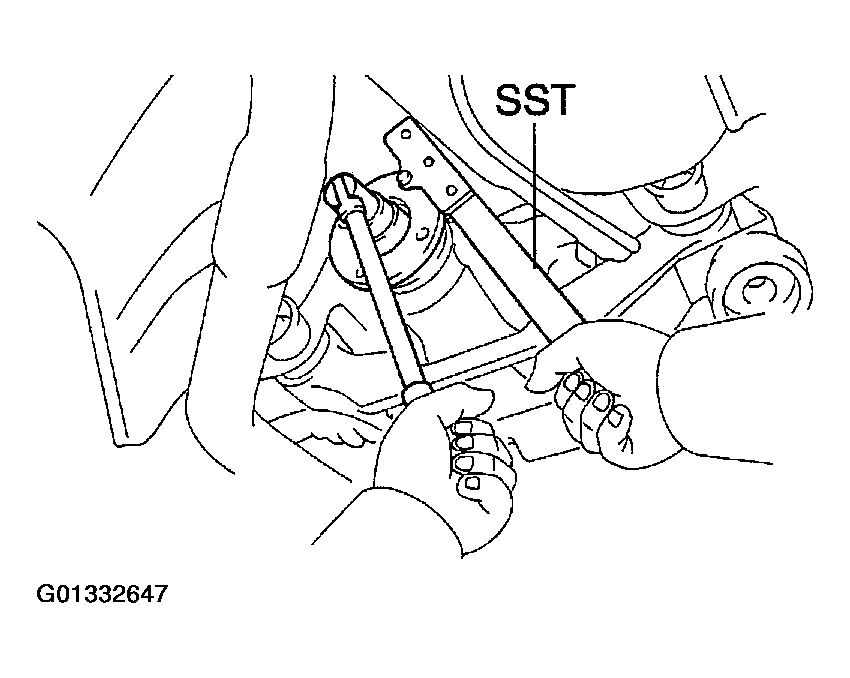 Courtesy of © TOYOTA, LICENSE AGREEMENT TMS1002
- Using SST to hold the flange, remove the nut.
- SST 09330-00021
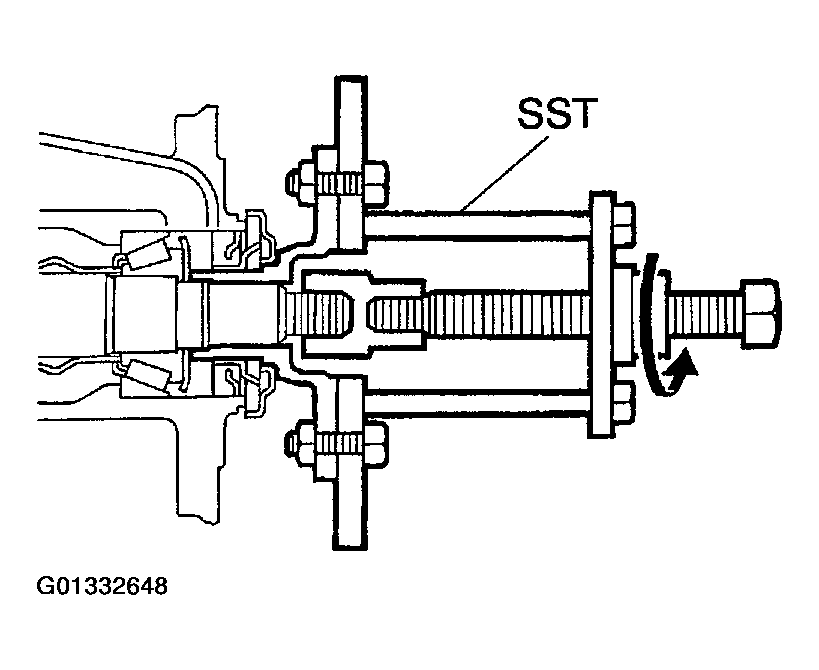 Courtesy of © TOYOTA, LICENSE AGREEMENT TMS1002
- Using SST, remove the companion flange.
- SST 09950-30012 (09951-03010, 09953-03010, 09954-03010, 09955-03030, 09956-03020)
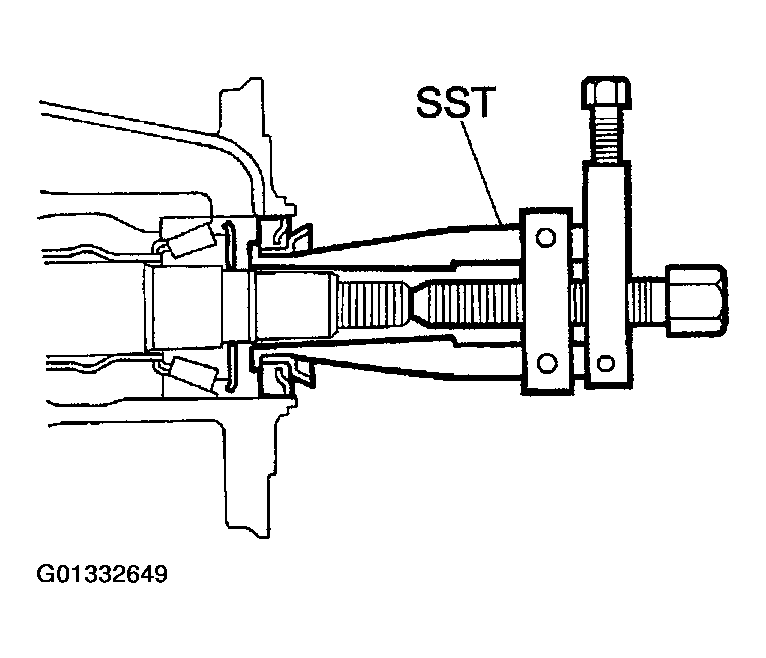 Courtesy of © TOYOTA, LICENSE AGREEMENT TMS1002
- REMOVE FRONT OIL SEAL AND OIL SLINGER
- Using SST, remove the oil seal.
- SST 09308-10010
- Remove the oil slinger.
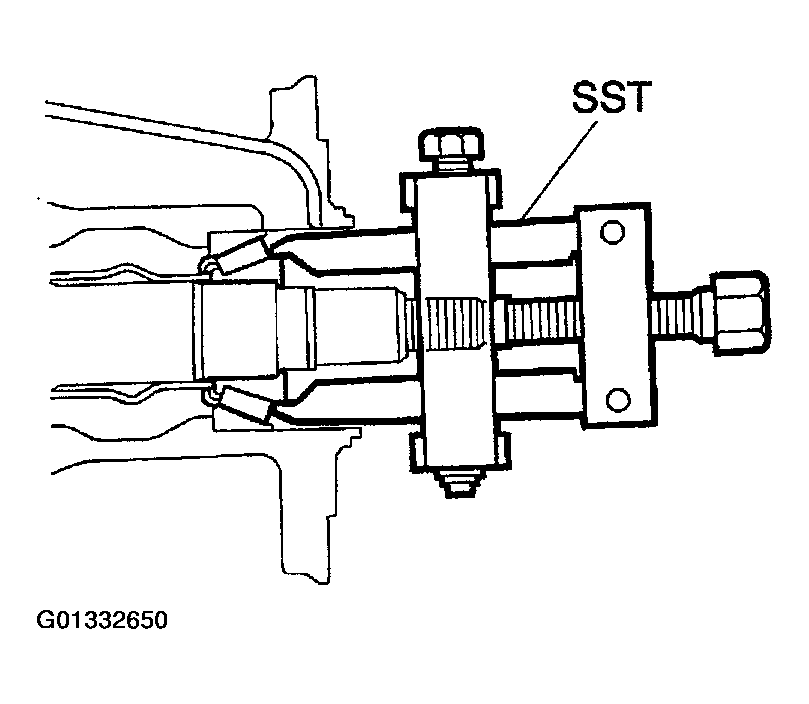 Courtesy of © TOYOTA, LICENSE AGREEMENT TMS1002
- REMOVE FRONT BEARING AND BEARING SPACER
- Using SST, remove the front bearing.
- SST 09556-22010
- Remove the bearing spacer.
- INSTALL NEW BEARING SPACER AND FRONT BEARING
- Install a new bearing spacer on the shaft.
- Install the front bearing on the shaft.
- INSTALL OIL SLINGER AND NEW OIL SEAL
- Install the oil slinger.
- Using SST, install a new oil seal.
- SST 09554-22010
- Oil seal drive in depth: 2.0 mm (0.079 in.)
- Coat MP grease to the oil seal lip.
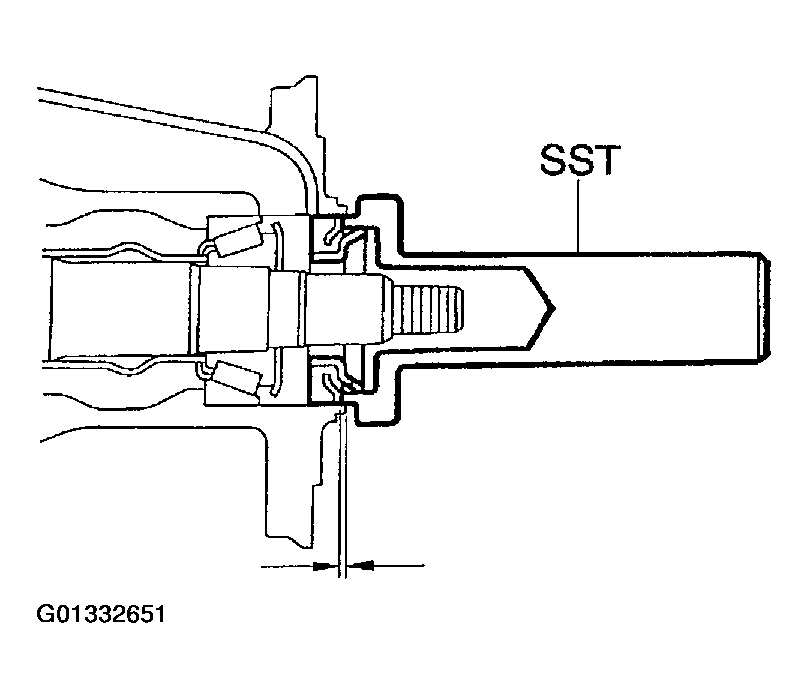 Courtesy of © TOYOTA, LICENSE AGREEMENT TMS1002
- INSTALL COMPANION FLANGE
- Using SST, install the companion flange on the shaft.
- SST 09950-30012 (09951-03010, 09953-03010, 09954-03010, 09955-03030, 09956-03020)
- Coat the threads of a new nut with hypoid gear oil.
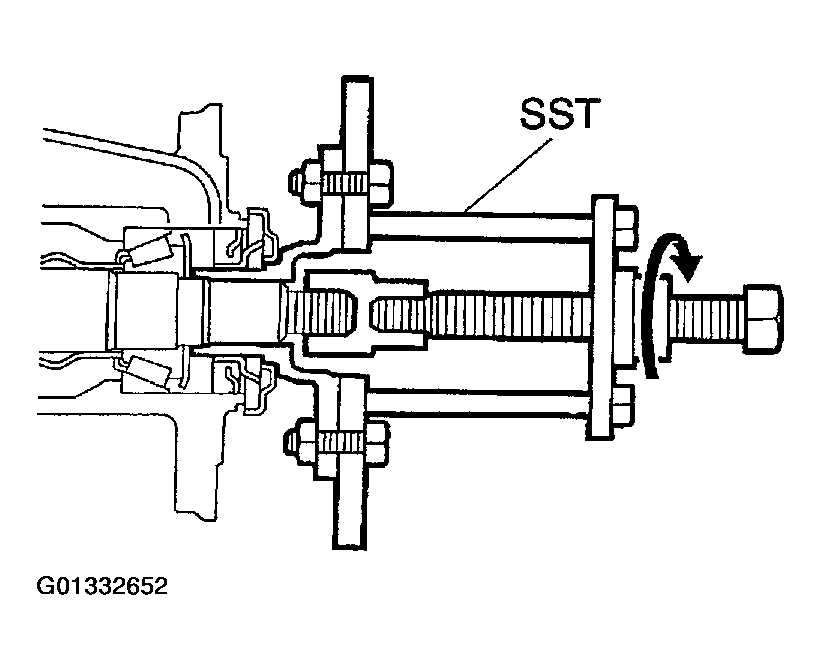 Courtesy of © TOYOTA, LICENSE AGREEMENT TMS1002
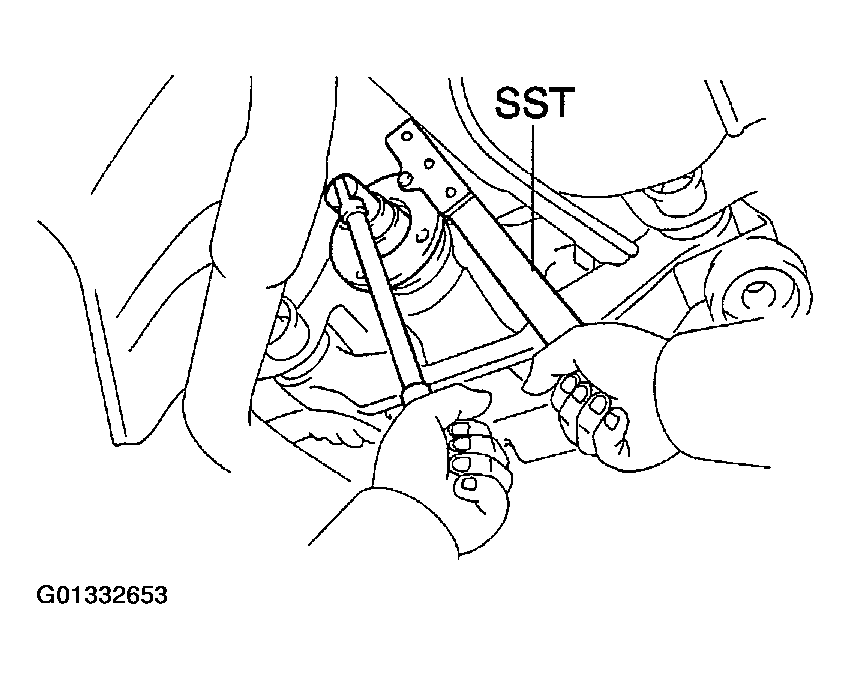
- Using SST to hold the flange, torque the nut.
- SST 09330-00021
- Torque: 108 N.m (1,100 kgf.cm, 80 ft.lbf)
- ADJUST DRIVE PINION PRELOAD (See REASSEMBLY
)
- STAKE DRIVE PINION NUT
- INSTALL PROPELLER SHAFT (See INSTALLATION
)
 Courtesy of © TOYOTA, LICENSE AGREEMENT TMS1002
- FILL DIFFERENTIAL WITH HYPOID GEAR OIL
- Torque: 49 N.m (500 kgf.cm, 36 ft.lbf)
- Oil grade: Hypoid gear oil API GL-5
- Recommended oil viscosity:
- Above-18°C(0°F)SAE 90
- Below -18°C (0°F) SAE 80W or 80W-90
- Capacity: 0.9 +/- 0.05 liters (0.95 +/- 0.05 US qts, 0.79 +/- 0.04 Imp. qts)
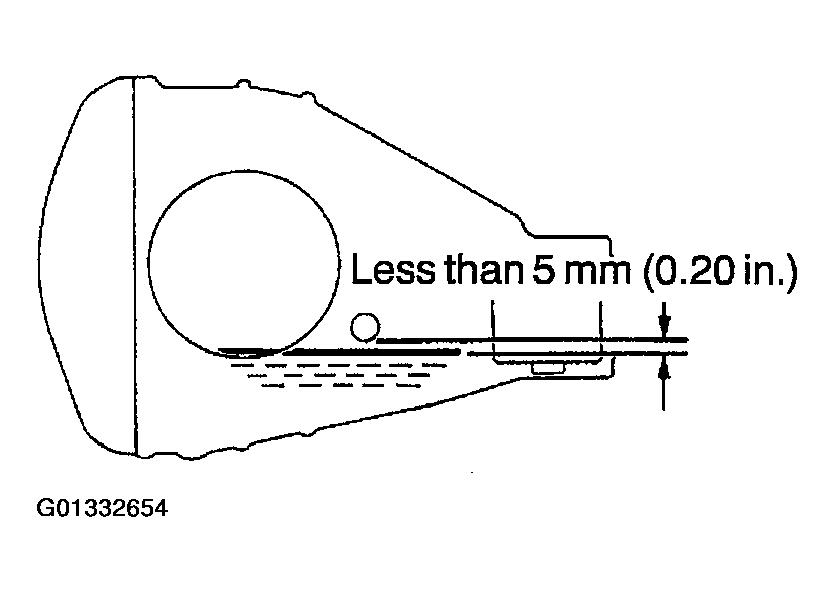 Courtesy of © TOYOTA, LICENSE AGREEMENT TMS1002